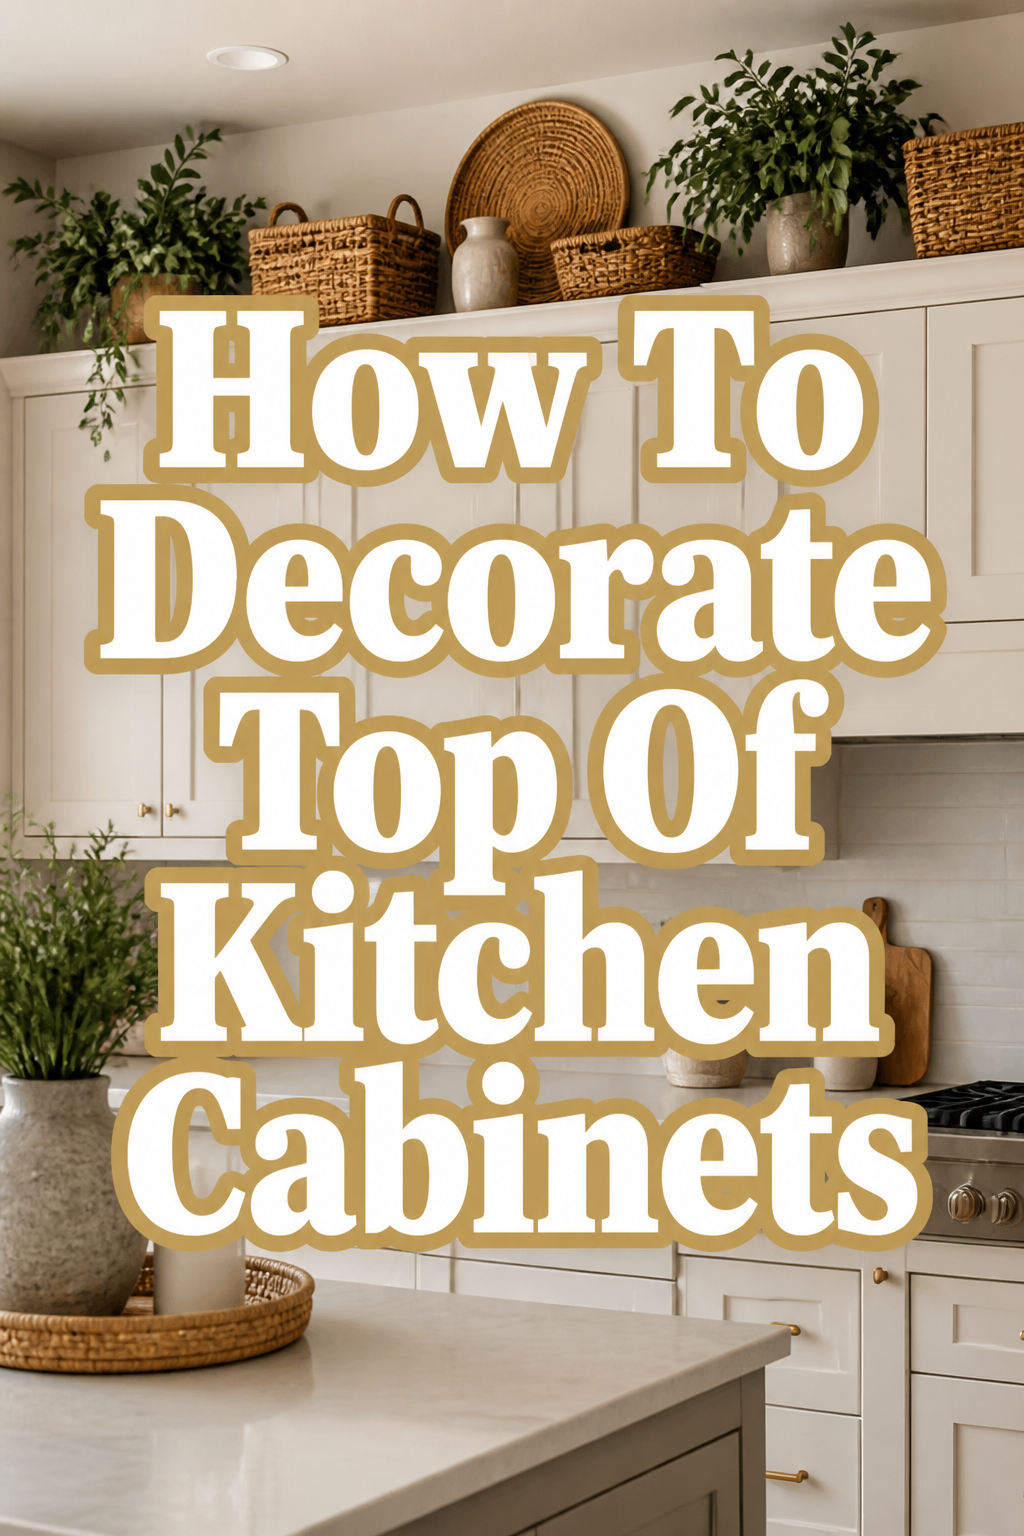
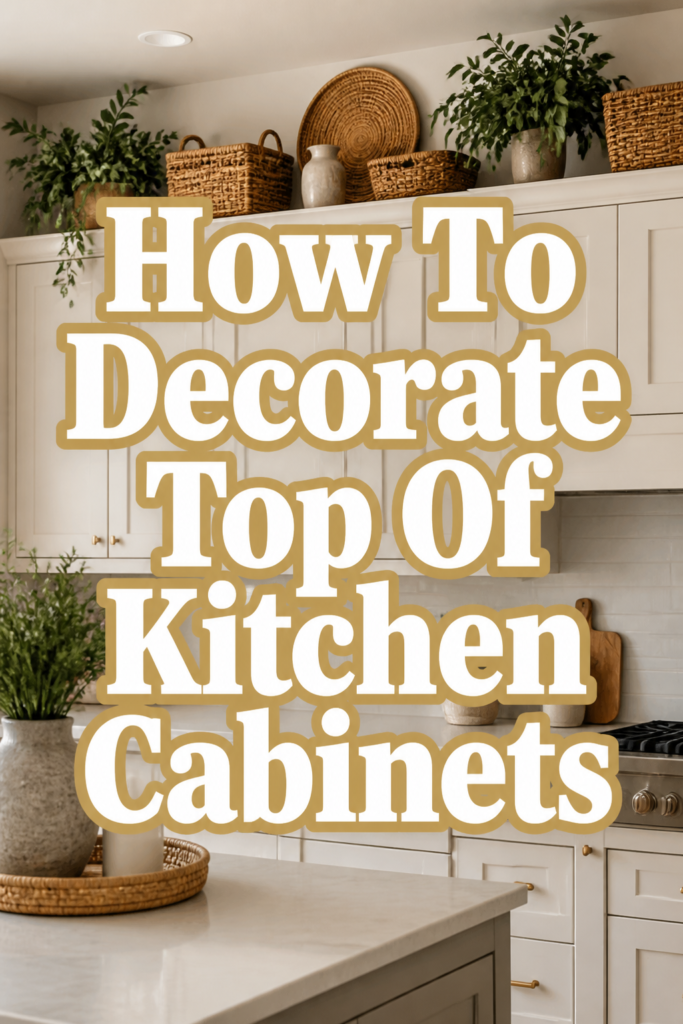
✨ How To Decorate Top Of Kitchen Cabinets
Do you ever look up at the space above your kitchen cabinets and feel a pang of missed opportunity? That empty expanse can feel daunting, a dusty ledge just waiting to be filled.
I remember staring at my own neglected cabinet tops for months, feeling uninspired until I finally decided to transform them into a cozy, intentional display.
This guide draws from years of making homes feel warm and inviting, helping you turn that forgotten area into a beautiful extension of your kitchen’s charm.
Quick Overview
This guide will walk you through transforming the often-overlooked space above your kitchen cabinets. You’ll learn how to create a visually appealing, cohesive, and cozy display that enhances your entire kitchen’s aesthetic.
- Time needed: 2-4 hours (including planning and shopping)
- Difficulty: Beginner
- What you’ll need: Cleaning supplies, tape measure, a variety of decorative items, a step stool or ladder, and perhaps some adhesive putty.
Step-by-Step Instructions
Step 1: Assess Your Space and Vision
Look closely at the area above your cabinets. Consider the height of your ceilings, the amount of natural light, and the overall style of your kitchen.
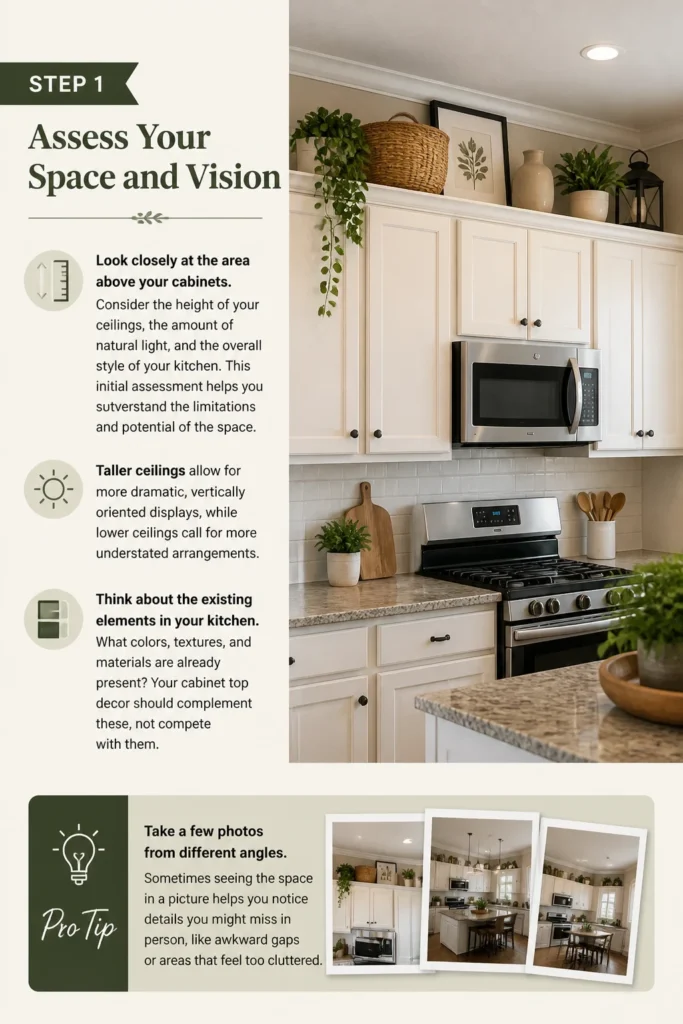
This initial assessment helps you understand the limitations and potential of the space. Taller ceilings allow for more dramatic, vertically oriented displays, while lower ceilings call for more understated arrangements.
Think about the existing elements in your kitchen. What colors, textures, and materials are already present? Your cabinet top decor should complement these, not compete with them.
Pro Tip: Take a few photos from different angles. Sometimes seeing the space in a picture helps you notice details you might miss in person, like awkward gaps or areas that feel too cluttered.
Step 2: Clean and Prepare the Area
Gather your cleaning supplies. The tops of kitchen cabinets are notorious dust and grease collectors, often overlooked during regular cleaning routines.
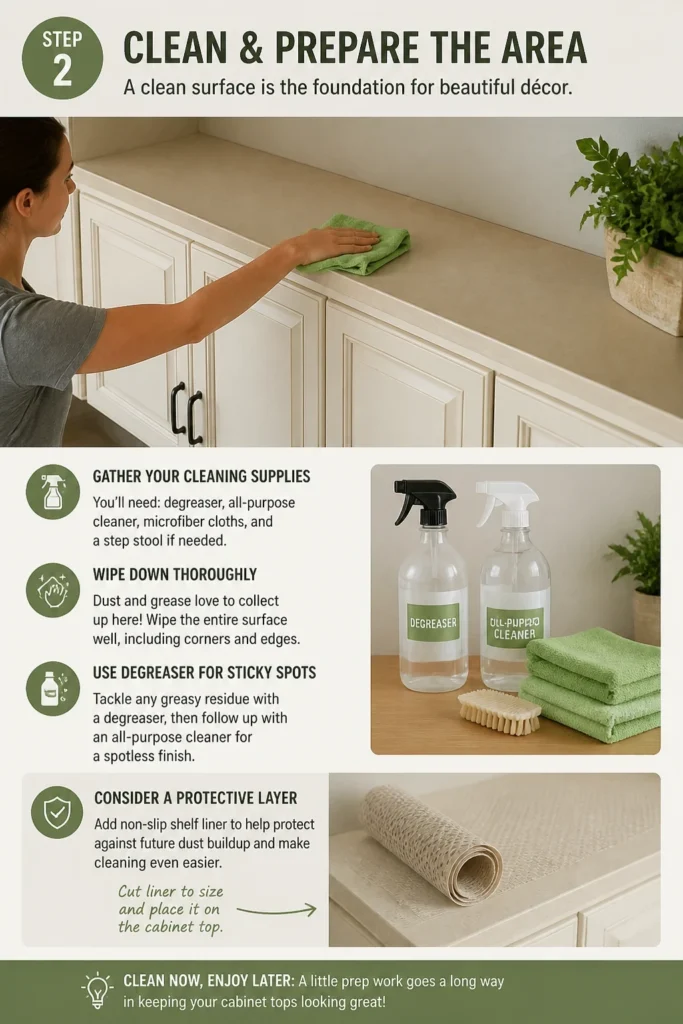
Wipe down the entire surface thoroughly. Use a degreaser for any sticky residue and a general all-purpose cleaner for dust and grime. A clean slate is essential for a fresh start.
Consider adding a protective layer if you’re worried about future dust buildup. A roll of non-slip shelf liner cut to size can make future cleaning much easier.
Step 3: Define Your Aesthetic and Color Palette
Determine the overall feeling you want to evoke. Do you lean towards rustic farmhouse, modern minimalist, cozy cottage, or something else entirely?
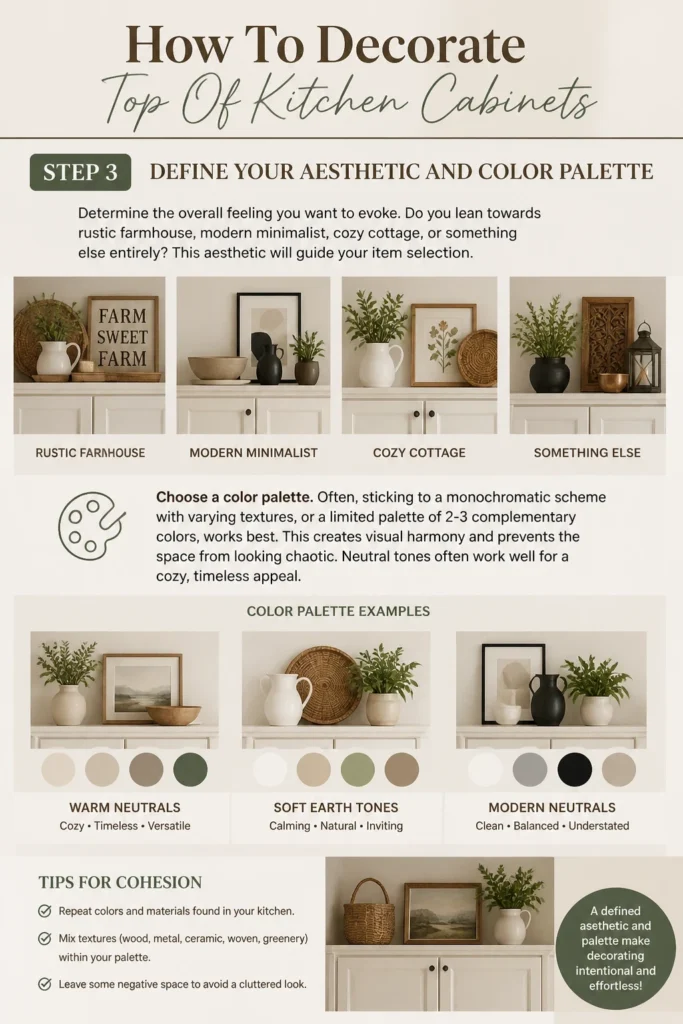
This aesthetic will guide your item selection. For a cozy feel, think warm woods, soft textures, vintage finds, and natural elements.
Choose a color palette. Often, sticking to a monochromatic scheme with varying textures, or a limited palette of 2-3 complementary colors, works best.
This creates visual harmony and prevents the space from looking chaotic. Neutral tones often work well for a cozy, timeless appeal.
Step 4: Curate Your Decorative Items
Select items that align with your chosen aesthetic and color palette. This is where your vision truly comes to life.
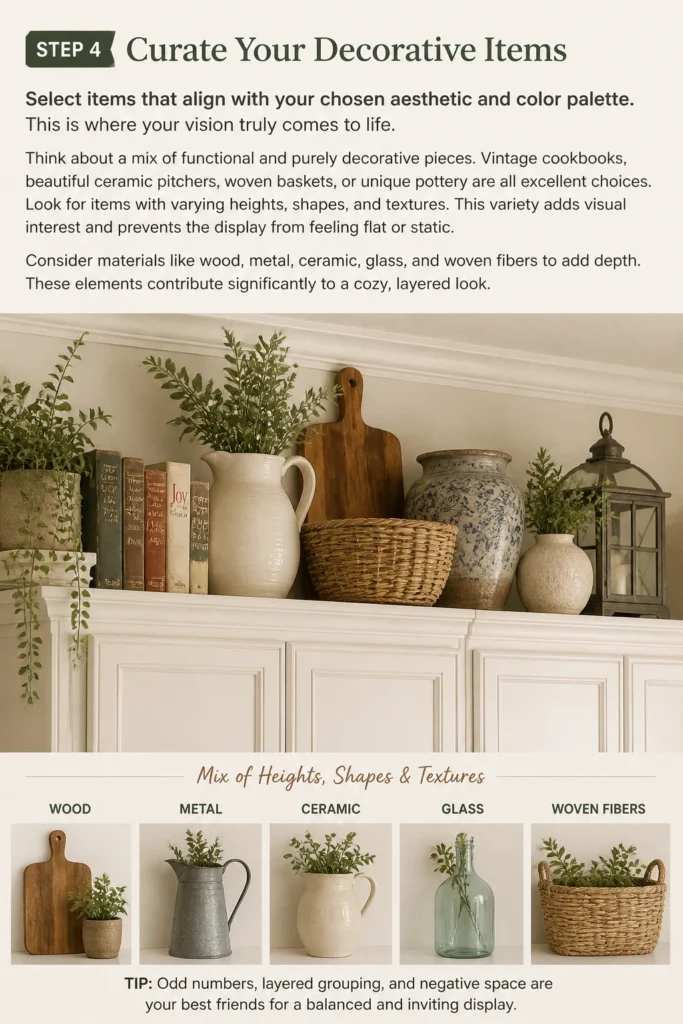
Think about a mix of functional and purely decorative pieces. Vintage cookbooks, beautiful ceramic pitchers, woven baskets, or unique pottery are all excellent choices.
Look for items with varying heights, shapes, and textures. This variety adds visual interest and prevents the display from feeling flat or static.
Consider materials like wood, metal, ceramic, glass, and woven fibers to add depth. These elements contribute significantly to a cozy, layered look.
Step 5: Arrange for Height and Visual Balance
Start with your tallest items. These usually act as anchors for your vignettes. Place them towards the back or at one end of a grouping.
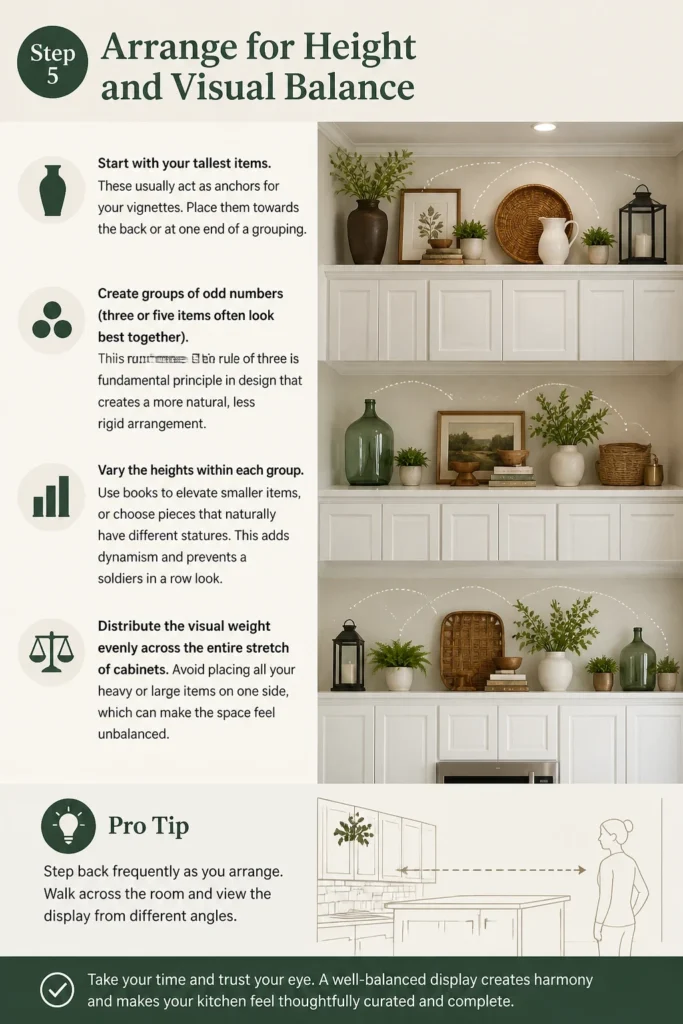
Create groups of odd numbers (three or five items often look best together). This “rule of three” is a fundamental principle in design that creates a more natural, less rigid arrangement.
Vary the heights within each group. Use books to elevate smaller items, or choose pieces that naturally have different statures. This adds dynamism and prevents a “soldiers in a row” look.
Distribute the visual weight evenly across the entire stretch of cabinets. Avoid placing all your heavy or large items on one side, which can make the space feel unbalanced.
Pro Tip: Step back frequently as you arrange. Walk across the room and view the display from different angles. What looks good up close might feel off from a distance.
Step 6: Incorporate Greenery and Natural Elements
Introduce plants, real or artificial, to bring life and freshness to the space. Greenery instantly adds a touch of nature and vibrancy.
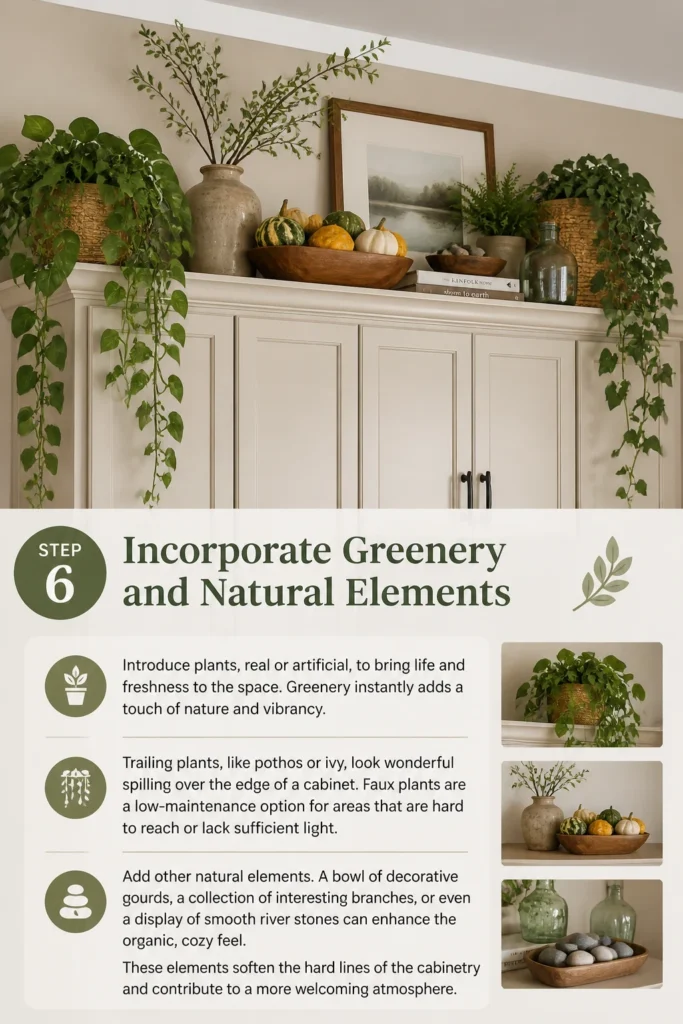
Trailing plants, like pothos or ivy, look wonderful spilling over the edge of a cabinet. Faux plants are a low-maintenance option for areas that are hard to reach or lack sufficient light.
Add other natural elements. A bowl of decorative gourds, a collection of interesting branches, or even a display of smooth river stones can enhance the organic, cozy feel.
These elements soften the hard lines of the cabinetry and contribute to a more welcoming atmosphere.
Step 7: Layer Textures and Materials
Think beyond just objects. The interplay of different textures is key to creating a rich, inviting display.
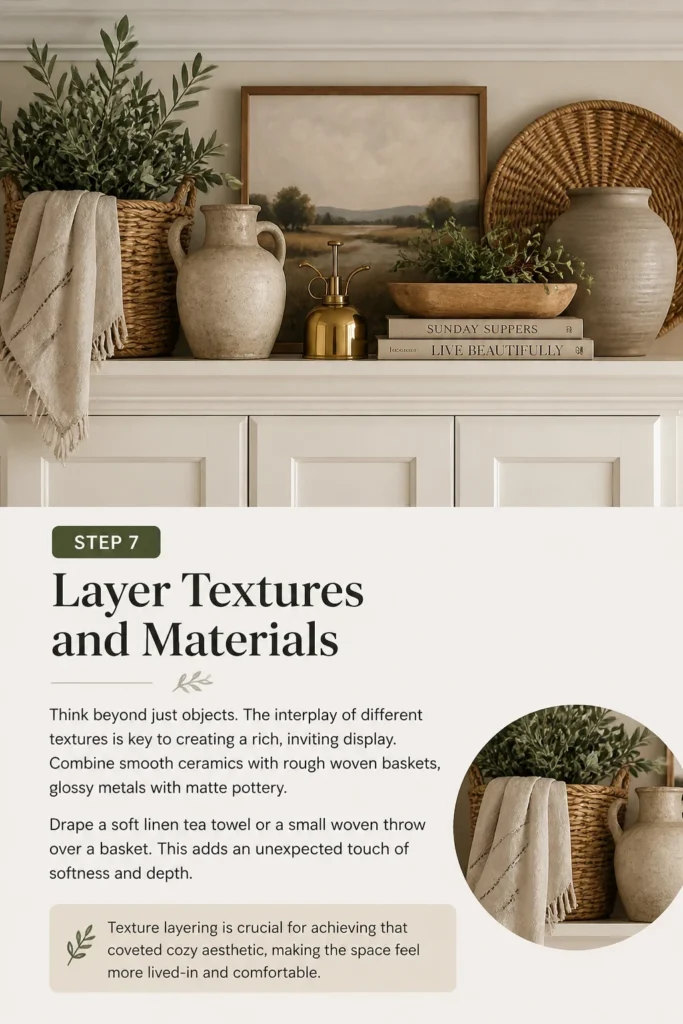
Combine smooth ceramics with rough woven baskets, glossy metals with matte pottery. This tactile contrast makes the display more engaging and visually appealing.
Drape a soft linen tea towel or a small woven throw over a basket. This adds an unexpected touch of softness and depth.
Texture layering is crucial for achieving that coveted cozy aesthetic, making the space feel more lived-in and comfortable.
Step 8: Consider Subtle Lighting
Enhance the ambiance with subtle lighting. This can transform your cabinet tops from a daytime display into a magical evening glow.
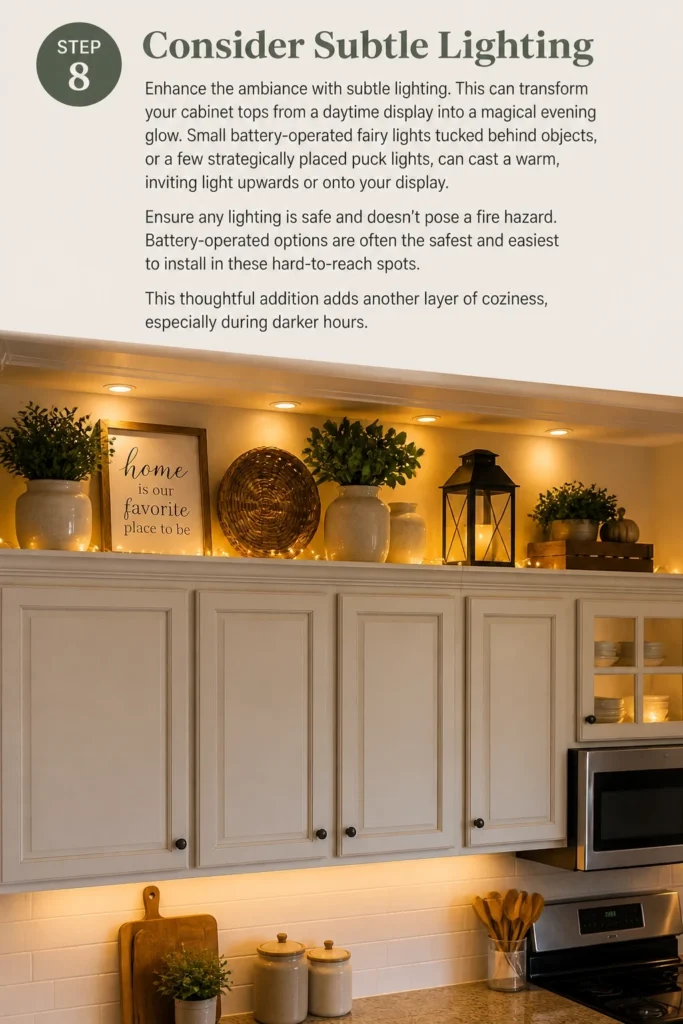
Small battery-operated fairy lights tucked behind objects, or a few strategically placed puck lights, can cast a warm, inviting light upwards or onto your display.
Ensure any lighting is safe and doesn’t pose a fire hazard. Battery-operated options are often the safest and easiest to install in these hard-to-reach spots.
This thoughtful addition adds another layer of coziness, especially during darker hours.
Step 9: Step Back and Refine Your Design
Take a final step back and view your entire kitchen. How does the cabinet top decor integrate with the rest of the room?
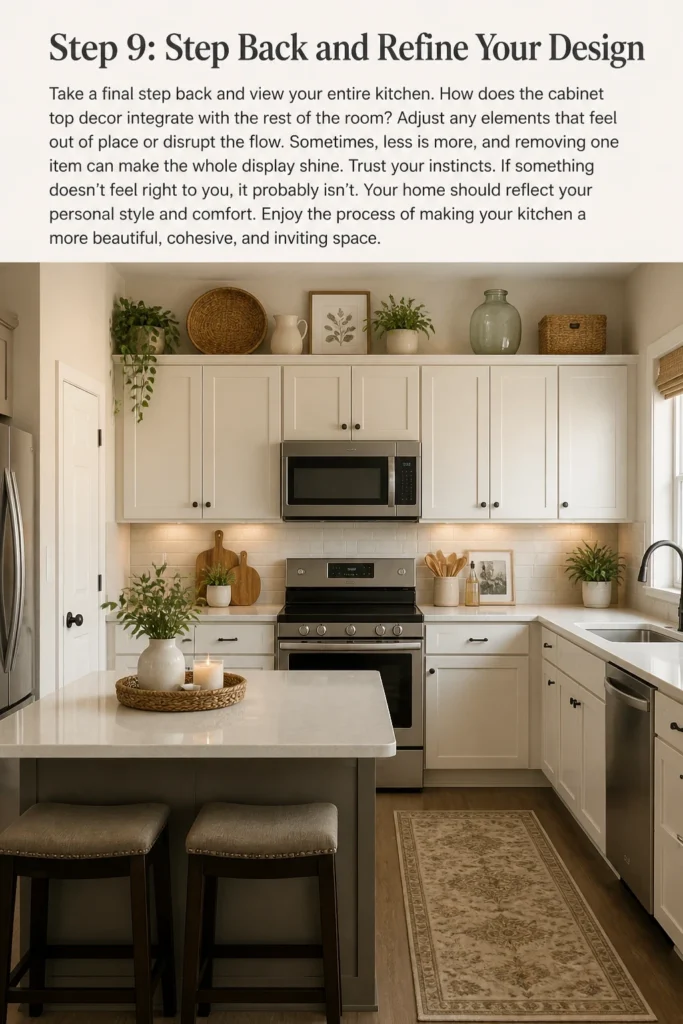
Adjust any elements that feel out of place or disrupt the flow. Sometimes, less is more, and removing one item can make the whole display shine.
Trust your instincts. If something doesn’t feel right to you, it probably isn’t. Your home should reflect your personal style and comfort.
Enjoy the process of making your kitchen a more beautiful, cohesive, and inviting space.
Common Mistakes to Avoid
Overcrowding the Space
A common pitfall is trying to fill every single inch of the cabinet tops. This can make the area look cluttered and dusty, rather than decorative.
Instead, aim for thoughtful groupings and leave some empty space between vignettes. This allows each item to breathe and be appreciated, contributing to a more serene and organized feel.
Ignoring Scale and Proportion
Using items that are too small for the space above your cabinets can make them look insignificant and lost. Conversely, items that are too large can feel overwhelming and cramped.
Always consider the height and depth of the space. Choose items that are substantial enough to be seen and appreciated from a distance, creating a balanced and harmonious display.
Lack of Cohesion
Mixing too many different styles, colors, or themes without a unifying element can lead to a disjointed and chaotic look. Your cabinet tops should tell a story, not a jumbled collection.
Stick to a clear aesthetic and color palette. This ensures that even diverse items work together to create a cohesive and pleasing visual narrative.
Forgetting About Dust and Maintenance
The tops of kitchen cabinets are prime locations for dust and grease to accumulate. Choosing items that are difficult to clean or have intricate details can make maintenance a chore.
Opt for items with smooth surfaces or simpler forms that are easy to wipe down. This foresight will save you time and effort in the long run, keeping your display looking fresh.
Troubleshooting
My Display Looks Too Flat
If your arrangement lacks dimension and appears one-note, it’s likely missing varied heights and depths. Flatness makes a space feel uninspired.
Introduce taller items to create vertical interest. Use stacks of old books or small risers to elevate some pieces. Pull certain items slightly forward to add depth and create a more dynamic, layered look.
The Items Feel Disconnected
When decorative elements don’t seem to relate to one another, the display can feel like a random assortment rather than an intentional design.
Re-evaluate your chosen color palette and theme. Try grouping items by color, material, or style. Adding a unifying element, like a consistent plant type or a repeated texture, can tie everything together beautifully.
It Feels Too Cluttered or Busy
An overly busy display can be overwhelming and visually exhausting. This often happens when too many items are competing for attention or the groupings are too dense.
Remove a few items and see how the space breathes. Embrace negative space; sometimes, what you don’t put in is just as important as what you do. Simplify your groupings and allow more empty areas between them.
Key Takeaways
- Cleanliness is foundational: Always start with a thoroughly cleaned surface to ensure your decor shines.
- Plan with purpose: Define your aesthetic and color palette before you begin selecting items to ensure a cohesive look.
- Vary heights and textures: Use a mix of tall, medium, and short items, along with different materials, to create visual interest and depth.
- Embrace odd numbers: Grouping items in threes or fives often creates a more natural and pleasing arrangement.
- Incorporate natural elements: Plants and organic materials bring life and a sense of coziness to the display.
- Don’t overcrowd: Allow for breathing room between your vignettes to prevent a cluttered appearance and make cleaning easier.
Frequently Asked Questions
What kind of items are best for a cozy kitchen aesthetic?
For a cozy feel, lean towards natural materials like wood, ceramic, woven baskets, and linen. Think vintage-inspired pieces, cookbooks, artisanal pottery, and plenty of greenery. Warm colors and soft textures contribute greatly to a welcoming atmosphere.
How do I make sure my items are safe and won’t fall?
Always ensure items are stable and placed away from the very edge of the cabinet. For extra security, especially in earthquake-prone areas or homes with active children and pets, use museum putty or earthquake gel to secure bases to the cabinet top. Avoid placing anything too heavy or precarious.
Should I decorate all my cabinet tops or just certain sections?
This depends on your kitchen layout and personal preference. For a cohesive look, decorating all continuous cabinet tops often works well. However, if you have a very long run of cabinets, you might create distinct vignettes in different sections to break up the visual, ensuring they still share a common theme.
What if my ceilings are very low?
With low ceilings, avoid overly tall or bulky items that can make the space feel even more compressed. Opt for flatter, wider items, or smaller groupings with less dramatic height variation. Focus on horizontal lines and lighter colors to create an illusion of more space.
Our Top Recommended Finds
- Woven Storage Baskets: Perfect for adding texture and discreetly hiding less attractive items or creating a base for a vignette.
- Artificial Trailing Plants: Ideal for hard-to-reach spots, these bring a touch of green without the need for watering or light.
- Decorative Ceramic Pitchers/Vases: Versatile pieces that can stand alone or hold faux flowers, adding a classic, homey touch.
Embrace Your Kitchen’s Untapped Potential
Transforming the space above your kitchen cabinets is more than just adding decor; it’s about infusing your personality and warmth into every corner of your home.
You now have the tools and inspiration to turn that neglected ledge into a captivating display, enhancing your kitchen’s overall comfort and charm.
Don’t let another day pass by. Grab your cleaning supplies, browse your favorite home stores, or simply look around your house for forgotten treasures.
Start small, experiment, and watch as your kitchen transforms into an even more inviting and beautiful space, one curated item at a time.