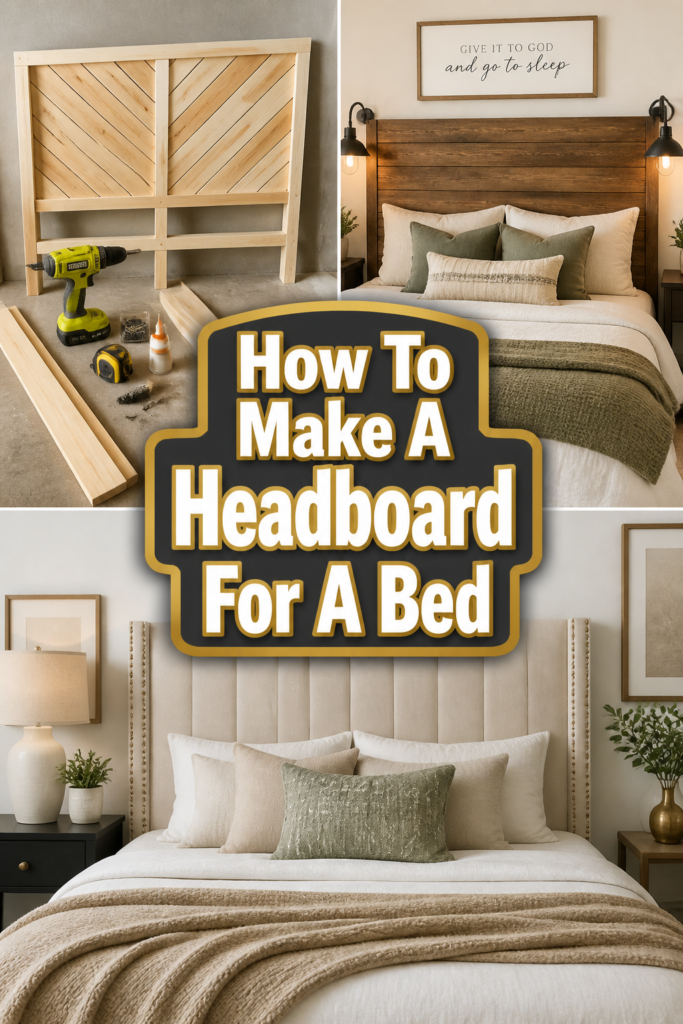
🏡 How To Make A Headboard For A Bed
Imagine stepping into your bedroom, a true sanctuary designed just for you. The centerpiece, a beautiful headboard, instantly draws your eye. It adds a touch of cozy elegance.
I remember my first DIY headboard project – a simple upholstered panel that transformed a bland room into a welcoming haven. It felt incredibly rewarding to create something so impactful with my own hands. This guide shares that practical, satisfying experience with you.
Quick Overview
Transform your bedroom with a custom headboard that reflects your unique style and adds a layer of comfort. This guide will walk you through creating a beautiful, sturdy headboard, perfect for cozy aesthetics and thoughtful room layouts.
- Time needed: 1-2 days (including drying time for glue/paint)
- Difficulty: Beginner to Intermediate
- What you’ll need: Plywood, foam, batting, fabric, staple gun, spray adhesive, measuring tape, saw, drill, screws, fabric scissors, optional: paint/stain.
Step-by-Step Instructions
Step 1: Plan Your Design and Measurements
Decide on the style you envision for your bedroom. Consider whether you prefer a classic rectangular shape, a sophisticated arch, or perhaps a unique custom silhouette. Think about the overall feel you want to achieve.
Measure the width of your bed frame. Most headboards are slightly wider than the mattress itself, often extending a few inches on each side for a balanced look. Determine the desired height, keeping in mind that it should be visible above your pillows.
Sketch out your design on paper, noting all dimensions. This visual plan helps prevent errors and clarifies your material needs. A well-planned headboard integrates seamlessly into your room’s layout.
Pro Tip: To visualize the height, tape a piece of cardboard or paper to the wall behind your bed. Adjust it until you find the perfect height that feels proportionate and cozy.
Step 2: Gather Your Materials and Cut the Plywood Base
Purchase a sheet of plywood that matches your determined dimensions. A thickness of 1/2 inch to 3/4 inch is generally suitable for stability. You can often have the store cut the main piece for you.
If cutting at home, carefully mark your dimensions on the plywood. Use a circular saw or jigsaw to cut the plywood to size. Always wear safety glasses and follow tool instructions.
Smooth any rough edges with sandpaper. This step ensures a clean finish and prevents snags later on when applying fabric. A smooth base is essential for a professional look.
Step 3: Attach the Foam Padding
Lay your cut plywood flat on a clean surface. Place the foam padding on top of the plywood. Make sure the foam covers the entire surface with a slight overhang on all sides.
Using a sharp utility knife or electric carving knife, trim the foam to match the plywood dimensions. A slight overhang of about 1/2 inch on the edges can create a softer, more rounded look. Secure the foam to the plywood using spray adhesive.
Spray both the plywood and the foam, following the product instructions for drying time before pressing them together. This ensures a strong, lasting bond. Work in sections to ensure even adhesion.
Step 4: Wrap with Batting for Softness
Unroll your quilt batting and lay it over the foam-covered plywood. The batting adds an extra layer of plushness and helps smooth out any imperfections in the foam. It also gives the headboard a luxurious, inviting feel.
Cut the batting so it extends several inches beyond all edges of the plywood. This extra material allows you to pull it taut and staple it securely to the back. Ensure a generous overlap for easy handling.
Begin stapling the batting to the back of the plywood, starting from the center of each side and working your way outwards. Pull the batting firmly but gently to avoid wrinkles on the front. Pay special attention to corners, folding them neatly like a present.
Step 5: Upholster with Your Chosen Fabric
Lay your chosen fabric face down on a clean floor or large table. Center your batting-covered headboard on top of the fabric. Ensure the fabric is aligned and there’s enough overhang on all sides.
Trim the fabric, leaving at least 4-6 inches of excess around all edges. This margin is crucial for pulling the fabric taut and securing it properly. A generous allowance makes the stapling process much easier.
Begin stapling the fabric to the back of the plywood, just as you did with the batting. Start in the middle of one long side, pull the fabric taut, and place a staple. Move to the opposite side, pull taut, and staple. Continue alternating sides.
Work your way around the headboard, pulling the fabric consistently tight to prevent sagging or wrinkles on the front. Take your time to achieve a smooth, professional finish. The corners require careful folding and stapling.
Pro Tip: For crisp corners, fold the fabric much like wrapping a gift. Trim away excess bulk in the folds to reduce lumps before stapling. Practice on a scrap piece if you’re new to upholstery.
Step 6: Attach Legs or Mounting Hardware
Decide how you will attach your headboard to your bed or wall. For bed frame attachment, you’ll need two sturdy wooden posts (legs) and bolts. For wall mounting, a French cleat system or D-rings are excellent choices.
If using legs, cut two pieces of 1×4 or 2×4 lumber to your desired leg length. These should extend from the bottom of your headboard to the floor, plus a few inches for attaching to the bed frame. Attach them vertically to the back of the headboard using screws and wood glue.
Ensure the legs are flush with the bottom edge of the headboard. Reinforce the connection with L-brackets for extra stability. This makes the headboard robust and prevents wobbling.
For wall mounting, install a French cleat system on the back of the headboard and the corresponding piece on your wall. Always locate wall studs for secure attachment. This method creates a floating headboard look.
Step 7: Position and Secure Your New Headboard
Carefully move your finished headboard into your bedroom. Position it behind your bed, making sure it’s centered and aligned. Take a moment to admire your handiwork.
If attaching to the bed frame, align the pre-drilled holes in the legs with the mounting holes on your bed frame. Insert bolts and tighten them securely with a wrench. Do not overtighten, as this can damage the frame.
If wall mounting, carefully lift the headboard and engage the French cleat or D-rings with their wall counterparts. Double-check that it is level and firmly in place. Step back and enjoy your beautifully transformed space.
Common Mistakes to Avoid
Not Measuring Accurately
Many DIY projects falter right at the start due to incorrect measurements. If your plywood is cut too wide or too narrow, it won’t fit your bed properly, leading to an awkward appearance. Always double-check all dimensions before making any cuts. Take your time with the tape measure.
Skimping on Foam or Batting
Using too thin a foam or insufficient batting can result in a headboard that looks flat and lacks comfort. The fabric might also show the plywood contours underneath. Invest in quality foam and ample batting to achieve that luxurious, plush feel. This makes a huge difference in the final look and comfort.
Pulling Fabric Unevenly
When stapling the fabric, it’s tempting to rush, but pulling unevenly can lead to wrinkles, puckers, or a lopsided appearance. The fabric might sag in some areas and be too tight in others. Always work from the center outwards, alternating sides, and maintain consistent tension for a smooth, professional finish.
Inadequate Mounting
A headboard that wobbles or isn’t securely attached can be frustrating and even unsafe. Using flimsy legs or insufficient wall anchors can cause the headboard to shift or fall. Always use appropriate hardware, locate wall studs if mounting, and reinforce leg attachments to ensure stability and safety.
Troubleshooting
Fabric Appears Wrinkled or Sagging
If your fabric looks wrinkled or sags in certain areas after stapling, it usually means the tension was inconsistent. You might need to carefully remove staples from the affected section. Re-pull the fabric taut, ensuring even tension across the entire area, and re-staple.
Small wrinkles can sometimes be smoothed out with a fabric steamer. Gently steam the area while lightly pressing to release the creases. Be cautious not to over-steam or damage the fabric.
Headboard Wobbles After Installation
A wobbly headboard often indicates loose connections or insufficient support. First, check all bolts and screws connecting the headboard to the bed frame or wall. Tighten any that feel loose.
If the wobble persists, consider adding L-brackets to reinforce leg attachments to the headboard. For wall-mounted headboards, ensure you’ve anchored into studs or used heavy-duty wall anchors. Adding an extra anchor point can also help.
Corners Look Bulky or Untidy
Bulky corners are a common challenge in upholstery. This usually happens when too much fabric is folded into the corner. Trim excess fabric from the folds before stapling.
Carefully re-fold the fabric at the corners, aiming for neat, tight pleats that resemble a well-wrapped gift. Use extra staples to secure the folds firmly. Practice on scrap fabric can improve your technique.
Key Takeaways
- Plan thoroughly: Accurate measurements and a clear design sketch are crucial for a successful project.
- Layer for comfort: Don’t skip on quality foam and batting for a plush, inviting headboard.
- Consistent tension: Pull fabric evenly and tautly during upholstery to avoid wrinkles and achieve a smooth finish.
- Secure mounting: Always prioritize sturdy attachment to ensure your headboard is safe and stable.
- Take your time: Rushing can lead to mistakes; patience ensures a beautiful, professional result.
- Personalize your space: A DIY headboard offers a unique opportunity to express your style and enhance your bedroom’s aesthetic.
Frequently Asked Questions
Can I make an upholstered headboard without a staple gun?
While a staple gun is highly recommended for speed and security, you could theoretically use a strong fabric adhesive or upholstery tacks. However, a heavy-duty staple gun (electric or pneumatic) will provide the most durable and professional finish. It also makes the process much faster and easier.
What kind of fabric is best for a headboard?
Durable upholstery fabrics like linen blends, velvet, microsuede, or even a sturdy cotton duck are excellent choices. Consider fabrics with a tight weave that resist snags and are easy to clean. Think about your room’s existing decor and choose a fabric that complements your style and provides the cozy aesthetic you desire.
How do I clean an upholstered headboard?
Regular light vacuuming with an upholstery attachment helps remove dust and debris. For spills or stains, spot clean immediately using a mild fabric cleaner designed for upholstery. Always test the cleaner on an inconspicuous area first. Avoid saturating the fabric, and blot gently rather than rubbing.
Can I make a tufted headboard using this guide?
This guide focuses on a smooth upholstered headboard. To create a tufted headboard, you would add an extra step after upholstering. This involves marking button placement, drilling holes through the plywood and foam, and using special upholstery needles and buttons to create the tufted effect. It’s a slightly more advanced technique.
Our Top Recommended Finds
- Electric Staple Gun: Makes upholstery a breeze, saving your hands and ensuring strong, even staples.
- High-Density Upholstery Foam: Provides excellent support and longevity, ensuring your headboard remains plush for years.
- Fabric Spray Adhesive: Crucial for securely bonding foam to plywood, preventing shifting and ensuring a smooth surface.
Craft Your Cozy Retreat Today
Transforming your bedroom with a custom headboard is a deeply satisfying project. It’s more than just adding furniture; it’s about infusing your space with personality and warmth. Imagine reading in bed, leaning back against a headboard you crafted with care.
This project empowers you to create a focal point that truly reflects your style, enhancing the cozy aesthetic of your entire room. Don’t wait to bring this vision to life. Gather your materials, follow these steps, and start building the headboard of your dreams this weekend.