🏡 How To Hide Ac Pipes In Room
There’s nothing quite like the feeling of a beautifully designed room. But sometimes, an unsightly AC pipe can interrupt that perfect flow, drawing attention away from your carefully chosen decor. I remember staring at a stark white pipe snaking across my living room wall, feeling frustrated by how it disrupted the cozy vibe I wanted to create.
This guide is born from that very experience, offering practical, aesthetic solutions to transform those pipes into invisible elements or even charming features. We’ll explore how to blend them seamlessly into your space, enhancing your room’s overall beauty and comfort.

Quick Overview
This guide will walk you through various creative methods to conceal or integrate AC pipes, turning a functional necessity into a design opportunity. You’ll learn how to approach this task with confidence, focusing on both practicality and aesthetics.
- Time needed: 2-8 hours (depending on chosen method and DIY skill)
- Difficulty: Beginner to Intermediate
- What you’ll need: Measuring tape, cleaning supplies, paint, brushes, possibly wood/MDF, decorative covers, or shelving units.
Step-by-Step Instructions
Step 1: Assess Your AC Pipe Situation
Before you grab any tools, take a good look at your AC pipes. Understand their exact path, how many there are, and their proximity to walls, ceilings, and windows. This initial assessment is crucial for planning.
Consider the material of the pipes and any surrounding surfaces. Are they exposed to direct sunlight, or tucked away in a corner? This will influence your choice of materials and methods.
Step 2: Clean and Prepare the Area
A clean surface is essential for any successful concealment project. Wipe down the pipes and surrounding walls thoroughly to remove dust, grime, or any residues. Use a mild detergent and a damp cloth.
Ensure the area is completely dry before proceeding. This step prevents issues like paint peeling or adhesives failing later on.
Step 3: Choose Your Concealment Method
This is where your creativity truly shines. Consider your room’s existing style, your budget, and your comfort level with DIY projects. There are many paths to a beautiful outcome.
Think about whether you want the pipes to completely disappear or if you’d like to integrate them as a decorative element. Your choice will guide the next steps.
Pro Tip: Snap a few photos of the pipes from different angles. This helps visualize potential solutions and makes it easier to compare ideas later.
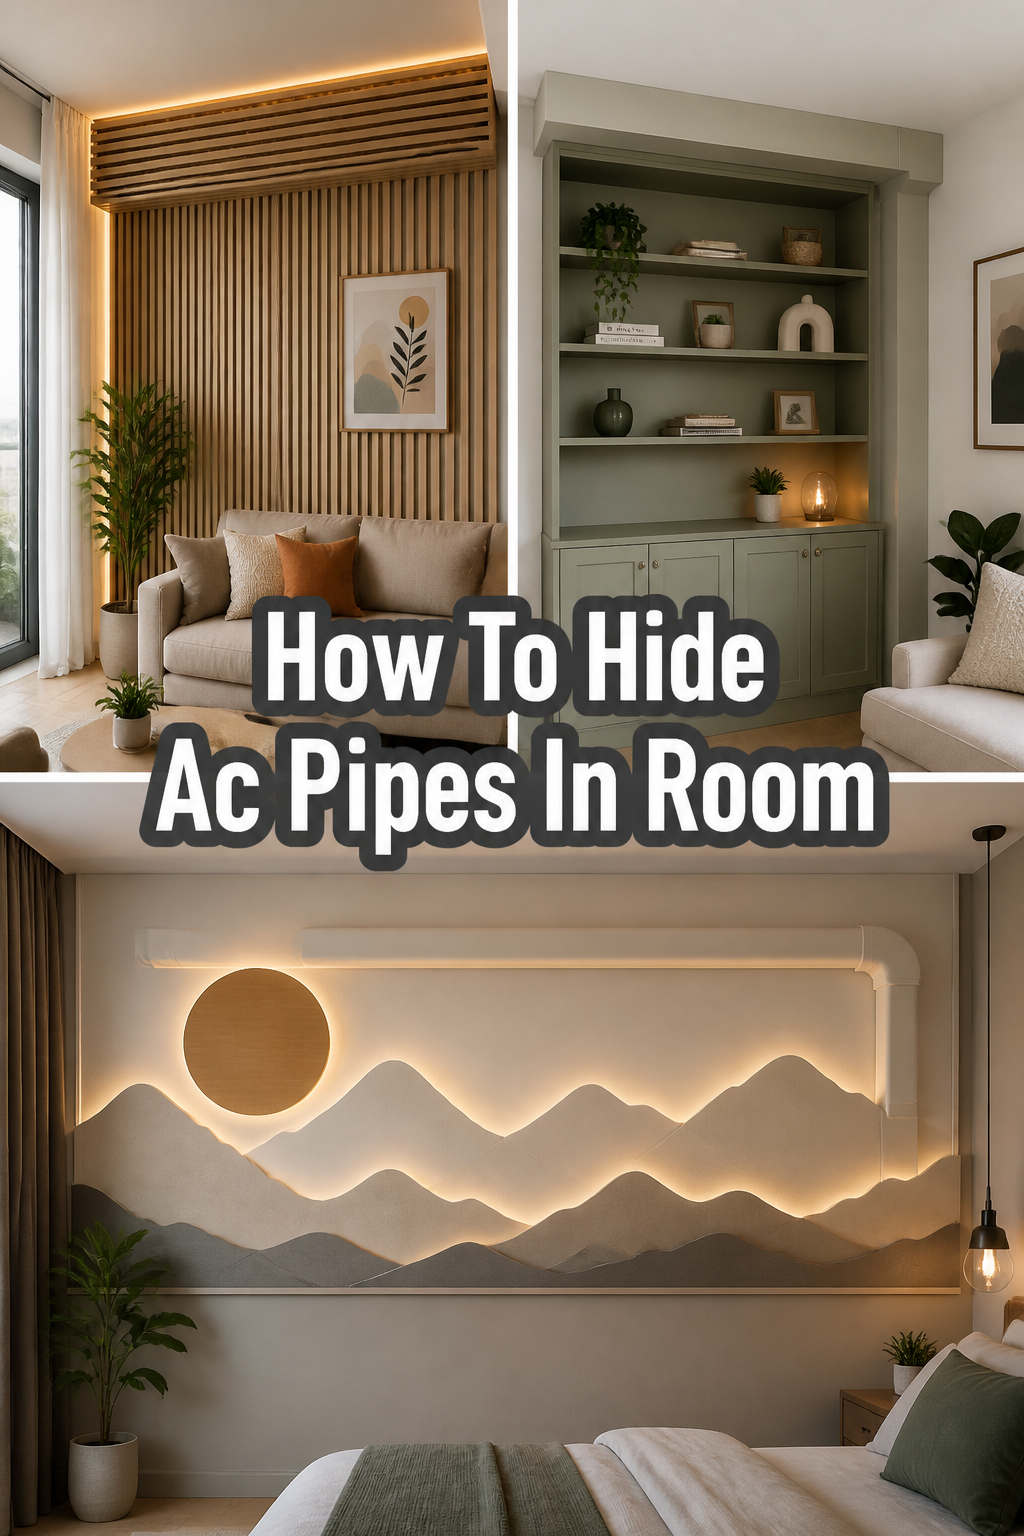
Step 4: Paint and Blend Them Away
One of the simplest and most effective methods is to paint the pipes the same color as the wall. This makes them visually recede into the background, becoming much less noticeable.
Select a paint color that perfectly matches your wall or ceiling. Apply a suitable primer first, especially if the pipes are metal or plastic, to ensure good adhesion. Then, apply two thin coats of your chosen paint, allowing each to dry completely.
Step 5: Create Custom Enclosures or Box-Outs
For a more polished and permanent solution, build a custom enclosure around the pipes. This can be constructed from wood, MDF, or even drywall, creating a clean, seamless look.
Measure the pipes carefully to ensure the box is just large enough to cover them without being bulky. You can then paint, wallpaper, or even tile this enclosure to match your room’s decor. This method offers a truly integrated appearance.
Step 6: Utilize Decorative Pipe Covers
Many home improvement stores offer pre-made decorative pipe covers. These are often made from plastic or metal and come in various styles and finishes. They offer a quick and neat solution.
Install these covers directly over the pipes. They are designed for easy installation and can instantly upgrade the look of exposed lines without extensive DIY work.
Step 7: Integrate with Shelving or Furniture
Turn your pipes into a functional design element by integrating them into shelving or bespoke furniture. Design a custom bookshelf or a console table that incorporates the pipe’s path.
The pipe can run behind or even through a cleverly cut shelf, making it appear intentional. This transforms an eyesore into a useful and stylish feature, adding storage or display space.
Pro Tip: Consider open shelving units. The pipes can run behind the back panel, or you can design the shelves to “frame” the pipe, making it look like a part of the furniture.
Step 8: Embrace with Creative Decor
Sometimes, you don’t need to hide the pipes completely; you can decorate them. Wrap them with faux ivy, string lights, or even a decorative rope. This turns the pipe into an accent.
For a bohemian or natural look, consider a vertical garden. Small, lightweight planters can be hung from a frame built around the pipe, or even directly from the pipe itself if it’s sturdy enough.
Step 9: Design Around the Pipes
Instead of directly concealing, strategically place furniture or decor items to obscure the pipes from direct view. A tall plant, a floor lamp, or a strategically positioned screen can work wonders.
This method requires minimal structural changes and can be easily adjusted if your room layout changes. It’s about clever placement and visual distraction.
Step 10: Add Final Touches and Style
Once your chosen method is complete, step back and admire your work. Ensure everything looks cohesive and clean. This is the time to add any finishing touches.
Style the surrounding area with complementary decor. A beautiful piece of art above a newly boxed-in pipe, or a cozy throw near a pipe integrated into a shelf, can complete the transformation.
Common Mistakes to Avoid
Ignoring Safety and Accessibility
It’s tempting to completely seal off pipes, but remember they might need maintenance or repair. Always ensure that your chosen method allows for future access to the pipes if needed. Building a removable panel or using snap-on covers is a smart approach.
Choosing the Wrong Materials
Not all materials are suitable for every environment. Avoid using materials that are sensitive to moisture or heat if your AC pipes are prone to condensation or get warm. Opt for durable, moisture-resistant options like treated wood, PVC, or metal.
Skipping Proper Preparation
Rushing the preparation stage can lead to frustrating re-dos. Never skip cleaning the pipes and surrounding areas, or applying primer when painting. These steps ensure a lasting and professional finish. A hasty start often leads to a disappointing end.
Blocking Airflow or Functionality
Be mindful not to obstruct any vents, sensors, or other parts of the AC unit itself while concealing pipes. Ensure that your design doesn’t impede the AC’s operation or reduce its efficiency. The goal is aesthetics without sacrificing function.
Troubleshooting
Visible Seams or Imperfections
If your custom enclosure or painted pipes show noticeable seams or unevenness, don’t despair. Sand down any rough edges or fill small gaps with wood filler or caulk. Then, repaint or re-finish the area for a smooth, professional look. Patience here makes all the difference.
Condensation on Pipes
If your AC pipes are sweating, this indicates a lack of proper insulation, which can lead to moisture damage. Before concealing, wrap the pipes with appropriate pipe insulation foam. This prevents condensation and protects your new aesthetic solution. Address the root cause first.
Difficulty Accessing Pipes for Maintenance
If you’ve created a permanent enclosure and now need access, consider adding a small, discreet access panel. This can be a magnetic catch door or a section held on by screws that can be easily removed. Planning for this upfront saves a lot of hassle.
Key Takeaways
- Plan thoroughly: Assess pipe location and choose a method that suits your room’s style and your DIY comfort.
- Prioritize preparation: Clean surfaces and prime pipes for a durable, professional finish.
- Consider multiple solutions: From painting to custom enclosures, decorative covers, or integrating with furniture, there’s a method for every situation.
- Ensure accessibility: Design your concealment so that pipes can be accessed for future maintenance or repairs.
- Focus on aesthetics and function: Blend pipes seamlessly while ensuring your AC unit operates efficiently.
- Embrace creativity: Sometimes, turning pipes into a decorative feature is the most charming solution.
Frequently Asked Questions
Can I paint any type of AC pipe?
Most AC pipes, whether copper or PVC, can be painted. However, always use a high-quality primer specifically designed for the pipe material (metal or plastic) to ensure the paint adheres properly and lasts. This prevents chipping or peeling.
What if my pipes get hot or cold?
AC pipes typically carry refrigerant and can get quite cold, leading to condensation. It’s crucial to insulate them properly with foam pipe insulation sleeves before concealing. If they get hot, also ensure your chosen materials can withstand the temperature without warping or degrading.
Do I need professional help for this?
For simple methods like painting or using decorative covers, you can absolutely do it yourself. If you’re building complex custom enclosures or altering walls, you might want to consult a professional carpenter or handyman. Always gauge your comfort and skill level.
What if I’m renting my home?
When renting, always check with your landlord before making any permanent changes like building enclosures or painting pipes. Temporary solutions like decorative wraps, strategically placed furniture, or freestanding screens are often renter-friendly options.
Our Top Recommended Finds
- Foam Pipe Insulation Sleeves: Essential for preventing condensation and protecting your concealment efforts. They wrap easily around pipes.
- All-in-One Wall & Trim Paint: A good quality, durable paint that can be tinted to match your walls perfectly, often includes primer for convenience.
- Decorative Cable/Pipe Covers: Many companies offer sleek, paintable plastic channels that snap over pipes, providing a clean, modern look.
Transform Your Space, One Pipe at a Time
You now have a toolkit of ideas and practical steps to tackle those visible AC pipes. Imagine your room, freed from that distracting element, feeling even more cohesive and inviting. It’s amazing what a little planning and creativity can achieve!
Don’t let a functional necessity dictate your design aesthetic. Take inspiration from these ideas and start envisioning the beautiful possibilities for your own home. Why not pick one method today and begin the journey to a more harmonious living space?