🕯️ How To Get Wax Out Of Clothes
There’s nothing quite like the soft glow and comforting scent of a candle, transforming any room into a cozy sanctuary.
But sometimes, a moment of relaxation can turn into a small mishap, leaving a stubborn wax stain on your favorite throw blanket or treasured tablecloth.
Having navigated countless candle emergencies in my own home, I’ve gathered the most gentle and effective methods to restore your beloved textiles, ensuring your cozy aesthetic remains perfectly pristine.
Quick Overview
Removing wax from clothes doesn’t have to be a daunting task. With a few simple tools and a calm approach, you can save your garments and get back to enjoying your beautifully curated space.
- Time needed: 30-60 minutes (drying time included)
- Difficulty: Beginner
- What you’ll need: Freezer, dull knife or credit card, iron, paper towels or brown paper bags, rubbing alcohol, laundry detergent, and a soft cloth.
Step-by-Step Instructions
Step 1: Freeze the Wax
The first and most crucial step is to harden the wax completely. This makes it brittle and much easier to remove.
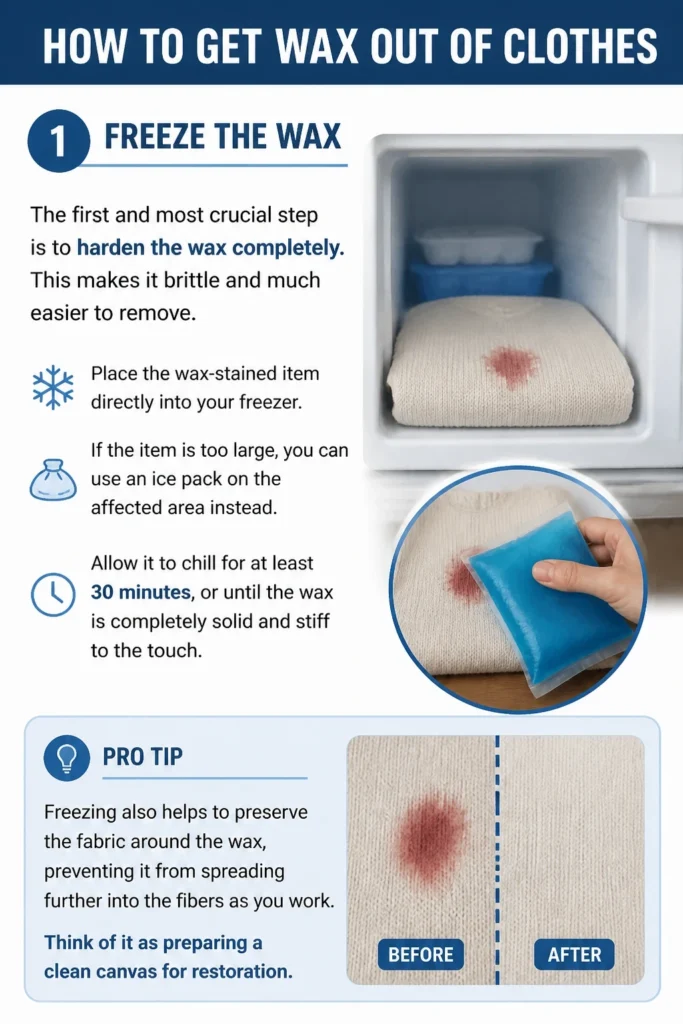
Place the wax-stained item directly into your freezer. If the item is too large, you can use an ice pack on the affected area instead.
Allow it to chill for at least 30 minutes, or until the wax is completely solid and stiff to the touch.
Pro Tip: Freezing also helps to preserve the fabric around the wax, preventing it from spreading further into the fibers as you work. Think of it as preparing a clean canvas for restoration.
Step 2: Scrape Off Excess Wax
Once the wax is thoroughly frozen, it’s time to gently remove the bulk of it.
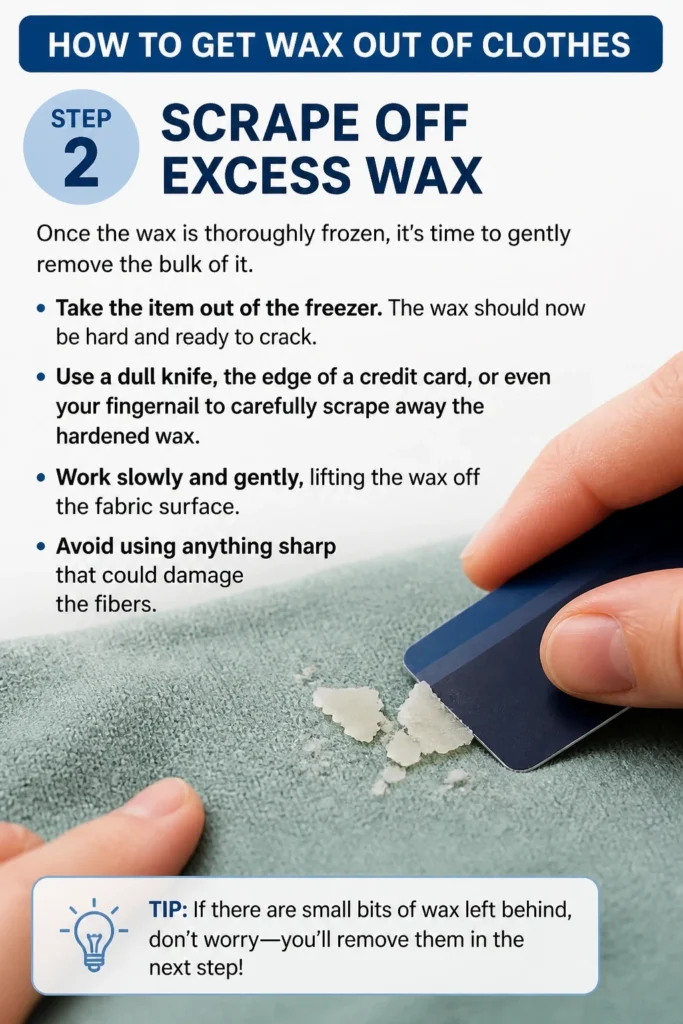
Take the item out of the freezer. The wax should now be hard and ready to crack.
Use a dull knife, the edge of a credit card, or even your fingernail to carefully scrape away the hardened wax.
Work slowly and gently, lifting the wax off the fabric surface. Avoid using anything sharp that could damage the fibers.
Step 3: Prepare for Ironing
After scraping, you’ll likely have a faint wax residue left behind. This next step uses heat to lift that remaining wax.
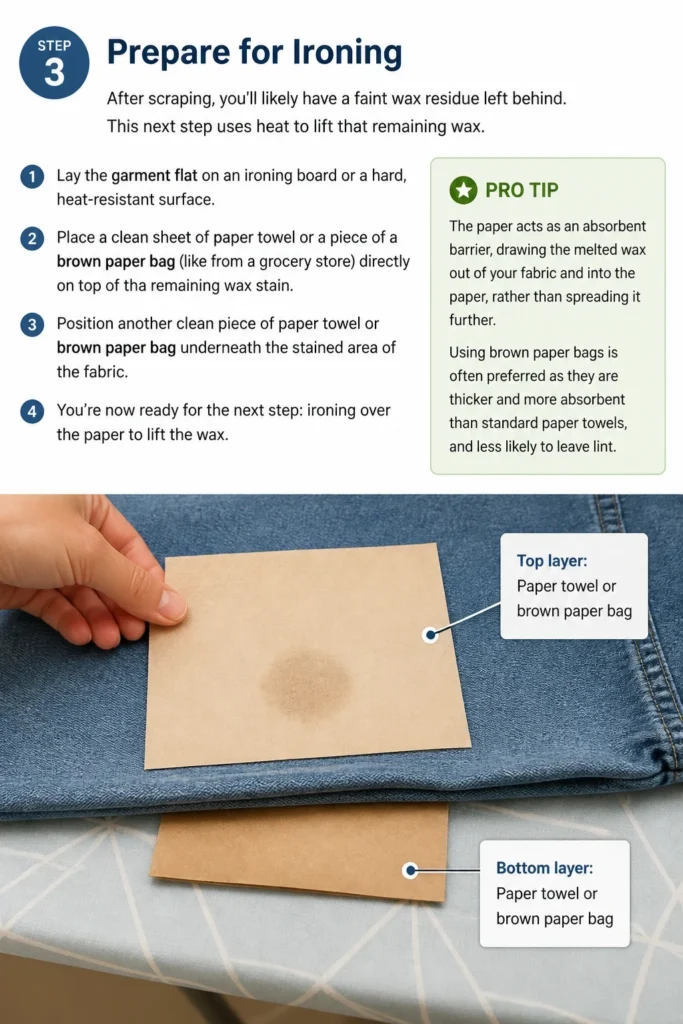
Lay the garment flat on an ironing board or a hard, heat-resistant surface.
Place a clean sheet of paper towel or a piece of a brown paper bag (like from a grocery store) directly on top of the remaining wax stain.
Position another clean piece of paper towel or brown paper bag underneath the stained area of the fabric.
Pro Tip: The paper acts as an absorbent barrier, drawing the melted wax out of your fabric and into the paper, rather than spreading it further. Using brown paper bags is often preferred as they are thicker and more absorbent than standard paper towels, and less likely to leave lint.
Step 4: Iron the Stain
Now, we’ll use gentle heat to transfer the wax from your clothes to the paper.
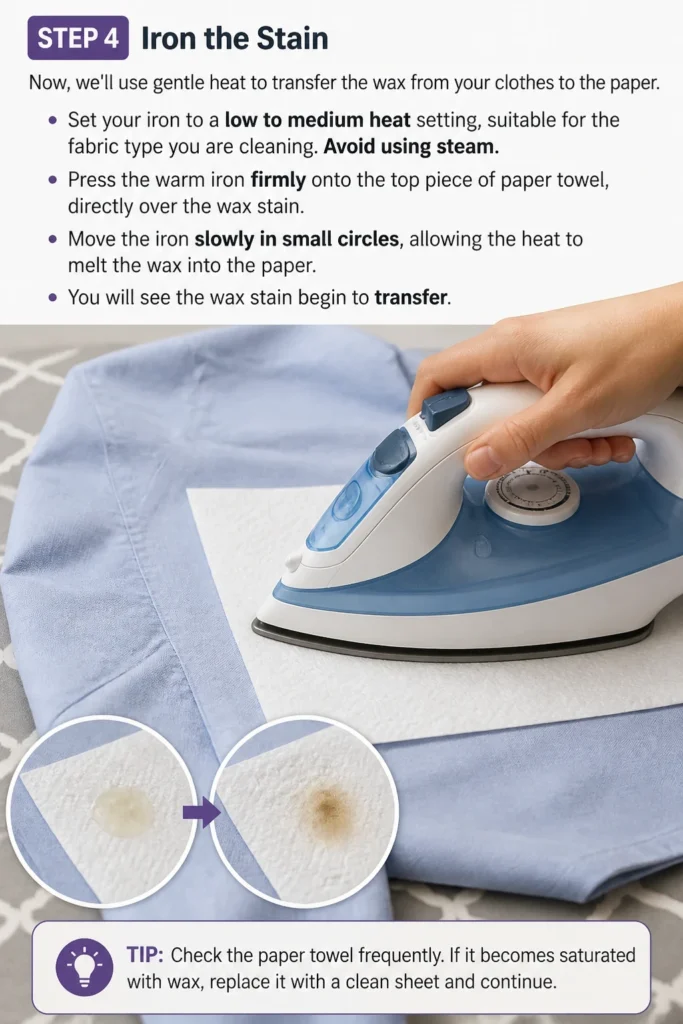
Set your iron to a low to medium heat setting, suitable for the fabric type you are cleaning. Avoid using steam.
Press the warm iron firmly onto the top piece of paper towel, directly over the wax stain.
Move the iron slowly in small circles, allowing the heat to melt the wax into the paper. You will see the wax stain begin to transfer.
Step 5: Replace Paper and Repeat
This step is crucial for ensuring all the wax is absorbed.
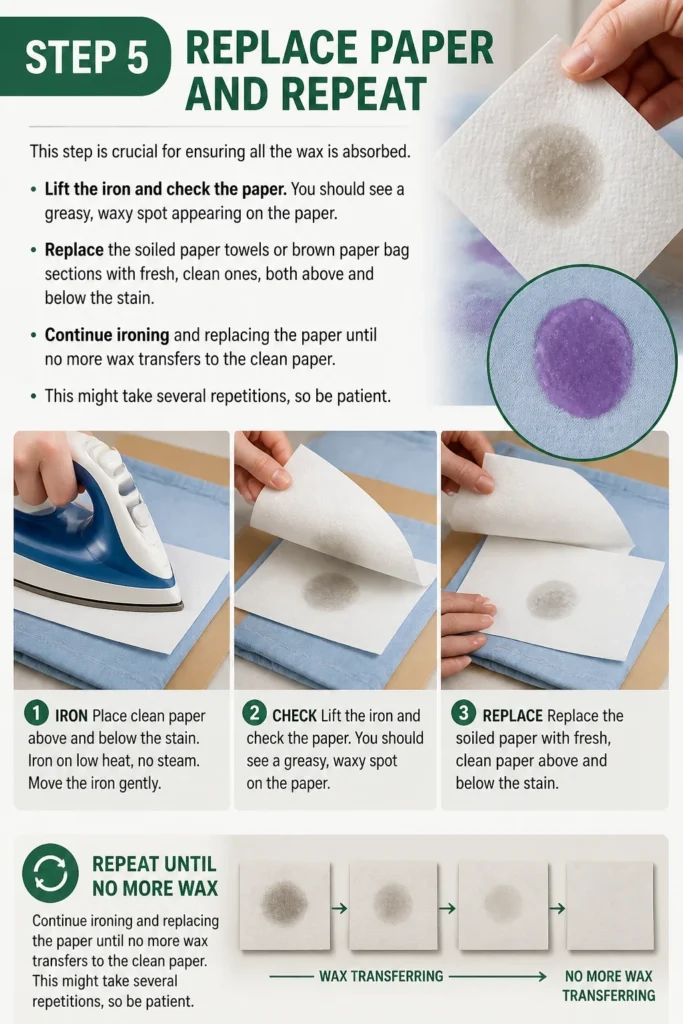
Lift the iron and check the paper. You should see a greasy, waxy spot appearing on the paper.
Replace the soiled paper towels or brown paper bag sections with fresh, clean ones, both above and below the stain.
Continue ironing and replacing the paper until no more wax transfers to the clean paper. This might take several repetitions, so be patient.
Step 6: Address Color Stains (If Applicable)
If the candle wax was colored, you might be left with a dye stain even after the wax is gone. This needs a slightly different approach.
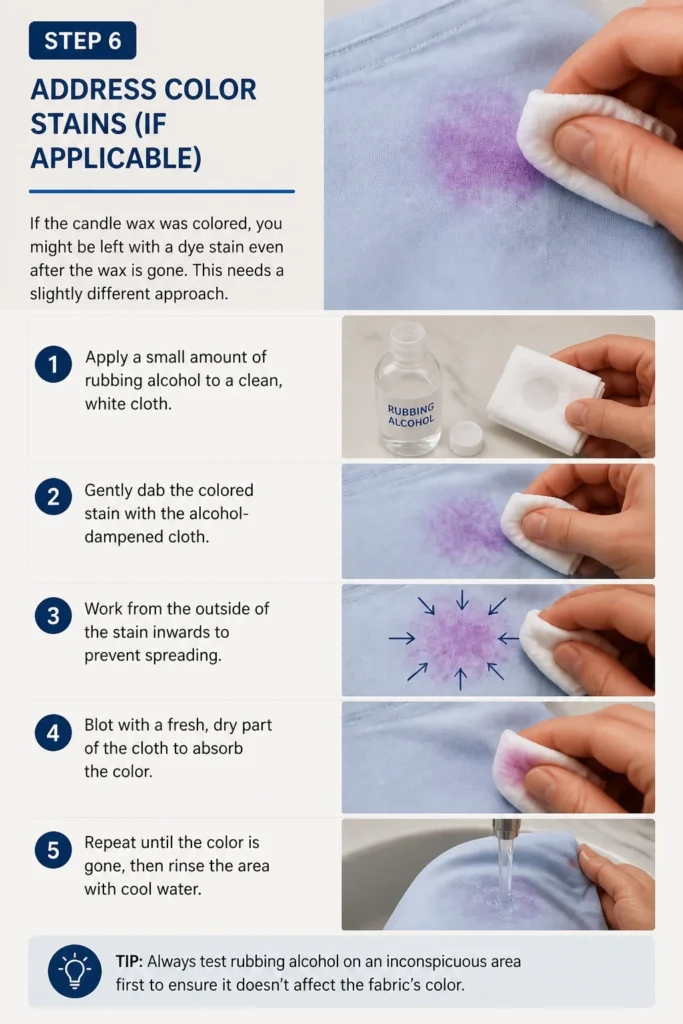
Apply a small amount of rubbing alcohol to a clean, white cloth.
Gently dab the colored stain with the alcohol-dampened cloth. Work from the outside of the stain inwards to prevent spreading.
Blot with a fresh, dry part of the cloth to absorb the color. Repeat until the color is gone, then rinse the area with cool water.
Step 7: Pre-Treat and Wash
The final step ensures any remaining residue or greasiness is completely removed.
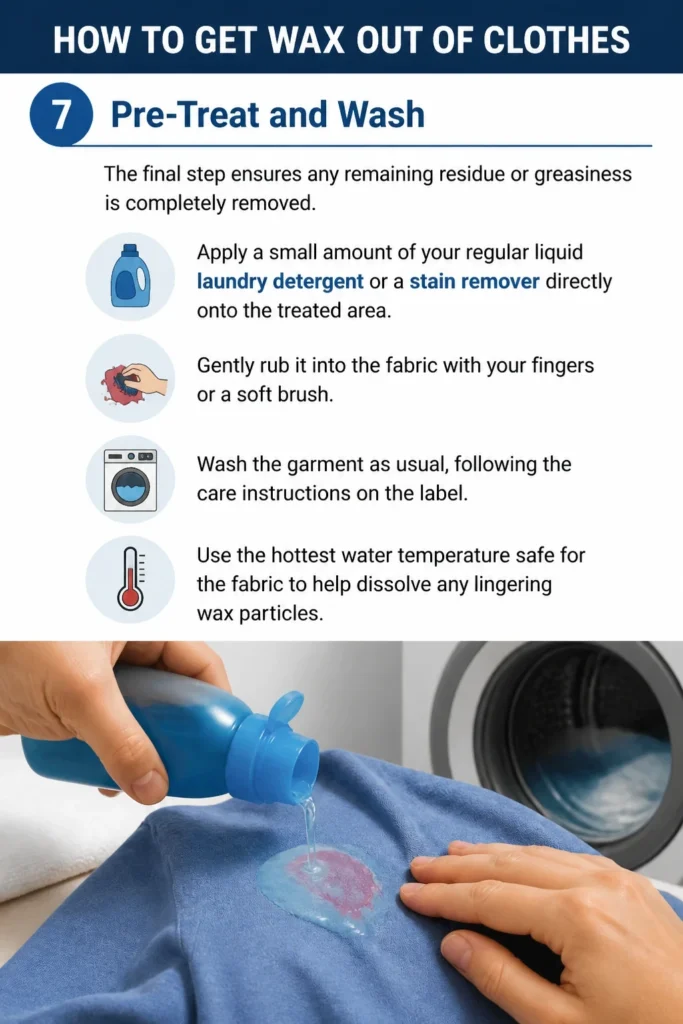
Apply a small amount of your regular liquid laundry detergent or a stain remover directly onto the treated area.
Gently rub it into the fabric with your fingers or a soft brush.
Wash the garment as usual, following the care instructions on the label. Use the hottest water temperature safe for the fabric to help dissolve any lingering wax particles.
Step 8: Air Dry and Inspect
This is a critical step to ensure the stain is truly gone before you set it in with heat.
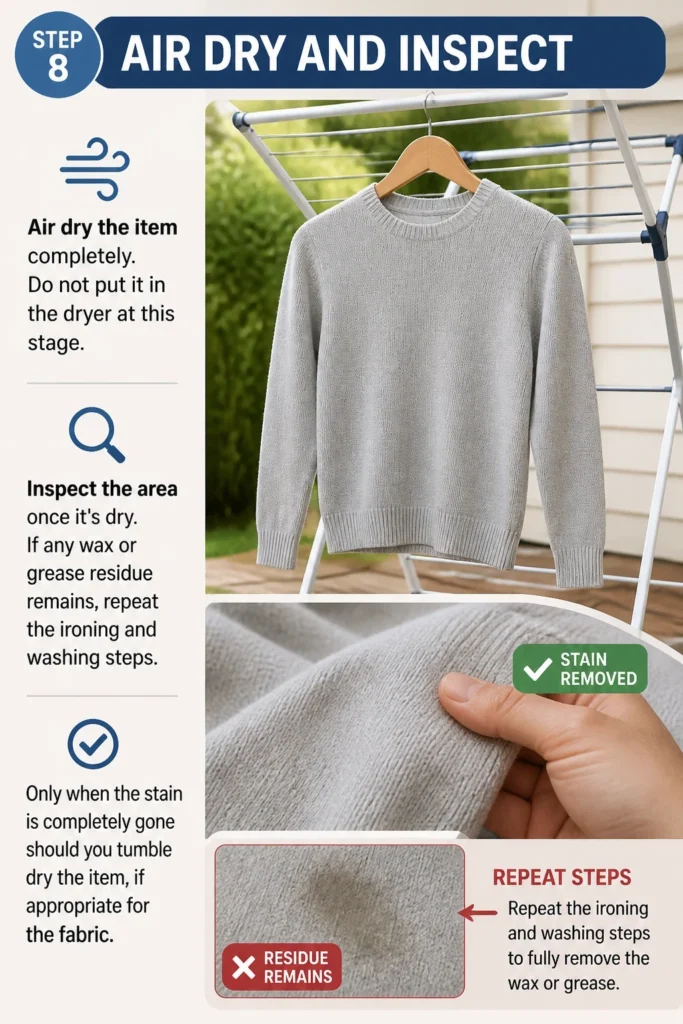
Air dry the item completely. Do not put it in the dryer at this stage.
Inspect the area once it’s dry. If any wax or grease residue remains, repeat the ironing and washing steps.
Only when the stain is completely gone should you tumble dry the item, if appropriate for the fabric.
Common Mistakes to Avoid
Rubbing the Stain
When you first notice a wax stain, your instinct might be to rub it vigorously. However, rubbing can push the wax deeper into the fabric fibers, making it much harder to remove.
Instead, let the wax cool and harden completely before attempting any removal. Patience is key to a successful outcome.
Using High Heat Immediately
Applying high heat to fresh wax can melt it further into the fabric, setting the stain permanently. It can also spread the wax over a larger area.
Always start by freezing the wax and scraping off the hardened excess. Only then should you introduce controlled, low-to-medium heat with an absorbent barrier like paper.
Skipping the Paper Barrier
Ironing wax without a protective and absorbent barrier like paper towels or a brown paper bag will simply melt the wax and spread it around, potentially transferring it to your iron or other parts of the garment.
The paper is essential for drawing the melted wax out of the fabric and away from your iron, ensuring a clean transfer.
Drying Before Inspection
Throwing a wax-stained item directly into the dryer after washing, without checking if the stain is fully gone, is a common pitfall. The heat from the dryer can permanently set any remaining wax or grease stain into the fabric.
Always air dry the garment first and inspect the area thoroughly. If any residue remains, repeat the cleaning process before using the dryer.
Troubleshooting
Greasy Residue Remains
Sometimes, even after ironing and washing, a faint greasy spot might linger where the wax once was. This indicates that some of the wax’s oil components are still embedded in the fabric.
To fix this, try applying a small amount of a pre-wash stain remover or even a dab of dish soap (which is excellent at cutting grease) directly to the spot. Gently rub it in, let it sit for 10-15 minutes, then rewash the item in the hottest water safe for the fabric. Air dry and inspect again.
Colored Wax Left a Dye Stain
If you’ve removed the wax but are left with a colored mark, it’s a dye stain from the candle. This can be more challenging than just removing the wax itself.
For dye stains, try dabbing the area with rubbing alcohol using a clean white cloth. Work from the outside in. For stubborn dyes, a diluted solution of hydrogen peroxide (test on an inconspicuous area first) or a commercial color-safe bleach might be needed, always following product instructions and fabric care labels carefully.
Wax on Delicate Fabrics (Silk, Rayon, etc.)
While the general principles apply, delicate fabrics require extra care. High heat can damage them, and aggressive scraping can snag threads.
For delicate items, opt for very gentle scraping after freezing. When ironing, use the lowest heat setting possible and place a thin cotton cloth between the paper and the iron to diffuse the heat even further. If unsure, professional dry cleaning might be the safest option to protect your cherished delicate pieces.
Key Takeaways
- Always freeze the wax first to make it brittle and easy to scrape.
- Use a dull tool like a credit card for scraping to avoid fabric damage.
- Paper towels or brown paper bags are essential for absorbing melted wax during ironing.
- Use low to medium heat on your iron, appropriate for the fabric type.
- Replace soiled paper frequently to ensure maximum wax absorption.
- Pre-treat any lingering grease spots with detergent or a stain remover before washing.
- Air dry and inspect the garment before putting it in a dryer to prevent setting any remaining stains.
Frequently Asked Questions
Can I use parchment paper instead of paper towels?
Yes, parchment paper works wonderfully! It’s non-stick and very effective at absorbing the melted wax without leaving any lint or residue on the fabric. In fact, many people prefer it over paper towels for its superior performance.
What if the wax is on a non-washable item, like upholstery?
For upholstery, the freezing and scraping steps remain the same. For the heat transfer, use the iron method with paper, but be very careful with the heat setting and ensure you’re not damaging the underlying cushion. You might need to use a handheld steamer or a hairdryer on a low setting, moving it constantly, with a clean cloth to blot the melted wax. Always test on an inconspicuous area first.
Will this method work for all types of wax, including soy or beeswax?
Yes, this method is effective for most types of candle wax, including paraffin, soy, and beeswax. The principle of freezing, scraping, and then melting into an absorbent paper works universally for these wax types. Colored wax might leave a dye stain that requires additional treatment, as outlined in the troubleshooting section.
Is there an alternative to ironing if I don’t have one?
If you don’t have an iron, you can use a hairdryer on a low-to-medium heat setting. Place paper towels above and below the stain, and direct the warm air at the area, gently blotting with the top paper towel as the wax melts. It might take a bit longer and require more patience, but it can be an effective alternative.
Our Top Recommended Finds
- Unscented Brown Paper Bags: Ideal for their absorbency and thickness, making them perfect for drawing out melted wax without leaving residue.
- Rubbing Alcohol (Isopropyl Alcohol): A versatile household staple, excellent for tackling colored wax stains and general spot cleaning.
- Gentle Fabric Stain Remover: For those stubborn oily residues or dye marks, a reliable stain remover designed for your fabric type is invaluable.
Reclaiming Your Cozy Haven
It’s truly satisfying to restore a cherished item, transforming a small mishap into a testament to your resourcefulness and care.
Now that you’re armed with these practical steps, you can confidently tackle any wax spill, ensuring your home remains the beautiful, serene space you’ve so carefully designed.
Don’t let a tiny wax drip dim your decorating spirit; embrace the warmth of candles knowing you have the power to keep your textiles looking their best.