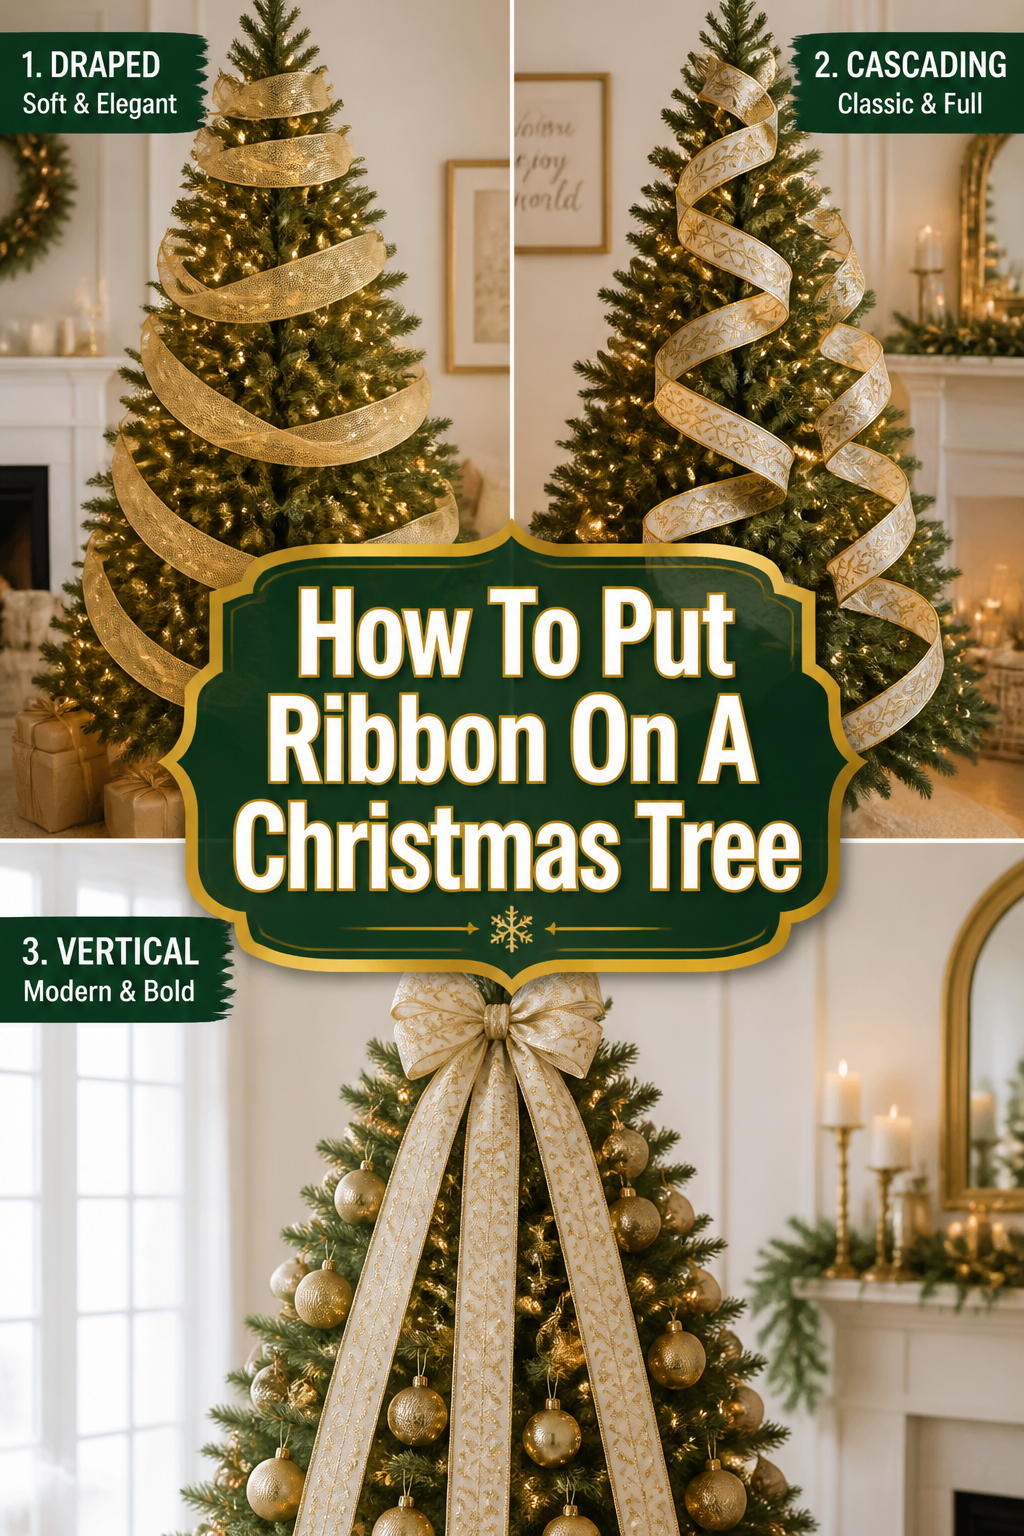
🎄 How To Put Ribbon On A Christmas Tree
There is something deeply comforting about the glow of a Christmas tree as the winter nights grow longer.
I remember spending hours as a child watching my grandmother meticulously weave velvet strands through evergreen branches to create a masterpiece.
After years of decorating professional displays and my own cozy living room, I have found that ribbon is the secret to a high-end look.

Quick Overview
Adding ribbon is often the most intimidating part of decorating, but it provides the most visual impact.
- Time needed: 60 to 90 minutes
- Difficulty: Intermediate
- What you’ll need: 2-3 rolls of 2.5-inch wired ribbon, floral wire or pipe cleaners, sharp scissors, and a sturdy step ladder.
Step-by-Step Instructions
Step 1: Choose Your Ribbon Style
Select a ribbon that features a wired edge to ensure it holds its shape throughout the season.
Wired ribbon allows you to create those beautiful, billowing “puffs” that stay put even if the cat decides to investigate the tree.
Consider mixing two different styles, such as a solid velvet paired with a patterned metallic, to add texture and depth to your design.
Pro Tip: Look for ribbon that is finished on both sides so you do not have to worry about the “ugly” side showing when you twist it.
Step 2: Prepare Your Tree
Fluff every single branch of your tree before you even think about touching the ribbon.
If you have an artificial tree, pull the branches out and up to fill any large gaps and create a lush canvas.
For real trees, ensure the branches are hydrated and strong enough to support the weight of your chosen fabric.
It is much easier to adjust the greenery now than it is once the ribbon is woven into the needles.
Step 3: Cut the Ribbon Into Strips
Resist the urge to wrap the ribbon around the tree directly from the spool in one continuous piece.
Instead, cut your ribbon into strips ranging from 12 to 18 inches long.
This “cut strip” method is the secret designer trick that makes the ribbon look like it is floating through the tree.
It prevents the tree from looking “strangled” and allows you to control exactly where the fabric billows and tucks.
Step 4: Create the Anchor Point
Start at the top of the tree, just below the topper, and secure your first piece of ribbon.
Use a small piece of floral wire or a pipe cleaner to attach the end of the ribbon deep into the center of the tree.
Tucking the ends deep into the branches creates the illusion that the ribbon is emerging naturally from within the tree.
Make sure the wire is tight so the ribbon does not slide down as you work on the lower sections.
Step 5: Master the “Billow and Tuck”
Form a soft loop with your ribbon strip and tuck the other end back into the tree branches.
You want the ribbon to look like a gentle wave, not a tight bandage.
Pinch the ribbon at the tuck point and use the tree’s own wire branches to “grab” and hold the fabric in place.
If you are using a real tree, use a small bit of green floral wire to mimic this grabbing action.
Step 6: Work in a Zig-Zag Pattern
Move down the tree in a diagonal or vertical zig-zag pattern rather than horizontal circles.
Horizontal ribbon can make a tree look shorter and wider, whereas vertical placement adds height and elegance.
Spread the ribbon strips out so they are not perfectly aligned, which creates a more organic and professional appearance.
Step back every few minutes to ensure the distribution looks balanced from across the room.
Pro Tip: If you see a “hole” in your tree where there are fewer branches, use a larger ribbon billow to mask the gap.
Step 7: Layer a Second Ribbon
Add a second, thinner ribbon over or alongside your primary ribbon for a sophisticated look.
You can tuck a 1-inch glittery ribbon right into the same “pinch points” as your 2.5-inch velvet ribbon.
This layering creates a designer feel and allows you to pull in multiple colors from your room’s decor.
Think of this second layer as the jewelry for your tree’s outfit.
Step 8: Curl the Ends
Finish your ribbon runs by curling the bottom ends into “tails” or tucking them completely out of sight.
If you want visible tails, cut a “V” shape into the end of the ribbon for a polished, professional finish.
You can also roll the end of the ribbon around your finger to create a spiral effect that hangs gracefully.
This small detail makes the transition from ribbon to floor look intentional and tidy.
Step 9: Adjust the Lighting
Check that your ribbon is not completely covering your Christmas lights.
The best part of using ribbon is how it catches the light, especially if you have metallic or sheer fabrics.
Pull some of the lights forward so they sit just behind or slightly to the side of the ribbon loops.
This creates a warm glow that makes the fabric appear to shine from within.
Common Mistakes to Avoid
The Mummy Wrap
Many people try to wrap the ribbon around the tree in a tight, circular spiral from top to bottom.
This often results in the ribbon being pulled too tight, which squishes the branches and hides the ornaments.
It also makes the tree look smaller and prevents the ribbon from having any movement or life.
Using Non-Wired Ribbon
Satin or silk ribbons without wire edges will limp and sag under their own weight almost immediately.
Without the internal wire, you cannot create the “poof” effect that gives a tree its volume.
You will spend the whole season trying to fix sagging loops that refuse to stay in place.
Ignoring the Back of the Tree
Even if your tree is in a corner, failing to put any ribbon on the sides or slightly toward the back can make it look flat.
You do not need to use your most expensive ribbon in the back, but adding a few loops creates a sense of fullness.
When someone walks into the room, they should see a 3D masterpiece, not a 2D facade.
Troubleshooting
The Ribbon Keeps Falling Out
If your ribbon strips are slipping, you likely aren’t anchoring them deep enough into the tree’s “spine.”
Use longer pieces of floral wire and wrap them around the main trunk or a very sturdy interior branch.
Avoid anchoring ribbon to the very tips of the branches, as these are the weakest points and will naturally droop.
The Tree Looks Too Busy
If you step back and the tree looks cluttered, you might have used too many different patterns or too much ribbon.
Try removing every third piece of ribbon to let the greenery breathe and show through.
Remember that the ribbon should complement your ornaments, not compete with them for attention.
The Ribbon Looks Flat
This usually happens when the loops are too long or the ribbon is too narrow for the size of the tree.
Try “scrunching” the ribbon more at the tuck points to create more tension and height in the loops.
You can also “finger-fluff” the ribbon by sticking your hand inside the loop and widening it from the inside out.
Key Takeaways
- Always use wired ribbon to ensure your loops and billows maintain their shape and volume.
- Cut your ribbon into smaller strips (12-18 inches) instead of using one continuous roll for better control.
- Tuck the ends deep into the branches to create a seamless look that appears professional.
- Work in a vertical zig-zag pattern to add height and elegance to your holiday display.
- Layer different textures like velvet and metallic to create a high-end, designer aesthetic.
- Step back frequently to check for balance and ensure the ribbon is distributed evenly.
Frequently Asked Questions
How much ribbon do I need for a 7-foot tree?
For a standard 7-foot tree, you will typically need about 45 to 60 feet of ribbon to achieve a full look.
This usually equates to about three standard rolls, though it is always better to have an extra roll on hand just in case.
If you are planning on doing very large loops or a heavy “waterfall” style, you may want to buy four rolls.
Should I put ribbon on before or after ornaments?
You should always put your ribbon on the tree after the lights but before the ornaments.
The ribbon acts as a secondary layer of “filler” that helps you see where the natural gaps in the tree are.
Once the ribbon is in place, you can nestle your ornaments into the spaces created by the ribbon loops.
Can I reuse my ribbon next year?
Yes, wired ribbon is very durable and can be used for many years if stored properly.
When taking the tree down, gently un-tuck the ribbon and roll it loosely around a cardboard tube or a dedicated ribbon reel.
Avoid folding or creasing the ribbon, as this can damage the wire and make it harder to shape next season.
Our Top Recommended Finds
- 2.5-Inch Wired Velvet Ribbon: This is the gold standard for holiday decorating because it looks expensive and holds its shape perfectly.
- Green Floral Wire: These pre-cut 12-inch pieces are much easier to handle than a continuous spool of wire when you are up on a ladder.
- Heavy-Duty Fabric Scissors: A clean cut on your ribbon ends prevents fraying and keeps the “V” cuts looking sharp and professional.
Bringing Your Holiday Vision To Life
Now that you have the techniques down, it is time to turn on some festive music and start decorating.
Don’t be afraid to experiment with different colors that match your room’s unique personality, like soft blues or warm coppers.
The most important part of the process is enjoying the creative journey and the cozy atmosphere you are building.
Once the ribbon is set, you can move on to hanging your favorite ornaments and placing the tree topper.
Take a photo of your finished tree today and share it with friends to inspire their holiday spirit.