🎄 How To Make Christmas Tree Look Fuller
There’s nothing quite like the magic of a beautifully decorated Christmas tree, glowing warmly in your living room. Yet, sometimes, that perfect vision is dimmed by a tree that looks a little sparse, a little less lush than you dreamed. I’ve been there, staring at a gappy artificial tree, wondering if it would ever achieve that cozy, abundant look.
Over the years, through trial and error and a passion for festive decor, I’ve discovered simple, effective ways to transform even the most modest tree into a showstopper. This guide shares all my best secrets, ensuring your tree becomes the heart of your holiday home.

Quick Overview
This guide will walk you through transforming your Christmas tree from sparse to splendid. You’ll learn professional techniques to add volume, depth, and a luxurious feel, making your living space feel truly magical. We’ll cover everything from fluffing branches to strategic decorating, ensuring your tree looks its absolute best.
- Time needed: 1-3 hours (depending on tree size and detail)
- Difficulty: Beginner
- What you’ll need: Gloves, floral picks (pine, berry, eucalyptus), garland, extra string lights, large filler ornaments, ribbon or mesh, and your cherished decorations.
Step-by-Step Instructions
Step 1: Fluff and Shape Every Branch
This is perhaps the most crucial initial step, especially for artificial trees. Think of it as waking your tree up from its long nap in storage. Each branch needs individual attention to reach its full potential.
Start at the bottom of the tree and work your way up. Gently pull each small branch and tip outwards and upwards, fanning them out like fingers. This creates a wider, more natural spread.
Make sure to vary the angles slightly. Don’t make them all perfectly straight; some should point slightly up, some slightly out, to mimic a real tree’s organic growth. This meticulous fluffing alone can add significant volume.
Pro Tip: Wearing gloves can protect your hands from prickly branches and sap, making the fluffing process much more comfortable. Don’t rush this step; it lays the foundation for a truly full tree.
Step 2: Assess and Fill Gaps with Picks and Sprays
Once fluffed, step back and observe your tree from various angles. Identify any noticeable gaps or areas where the branches look thin. This is where artificial floral picks and sprays become your best friends.
Insert these picks deep into the tree, tucking their stems securely into the central pole or existing branches. Choose picks that complement your tree’s existing needles, like extra pine branches, or add texture with frosted berries, eucalyptus, or flocked branches.
Vary the size and texture of your picks to create visual interest. Distribute them evenly throughout the tree, focusing on the sparse spots. This instantly adds volume and a layered look.
Step 3: Layer in Garland or Faux Greenery
Garland isn’t just for draping; it’s a fantastic tool for adding internal fullness. Instead of just wrapping it around the outside, weave it deeply into the tree.
Choose a garland that contrasts slightly with your tree’s color or texture, like a darker green pine garland or a frosted eucalyptus garland. Start at the top and work your way down, spiraling it in.
Push parts of the garland towards the trunk and pull other parts closer to the tips of the branches. This creates depth and makes the tree appear much denser from within. You can also use multiple types of garland for even more texture.
Step 4: Strategically Place Your Lights
Many people only wrap lights around the outer edges of their tree, which leaves the interior dark and hollow-looking. For a truly full and glowing tree, you need to layer your lights.
Begin by stringing some lights closer to the trunk, weaving them around the main branches. This creates an internal glow that makes the tree appear deeper and richer. These are your “foundation” lights.
Then, add another layer of lights, weaving them through the middle and outer sections of the branches. Make sure they are evenly distributed, avoiding clumps or dark spots. Consider using warm white lights for a cozy, inviting glow.
Pro Tip: If your tree isn’t pre-lit, consider using slightly more lights than recommended for your tree size. An abundance of light enhances the illusion of fullness and sparkle.
Step 5: Incorporate Large Filler Ornaments
Before bringing out your cherished, delicate ornaments, use larger, less expensive baubles to fill interior spaces. These act as “depth creators,” making the tree look full even before the main decorations go on.
Place these filler ornaments deep inside the tree, nestled against the trunk or within the denser parts of the branches. They don’t need to be perfectly visible; their purpose is to occupy space and reflect light.
Choose ornaments in a neutral color that blends with your tree or in one of your main accent colors. Matte finishes or simple spheres work wonderfully for this purpose.
Step 6: Weave in Ribbon or Mesh
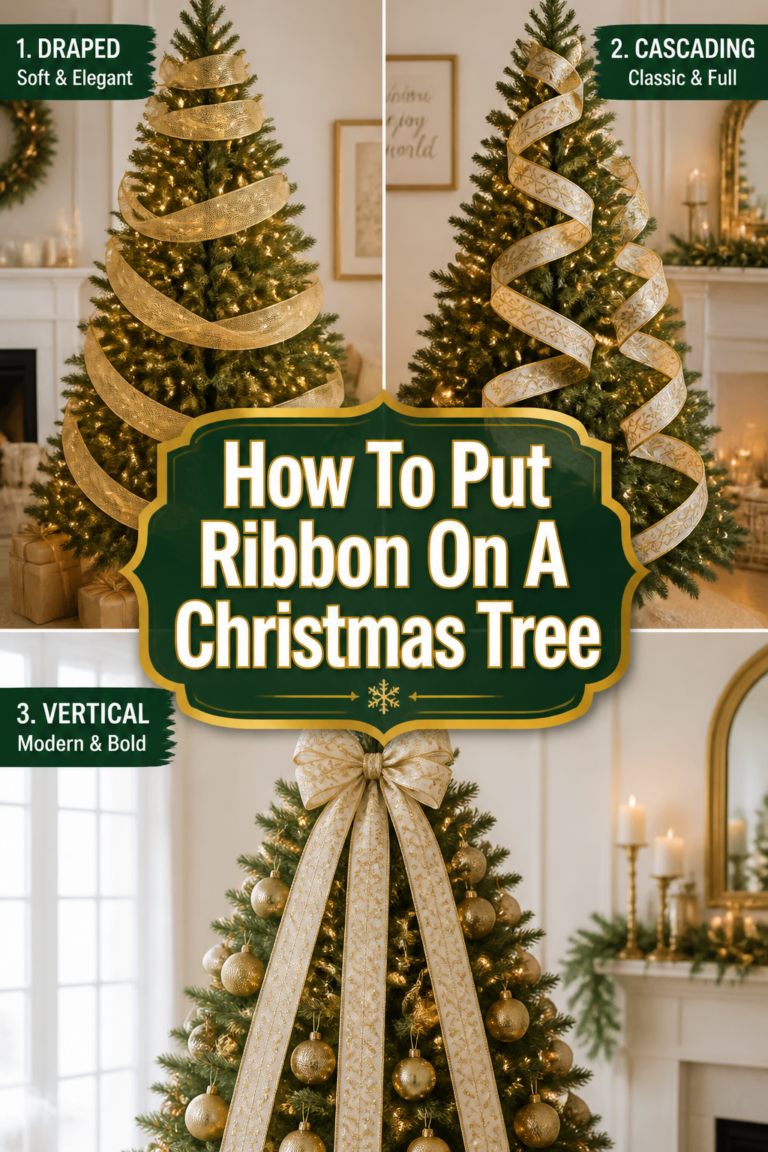
Ribbon and decorative mesh are incredible for adding visual weight and texture. They help fill voids and create flowing lines that guide the eye.
Cut your ribbon or mesh into manageable lengths, typically 1 to 2 feet long. Start at the top of the tree and tuck one end deep into the branches.
Then, gently “poof” or loop the ribbon, securing it periodically to branches as you work your way down and outwards. You can create vertical cascades, horizontal swags, or even diagonal patterns.
The key is to let the ribbon flow naturally and fill any remaining gaps. This adds a luxurious, custom-decorated feel that significantly contributes to the tree’s perceived fullness.
Step 7: Hang Your Main Ornaments Thoughtfully
Now it’s time for your special ornaments! With the foundation of fullness already established, your cherished decorations will truly shine.
Distribute your ornaments evenly around the tree, stepping back frequently to check for balance. Place larger, more prominent ornaments first, then fill in with smaller ones.
Remember to hang some ornaments closer to the trunk and others nearer the tips of the branches. This layering creates depth and prevents the tree from looking flat.
Step 8: The Finishing Touches and Final Assessment
With your ornaments in place, it’s time for the final details. Add your tree topper, ensuring it’s securely fastened and proportional to your tree’s height.
Drape a beautiful tree skirt around the base, covering the stand and adding to the cozy aesthetic. Step back and view your tree from every angle, adjusting any ornaments, lights, or picks as needed.
Consider adding a few gift boxes wrapped in coordinating paper beneath the tree. This final touch not only adds to the festive atmosphere but also helps ground the tree and make the entire display feel more complete and abundant.
Common Mistakes to Avoid
Ignoring the Fluffing Stage
Many people rush through setting up their artificial tree, barely pulling out the branches. This is a critical error because a poorly fluffed tree will look sparse, no matter how many decorations you add. Taking the time to individually shape each branch creates the foundational volume you need.
Only Decorating the Outer Branches
A common pitfall is to only hang ornaments and lights on the most visible, outer tips of the branches. This leaves the interior of the tree dark and empty, creating a flat, two-dimensional appearance. True fullness comes from decorating the tree from the inside out, layering elements at varying depths.
Using Too Few Lights
Under-lighting a tree is a missed opportunity to create depth and warmth. Sparse lighting can make even a well-fluffed tree look less vibrant and full. An abundance of strategically placed lights, both deep within the branches and on the outer tips, is essential for a rich, glowing effect.
Clustering Ornaments
Hanging all your ornaments in tight groups or only on certain sections of the tree can make it look uneven and less abundant. Spreading your decorations thoughtfully, ensuring a balance of sizes, colors, and textures across the entire tree, creates a more harmonious and fuller display.
Troubleshooting
My Tree Still Looks Sparse After Fluffing and Picks
If your tree still appears gappy, you might need to add more layers. Consider another pass with additional floral picks, choosing larger, more voluminous ones like magnolia leaves or extra pine branches. You can also weave in a second type of garland, perhaps a flocked one, for added visual weight and texture.
Ornaments Keep Falling Off
This usually happens if branches are too weak or hooks aren’t secure. Ensure you’re hanging heavier ornaments on stronger, thicker branches closer to the trunk. Use ornament hooks that fully close or wire hooks that you can bend around the branch for extra security. For delicate ornaments, consider tying them directly with thin floral wire.
Lights Aren’t Evenly Distributed
If you notice dark spots or overly bright areas, gently re-distribute your light strands. Turn off other room lights to clearly see your tree’s illumination. Take a section of lights and carefully re-wrap them, ensuring they are spread out along the branch and not bunched up. For future reference, stringing lights before adding any ornaments makes even distribution much easier.
Key Takeaways
- Fluffing is Fundamental: Dedicate ample time to individually shape every branch for foundational volume.
- Layer, Layer, Layer: Build fullness from the inside out using picks, garland, and lights at varying depths.
- Strategic Lighting: Place lights both deep within the tree and on outer branches for a rich, internal glow.
- Utilize Filler Ornaments: Use large, inexpensive baubles to occupy interior space and reflect light.
- Ribbon Adds Elegance and Volume: Weave ribbon or mesh through the tree to fill gaps and create flowing lines.
- Step Back and Assess: Regularly view your tree from different angles to ensure balance and address any sparse areas.
Frequently Asked Questions
Can I make a real tree look fuller?
Absolutely! While you can’t add branches to a real tree, you can certainly enhance its perceived fullness. Use many lights, weaving them deep into the tree. Employ large, inexpensive ornaments as fillers, tucking them into any sparse spots. Ribbon or mesh can also be effectively woven in to create visual density and cover gaps.
What kind of picks should I use?
The best picks mimic natural elements or add complementary textures. Consider pine branches (frosted or plain), berry sprays (red, white, or gold), eucalyptus, magnolia leaves, or even glittery floral stems. Choose picks that match your tree’s needle type or offer a pleasing contrast to your overall decor theme.
How many lights do I really need for a full look?
A good rule of thumb for a truly full and glowing tree is 100 lights per foot of tree height. So, a 7-foot tree would ideally have 700 lights. For an even more dramatic and abundant glow, you can go up to 150 lights per foot. This ensures both internal depth and external sparkle.
Should I decorate from top to bottom or bottom to top?
For maximum fullness and ease, it’s generally best to work from the bottom up when fluffing, adding picks, and stringing lights. When it comes to hanging ornaments, many find it easiest to start with larger filler ornaments deep inside and then move to your main, cherished ornaments from top to bottom, ensuring even distribution.
Our Top Recommended Finds
- Artificial Pine & Berry Picks: These versatile additions instantly fill gaps and add a festive pop of color and texture. Look for sets with varying styles.
- Warm White LED String Lights: Opt for high-quality, dense strands. LED lights are energy-efficient and provide a beautiful, consistent glow that enhances fullness.
- Decorative Christmas Ribbon or Mesh: A generous roll of wired ribbon (4-6 inches wide) or festive mesh allows for easy shaping and adds significant visual volume and elegance.
Embrace the Magic of a Fuller Tree!
Transforming your Christmas tree into a magnificent, abundant display is a truly rewarding experience. It’s more than just decorating; it’s about crafting a centerpiece that radiates warmth and joy throughout your home. With these steps, you’re not just making your tree look fuller; you’re infusing your space with an extra layer of holiday magic.
Imagine the cozy evenings, the soft glow reflecting off every ornament, the feeling of wonder as friends and family gather around. Your efforts will create memories that last long after the season ends. Now that you have the tools, why not start planning your tree transformation today? Perhaps next, you’ll want to explore creating a cohesive mantel display or designing a festive entryway to complement your stunning tree!