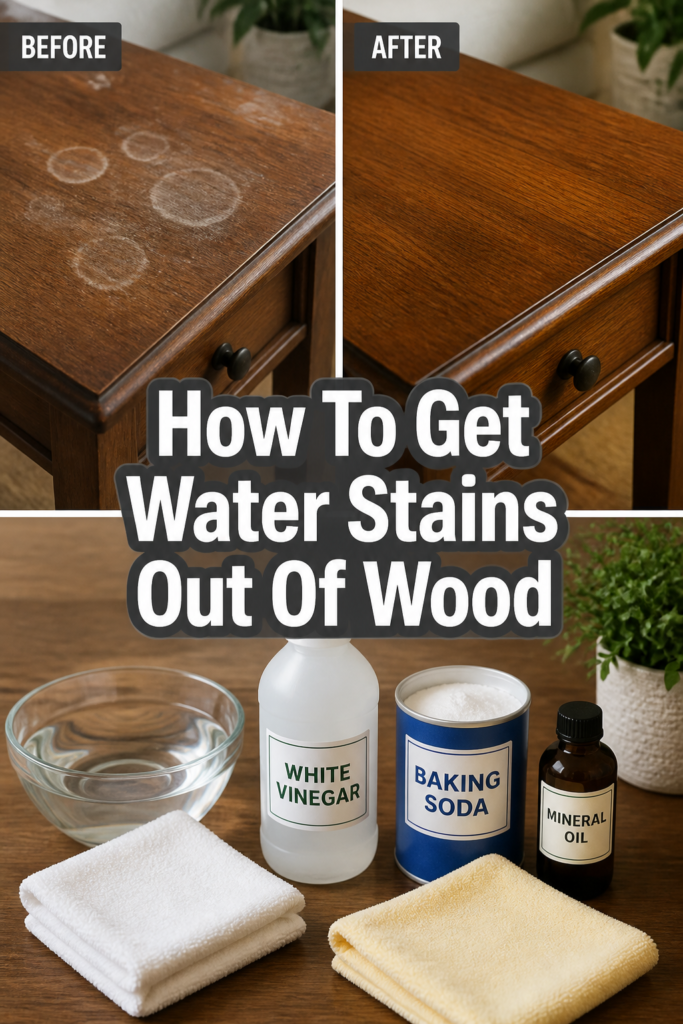
How To Get Water Stains Out Of Wood
There’s nothing quite like the warmth and character wood furniture brings to a home.
I remember the sinking feeling when I first spotted a cloudy ring on my beloved vintage coffee table – a stark reminder of an un-coastered mug.
Having navigated the panic and successfully restored several cherished pieces since, I can confidently guide you through bringing your wood back to its beautiful best.
Quick Overview
Transforming your water-stained wood back to its original glory is entirely achievable with a bit of patience and the right techniques.
This guide empowers you to tackle those unwelcome marks, preserving the aesthetic and comfort of your living spaces.
- Time needed: 30 minutes to a few hours (depending on drying time and stain severity)
- Difficulty: Beginner
- What you’ll need: Soft cloths, iron, hairdryer, mayonnaise, non-gel toothpaste, baking soda, olive oil, fine-grit sandpaper (optional), wood cleaner, wood polish/conditioner.
Step-by-Step Instructions
Step 1: Assess Your Stain and Wood Finish
Before you begin, take a moment to understand the enemy. Water stains on wood typically fall into two categories: white/light or dark/black.
White or cloudy marks are usually surface-level, indicating moisture trapped in the finish. Dark or black stains suggest the water has penetrated deeper, potentially into the wood itself, sometimes even causing mold.
Also, identify your wood’s finish. Is it varnished, lacquered, oiled, or waxed? This knowledge will help you choose the gentlest and most effective method.
Pro Tip: Always test any method on an inconspicuous area first, like the underside of a table or inside a cabinet door. This ensures compatibility with your specific wood finish and prevents unexpected reactions.
Step 2: The Heat Method for Fresh, White Marks
For fresh, white, or cloudy water rings, heat can work wonders. This method helps evaporate the trapped moisture from the wood’s finish.
You can use either an iron or a hairdryer for this technique.
- Prepare your surface by wiping it clean.
- Place a clean, dry cotton cloth (like a t-shirt or dish towel) over the water stain. Avoid using a towel with any texture or patterns that could transfer.
- Set your iron to its lowest heat setting with no steam.
- Lightly press the iron onto the cloth directly over the stain for just a few seconds.
- Lift the iron and cloth to check the stain. Repeat this process, moving the iron slightly and checking frequently, until the stain begins to fade or disappear.
- Alternatively, use a hairdryer on a low to medium heat setting. Hold it a few inches above the stain, moving it constantly to prevent overheating one spot. Watch as the cloudy ring gradually vanishes.
Step 3: The Mayonnaise Mask for White Rings
This method sounds unusual, but it’s a time-honored trick for stubborn white water rings. The oil in mayonnaise (or petroleum jelly) helps draw out the moisture from the wood’s finish.
- Dab a generous amount of full-fat mayonnaise onto a clean cloth.
- Apply the mayonnaise directly over the entire white water stain, ensuring it’s completely covered.
- Let it sit for several hours, or even overnight, for best results. The longer it sits, the more time it has to work its magic.
- Wipe away the mayonnaise with a clean cloth. You should see the stain significantly diminished or completely gone.
- Buff the area gently to restore its shine.
Step 4: Baking Soda & Toothpaste Power for White Rings
For a slightly more abrasive, yet still gentle, approach to white rings, a paste made from baking soda or non-gel toothpaste can be effective.
- Mix one part baking soda with one part water to create a thick paste. Alternatively, use a small dab of white, non-gel toothpaste.
- Gently rub the paste onto the water stain with a soft cloth, moving in the direction of the wood grain.
- Apply light pressure. You’re aiming to gently abrade the surface, not scratch it.
- Wipe away the paste with a clean, damp cloth.
- Inspect the area. Repeat if necessary, but proceed with caution and check frequently to avoid damaging the finish.
Step 5: Gentle Abrasion for Stubborn White Marks
If the above methods haven’t fully removed a persistent white ring, a very gentle abrasive might be needed. This step requires extra care.
- Gather some very fine steel wool (grade #0000) or extra-fine sandpaper (220-grit or higher).
- Dip the steel wool or dampen the sandpaper lightly with mineral spirits or olive oil.
- Gently rub the stained area, moving with the grain of the wood. Use very light pressure.
- Check your progress constantly. The goal is to lightly buff away the affected top layer of the finish.
- Wipe clean with a soft cloth. Once the stain is gone, proceed to re-finishing and polishing.
Step 6: Addressing Deeper, Darker Stains (with care)
Dark or black water stains are more challenging as they indicate deeper penetration or even mold growth. For these, a professional restorer is often the safest bet, especially for valuable pieces.
However, for lighter dark stains, you might try a very dilute vinegar solution (one part white vinegar to four parts water) on a cloth. Gently wipe the stain, then immediately wipe dry.
For deep, black stains caused by water interacting with the wood’s tannins, a product containing oxalic acid is sometimes used, but this is a more advanced technique that can strip the finish and lighten the wood. We strongly recommend consulting a professional for deep black stains to avoid irreversible damage.
Step 7: Clean, Restore, and Protect
Once the water stain is removed, it’s time to bring back the wood’s luster and protect it from future incidents.
- Clean the entire surface of your furniture with a good quality wood cleaner to remove any residue from your stain removal efforts.
- Apply a wood polish or conditioner. This step nourishes the wood, restores its natural oils, and helps blend the treated area with the rest of the surface.
- Buff the wood to a beautiful shine with a clean, dry microfiber cloth. This brings out the grain and depth, making your piece look refreshed.
- Consider adding a protective layer, such as a furniture wax, to provide an extra barrier against moisture.
Common Mistakes to Avoid
Using Harsh Chemicals
Reaching for strong household cleaners or abrasive scouring pads might seem like a quick fix, but these can strip your wood’s finish, bleach its color, or leave permanent scratches. Always start with the gentlest methods and products specifically designed for wood.
Scrubbing Too Hard
Aggressive scrubbing can damage the wood grain and finish, creating a new problem that’s harder to fix than the original stain. Be patient and use gentle, circular motions or rub with the grain, allowing the product to do the work.
Not Testing First
Every piece of wood and its finish is unique. Skipping the step of testing your chosen method in an inconspicuous area can lead to unexpected discoloration or damage on a visible surface. A little patience here saves a lot of potential regret.
Leaving Moisture on the Wood
The very thing that caused the stain can also worsen the problem during treatment. Always wipe away any cleaning solutions, pastes, or mayonnaise promptly and thoroughly. Ensure the wood is completely dry before moving to the next step or applying polish.
Troubleshooting
The Stain Isn’t Completely Gone
If a ghost of the stain remains, don’t despair. Sometimes, multiple applications of a gentle method are needed. Try repeating the heat method, or the mayonnaise trick, allowing it to sit for a longer duration. For very stubborn white rings, you might need to carefully move to the gentle abrasion step with fine steel wool.
The Wood Looks Dull or Dry After Treatment
After any stain removal, the treated area might appear slightly duller or drier than the surrounding wood. This is common. Generously apply a high-quality wood polish or conditioner to the entire surface. Let it soak in for a few minutes before buffing with a clean, soft cloth. This will nourish the wood and restore its natural sheen.
New Marks Appear After Drying
If you notice new marks or a cloudiness in a different spot, it’s possible that residue from the cleaning agent wasn’t fully removed, or moisture was reintroduced. Thoroughly clean the entire surface with a dedicated wood cleaner. Ensure the wood is completely dry before applying any polish or wax, and always use clean cloths for each step.
Key Takeaways
- Always assess the type of water stain (white/dark) and your wood’s finish before starting.
- Begin with the gentlest methods, like heat or mayonnaise, and only move to more abrasive options if necessary.
- Test any new technique or product on an inconspicuous area first to prevent damage.
- Patience is vital; some methods require time to work effectively.
- After stain removal, always clean, condition, and protect your wood to restore its beauty and prevent future damage.
Frequently Asked Questions
Can all water stains be removed from wood?
Most white or cloudy water stains are treatable at home. Dark or black stains, especially those that have penetrated deeply or caused mold, are much more challenging and often require professional restoration. Early intervention is always best for any stain.
How do I prevent water stains on my wood furniture?
Prevention is key! Always use coasters under drinks, particularly those with condensation. Place protective mats under plants and vases. Wipe up spills immediately, and avoid placing hot items directly on wood surfaces. Regular cleaning and conditioning also help maintain a protective barrier.
Is it safe to use heat on all wood finishes?
Using heat (like an iron or hairdryer) is generally safe for most common wood finishes like varnish or lacquer, especially for surface-level white stains. However, extreme heat can damage or melt some finishes, particularly shellac or very old, delicate coatings. Always use the lowest heat setting, keep it moving, and test first.
When should I call a professional?
If you’re dealing with deep black stains, extensive damage, or if you’ve tried gentle methods without success, it’s wise to consult a professional furniture restorer. They have specialized tools and knowledge to safely address complex issues without causing further harm to your cherished pieces.
Our Top Recommended Finds
- High-Quality Microfiber Cloths: Essential for gentle application, cleaning, and buffing without scratching.
- Gentle Wood Cleaner & Polish: Look for products that nourish and protect, restoring shine without leaving residue.
- Stylish Coasters: An attractive and practical way to prevent future stains, seamlessly blending into your home decor.
Reclaim Your Space: A Beautiful Home Awaits
Seeing a water stain vanish from a beloved wooden piece is incredibly satisfying. It’s not just about cleaning; it’s about preserving the stories and comfort these items bring to your home.
Imagine your coffee table, once marred, now gleaming beautifully, ready to host cozy evenings or lively gatherings. The satisfaction of restoring its original charm enhances your entire living space.
Don’t let those marks diminish your home’s aesthetic appeal. Take the first step today, gather your supplies, and embark on this rewarding journey of restoration. Your beautiful, stain-free wood is waiting to shine again!