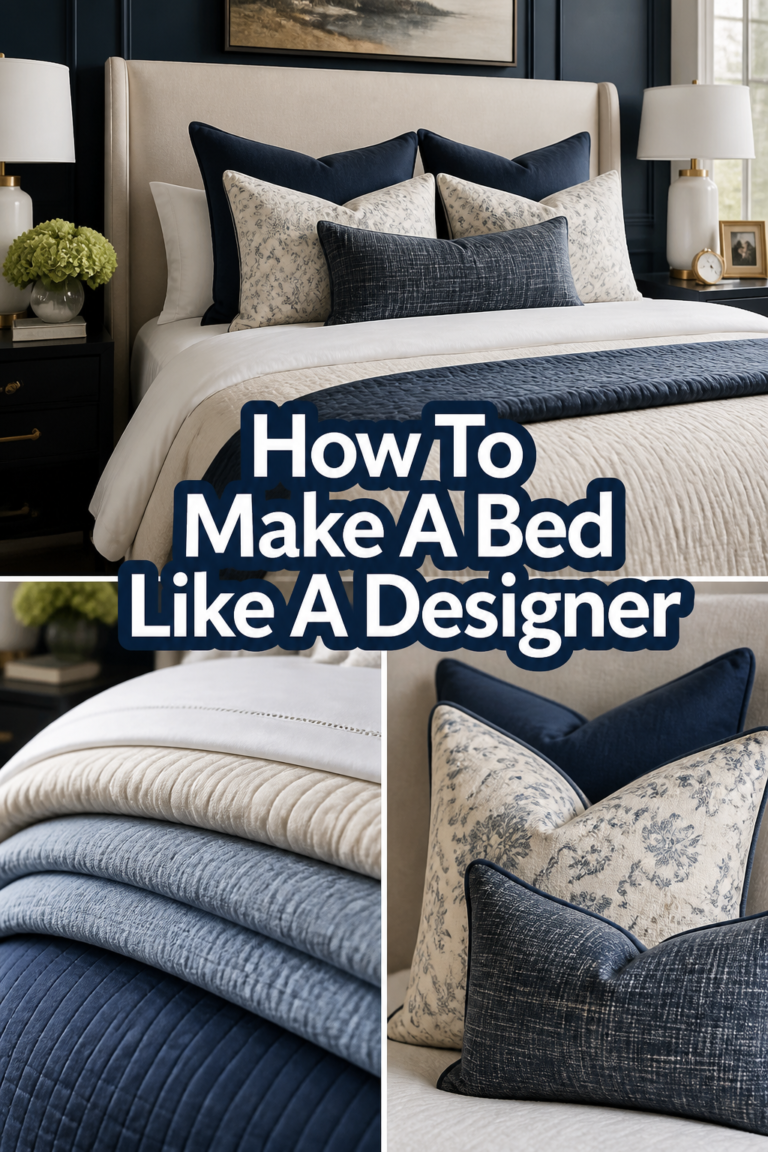
🛌 How To Layer A Bed Like A Designer
Have you ever scrolled through a design magazine or admired a beautifully made bed in a boutique hotel? It looks so inviting, so perfectly put together.
I used to think that kind of luxurious comfort was out of reach, reserved only for professional stylists. But after years of experimenting in my own home and helping friends create their dream bedrooms, I’ve discovered the simple secrets to achieving that coveted layered look.
It’s all about understanding how each piece contributes to the overall feel, creating a sanctuary that’s both stunning and incredibly comfortable.

Quick Overview
This guide will walk you through each layer, from the very foundation to the final decorative touches. You’ll learn how to combine textures, colors, and patterns to build a bed that feels like a warm, stylish hug. Get ready to transform your sleep space into a cozy haven, inspiring sweet dreams and restful mornings.
- Time needed: 45-75 minutes for initial setup, 10-15 minutes for daily styling
- Difficulty: Beginner
- What you’ll need: Mattress protector, mattress topper, fitted sheet, flat sheet, duvet insert, duvet cover, sleeping pillows, decorative pillows, throw blanket, decorative cushions.
Step-by-Step Instructions
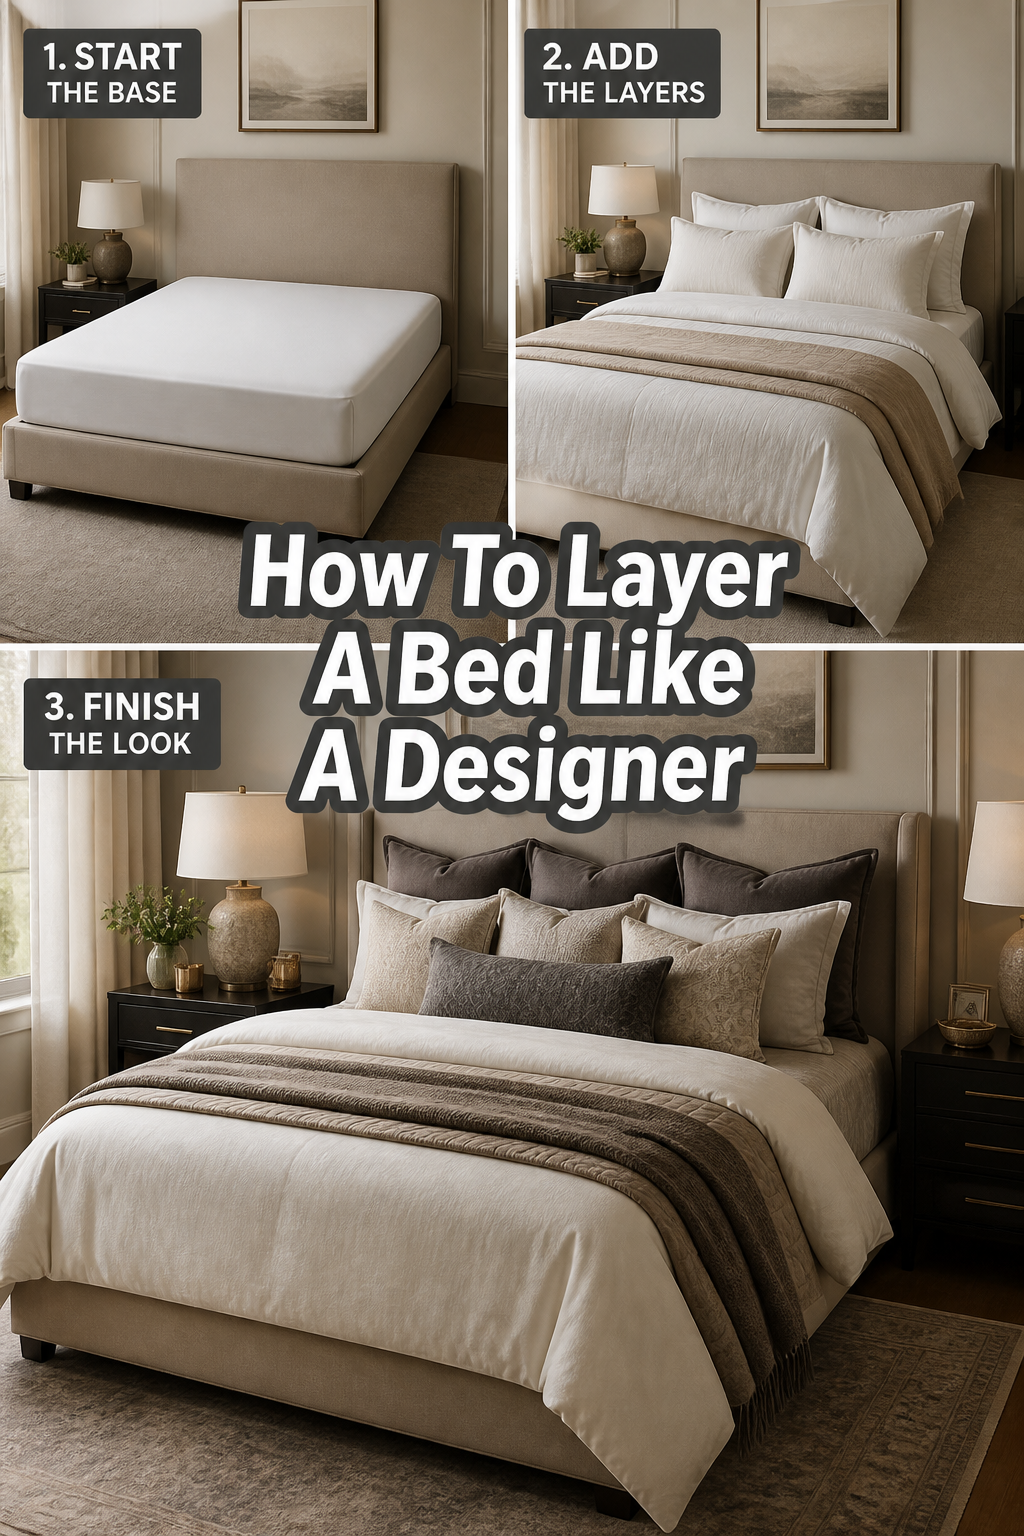
Step 1: Build a Strong Foundation
Start with the basics. A good mattress is key, but you can enhance its comfort and longevity with the right foundational layers. This step ensures your bed is not only beautiful but also wonderfully supportive.
First, place a high-quality mattress protector over your mattress. This shields it from spills, allergens, and wear, extending its life significantly. Think of it as the invisible guardian of your investment.
Next, add a mattress topper for an extra layer of plushness or support. Whether it’s memory foam for contouring or a featherbed for cloud-like softness, a topper elevates the comfort instantly. This is where true luxury begins.
Step 2: Choose and Place Your Sheets
Sheets are the next layer, directly touching your skin, so comfort is paramount. Selecting the right material and ensuring they are properly fitted makes a big difference in both feel and appearance.
Pick a fitted sheet made from a breathable, soft material like cotton, linen, or bamboo. Ensure it has deep pockets to snugly fit over your mattress and any toppers, preventing it from slipping off during the night.
Smooth the fitted sheet tightly over the mattress, pulling out any wrinkles. A taut fitted sheet creates a clean, crisp base for the layers that follow. It’s the first step towards a polished look.
Next, lay a flat sheet over the fitted sheet, placing it upside down. This way, when you fold it back over the duvet later, the finished side will be facing up, showing off its best texture and color.
Align the top edge of the flat sheet with the head of the bed, or slightly below it if you prefer. Allow enough overhang on the sides and foot to tuck it in neatly.
Pro Tip: For an extra crisp look, iron your flat sheet before placing it on the bed. It makes a noticeable difference in the overall presentation.
Step 3: Embrace the Duvet
The duvet is often the largest and most impactful layer, defining the bed’s overall aesthetic and warmth. It’s crucial for both comfort and visual appeal.
First, choose a duvet insert appropriate for your climate and personal warmth preferences. Options range from down to synthetic fills, offering various levels of loft and insulation.
Next, slip your duvet insert into a stylish duvet cover. This cover is your chance to introduce color, pattern, and texture that complements your room’s design.
Shake and fluff the duvet to distribute the filling evenly within its cover. Ensure it fills the cover completely, avoiding any empty, sagging corners.
Lay the duvet flat over your bed, centered above the flat sheet. Allow it to hang evenly over the sides and foot of the bed.
For a classic designer look, fold the top edge of the duvet down about a third of the way, creating a beautiful layered effect with the flat sheet peeking out. This adds depth and visual interest.
Step 4: Master the Art of Pillow Power
Pillows are essential for comfort and provide a significant opportunity for styling. Combining sleeping pillows with decorative ones adds depth and luxury.
First, place your sleeping pillows (two for a twin, four for a queen/king) against the headboard. These are the pillows you actually sleep on, so comfort is key.
Cover your sleeping pillows with pillowcases that match or coordinate with your sheet set. Ensure they are neatly tucked and smoothed.
Next, introduce standard or king-sized shams. These are often part of a duvet cover set and can be placed in front of your sleeping pillows, creating a more formal stacked look.
For an added touch of elegance, lean Euro shams against the headboard, behind your sleeping pillows. These larger, square pillows add height and structure, especially on queen and king-sized beds.
Pro Tip: When arranging pillows, layer them from largest to smallest, with the Euro shams at the back, followed by sleeping pillows, then standard shams, and finally decorative cushions. This creates a pleasing visual progression.
Step 5: Add a Layer of Intrigue with a Throw Blanket
A carefully placed throw blanket is like the jewelry for your bed. It introduces additional texture, color, and a sense of inviting warmth.
Select a throw blanket that complements your duvet cover and existing color scheme. Consider different textures like chunky knits, faux fur, or soft cashmere for visual interest.
There are several ways to style a throw. You can drape it casually over one corner of the bed, allowing it to spill onto the floor slightly. This creates a relaxed, inviting vibe.
Alternatively, fold the throw neatly and lay it across the foot of the bed. This provides a more tailored and organized look, ready for a quick nap or extra warmth.
For a truly effortless feel, gather the throw loosely in the middle of the bed, creating soft folds and inviting texture. This look suggests comfort and ease.
Step 6: Introduce Decorative Cushions
Decorative cushions are the finishing touches that bring personality and a curated feel to your layered bed. They are where you can truly express your style.
Choose one to three decorative cushions in varying shapes, sizes, and textures. Lumbar pillows, square cushions, or round ones can all work beautifully together.
Arrange these cushions in front of your layered sleeping and sham pillows. They should sit proudly, drawing the eye and adding a focal point.
Mix patterns and solids, or different textures like velvet, linen, or embroidery, to create a rich and interesting display. Just ensure they share a common color palette to maintain harmony.
Step 7: Introduce Textural Elements
Beyond the basic layers, incorporating diverse textures is a hallmark of designer styling. It adds depth and makes the bed feel more luxurious and inviting.
Think beyond just the fabric of your sheets and duvet. Consider a knitted throw, a faux fur cushion, or a linen duvet cover for subtle shifts in feel.
Combine smooth, crisp percale sheets with a plush velvet cushion, or a soft cotton duvet with a chunky wool throw. These contrasts are visually appealing.
Even the weave of your fabrics adds texture. A crisp cotton percale feels different from a soft sateen, and linen has a distinct, relaxed texture all its own.
Step 8: Consider the Bed Skirt or Valance
A bed skirt or valance is often overlooked but plays a vital role in creating a polished, finished look, especially if your bed frame or storage underneath isn’t aesthetically pleasing.
Select a bed skirt that matches your overall bed linen or complements it beautifully. It should reach the floor without pooling too much or being too short.
Place the bed skirt between your box spring and mattress. It subtly hides the bed frame, under-bed storage, and even the mattress foundation itself.
A well-chosen bed skirt adds a touch of tailored elegance and completes the visual flow of your bed from top to bottom. It’s a small detail that makes a big impact.
Step 9: Final Touches and Styling
Once all your layers are in place, take a step back. This is where you fine-tune the arrangement and ensure everything looks just right.
Fluff all pillows and cushions, ensuring they maintain their shape and loft. A well-fluffed pillow looks much more inviting.
Adjust the duvet and flat sheet, making sure they are centered and hang evenly. Smooth out any visible wrinkles.
Tweak the placement of your throw blanket and decorative cushions until you achieve a balanced and aesthetically pleasing arrangement. Sometimes a slight shift makes all the difference.
Finally, consider the surrounding elements in your bedroom. Ensure your nightstands are tidy, and any bedside lamps or decor complement your beautifully layered bed.
Common Mistakes to Avoid
Over-stuffing with Too Many Pillows
While decorative pillows add charm, using too many can make the bed feel cluttered and impractical. It becomes a chore to remove them all before sleep, detracting from the bed’s inviting nature. Aim for a balanced number – typically two sleeping pillows, two shams, and one to three decorative cushions are plenty for a queen or king bed.
Ignoring the Importance of Texture
A common mistake is focusing only on color and pattern, neglecting texture. A bed with all smooth, flat fabrics can feel one-dimensional. Varying textures like a crisp percale sheet, a soft sateen duvet, a chunky knit throw, and a velvet cushion adds depth, interest, and a luxurious tactile experience that elevates the design.
Mismatched Proportions
Using pillows that are too small for your bed size, or a duvet that barely covers the mattress, can make the bed look skimpy and unfinished. Ensure your duvet is oversized (e.g., a king duvet on a queen bed) for a generous drape, and select pillow sizes appropriate for your bed width. Euro shams are perfect for adding height to larger beds.
Forgetting the Bed Skirt
Leaving the underside of your bed exposed can disrupt an otherwise perfectly layered look. An exposed box spring or bed frame often looks less refined. A bed skirt or valance provides a clean, tailored finish, hiding unsightly elements and completing the bed’s aesthetic from top to bottom.
Troubleshooting
My Duvet Keeps Bunching Inside the Cover
This is a very common frustration. The duvet shifting inside its cover can make your bed look lumpy and uneven. To fix this, look for duvet covers with internal ties in each corner. Tie these securely to the loops on your duvet insert. If your cover doesn’t have ties, you can sew small ribbon loops into the corners yourself. Another trick is to simply shake and fluff the duvet vigorously each morning to redistribute the filling.
My Pillows Look Flat and Lifeless
Flat pillows instantly diminish the luxurious feel of a layered bed. First, ensure your pillow inserts are still supportive; they do flatten over time and might need replacing every 1-2 years. For a quick fix, vigorously “karate chop” the top edge of your decorative pillows to create a more structured, upright look. Fluff all sleeping and sham pillows daily by holding them on opposite sides and compressing, then releasing, to bring back their loft.
The Bed Looks Messy, Not “Effortlessly Styled”
Sometimes the line between artfully disheveled and just plain messy can be thin. The key is intentionality. Ensure your fitted sheet is taut and smooth. While a casually draped throw is lovely, make sure it’s not simply crumpled. Try folding it once or twice before draping to give it some structure. Also, ensure your duvet is centered and even before adding throws and decorative pillows. A neat foundation allows for more relaxed styling on top.
Key Takeaways
- Building layers from the mattress up creates a truly comfortable and visually appealing bed.
- Combining different textures (smooth, plush, crisp) adds depth and luxury to your bedding.
- Pillows are both functional and decorative; use a mix of sleeping pillows, shams, and decorative cushions.
- A throw blanket is a versatile styling tool that adds color, texture, and a touch of warmth.
- Paying attention to details like bed skirts and ensuring proper proportions elevates the overall design.
- Don’t be afraid to experiment with colors and patterns to express your personal style.
Frequently Asked Questions
How many decorative pillows should I use?
For a queen or king bed, aim for one to three decorative cushions. Any more can make the bed feel overcrowded and cumbersome to manage daily. For a twin bed, one decorative cushion is usually sufficient.
Can I mix different patterns and colors?
Absolutely! Mixing patterns and colors is a hallmark of designer styling. The trick is to choose a cohesive color palette (2-3 main colors) and vary the scale of your patterns. Pair a large floral with a subtle stripe or a geometric print with a solid texture.
What’s the best way to keep my duvet from sliding?
The best solution is to use a duvet cover with internal ties that attach to loops on your duvet insert. If your current cover lacks these, you can sew in simple ribbon ties yourself. Alternatively, use duvet clips or pins designed to keep the insert in place.
How often should I wash my bedding layers?
Your fitted and flat sheets and pillowcases should be washed weekly. Duvet covers can be washed every 2-4 weeks, depending on use. Decorative pillows and throws can be spot cleaned as needed or laundered seasonally, following their care instructions.
Our Top Recommended Finds
- High-Quality Duvet Insert: An investment in a good duvet insert (down, down alternative, or wool) will provide lasting comfort and loft, filling out your duvet cover beautifully.
- Linen Sheet Set: Known for its breathable, relaxed texture, linen adds an effortless, luxurious feel that only gets softer with each wash.
- Chunky Knit Throw Blanket: This adds instant warmth, tactile interest, and a cozy, inviting aesthetic that’s perfect for draping casually.
Your Dream Bed Awaits
You now have all the tools and inspiration to create a bed that rivals any designer showcase. It’s more than just a place to sleep; it’s a personal sanctuary, a space designed for comfort, beauty, and ultimate relaxation.
Don’t wait to bring this vision to life. Gather your favorite textures, choose colors that speak to you, and start layering today. Your bedroom will thank you, transforming into a haven you’ll love retreating to every single night.