🎄 How To Decorate A Pencil Christmas Tree
There’s something truly special about a Christmas tree, especially when it fits perfectly into your cozy corner.
Having decorated countless compact spaces, I’ve learned that a pencil tree isn’t just a space-saver; it’s a canvas for intimate, elegant holiday magic.
This guide shares my tried-and-true methods for transforming your slim tree into a stunning focal point.

Quick Overview
You’re about to transform a simple pencil tree into a beautifully decorated, festive masterpiece that enhances your home’s holiday charm.
We’ll cover everything from branch shaping to strategic ornament placement, ensuring your tree looks full and inviting.
- Time needed: 1-2 hours
- Difficulty: Beginner
- What you’ll need: Pencil Christmas tree, string lights, a variety of ornaments (small to medium), ribbon or garland, tree topper, tree skirt or collar, extension cord.
Step-by-Step Instructions
Step 1: Choose Your Tree’s Home
Before you even think about ornaments, decide where your pencil tree will live. Its slim profile makes it perfect for tight spots like entryways, small living rooms, or even a cozy bedroom corner.
Consider the room’s flow and existing furniture. You want your tree to complement the space, not overwhelm it, creating a natural focal point for your holiday cheer.
Pro Tip: Position your tree near an outlet for lights, but also think about how natural light hits it during the day. A well-lit corner looks inviting day and night.
Step 2: Fluff and Shape the Branches
This step is absolutely crucial for a pencil tree, which can often look sparse right out of the box. Spend time meticulously separating and spreading each branch and tip.
Work from the bottom up, fanning out the branches to fill any gaps. This creates a much fuller appearance and provides a better foundation for your decorations.
Think of it as giving your tree a good stretch after its long journey. It really makes a difference to the overall density and shape.
Step 3: Wrap the Lights
Start with your lights before any other decorations. For a pencil tree, warm white LED lights often provide the most inviting glow, enhancing that cozy aesthetic.
Begin at the top of the tree, weaving the lights in and out of the branches, working your way downwards. Ensure some lights are nestled deeper into the tree for depth, and others closer to the tips for sparkle.
Distribute them evenly, stepping back occasionally to check for dark spots. For a 7-foot pencil tree, 200-300 lights usually create a beautiful, luminous effect.
Pro Tip: Opt for smaller bulb LED lights. They don’t add bulk to the slim branches and give a more delicate, enchanting twinkle.
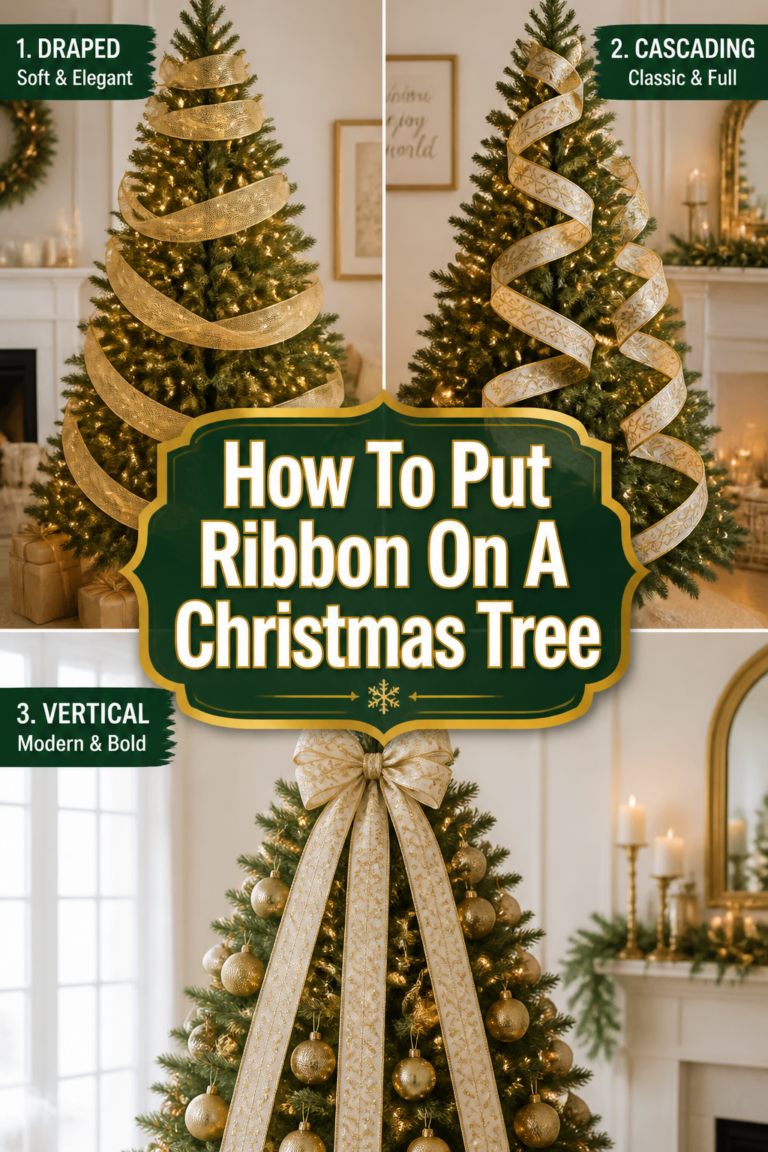
Step 4: Add Garlands or Ribbons
Garlands or ribbons are wonderful for adding vertical interest and texture to a pencil tree. They help to fill space and guide the eye upwards, emphasizing the tree’s height.
Drape your chosen material (be it beaded garland, burlap ribbon, or velvet ribbon) in a gentle spiral around the tree. Tuck it into the branches slightly to give it depth, rather than just letting it hang on the outside.
Consider colors that complement your room’s existing palette to create a cohesive design. A simple, elegant ribbon can elevate the whole look.
Step 5: Place Your Core Ornaments
Now it’s time for your main ornaments. These are typically your larger, more sentimental, or statement pieces. Place them strategically around the tree, ensuring even distribution.
Vary their depth, hanging some closer to the trunk and others nearer the branch tips. This creates visual interest and makes the tree appear fuller and more dynamic.
For a pencil tree, generally stick to small to medium-sized ornaments to maintain its elegant, slim profile. Too many large ornaments can make it look top-heavy or cluttered.
Step 6: Layer in Filler Ornaments
After your core ornaments are placed, fill in the remaining gaps with smaller, complementary ornaments. These are often solid colored balls, glittery accents, or mini pinecones.
These filler ornaments add sparkle, depth, and a sense of abundance without making the tree feel overloaded. Scatter them evenly, ensuring no two similar ornaments are right next to each other.
Think about using shatterproof options, especially if your tree is in a high-traffic area. They’re lighter and safer, perfect for slim branches.
Pro Tip: Use a mix of matte, glossy, and glitter finishes for your filler ornaments. This adds visual texture and makes the lights bounce in interesting ways.
Step 7: Crown Your Tree with a Topper
The tree topper is the grand finale, completing your tree’s vertical line. Choose a topper that is proportionate to your pencil tree’s height and width.
A star, an angel, or a large bow are classic choices. Make sure it’s not too heavy, as pencil tree tops can be less sturdy than those of wider trees.
Secure it firmly to the top branch, ensuring it stands straight and proud. This final touch truly defines your tree’s silhouette.
Step 8: Arrange the Tree Skirt
A tree skirt or collar provides a polished finish, hiding the tree stand and adding another layer of texture and color to your display.
For a pencil tree, a smaller diameter skirt or a slim tree collar works best. You don’t want the skirt to overwhelm the base of the slender tree.
Smooth it out carefully, ensuring it sits evenly around the base. This grounds your tree and makes it feel complete, ready for presents.
Step 9: Style the Surrounding Area
Extend the festive feeling beyond the tree itself. Arrange a few complementary decorations around its base to create a cozy vignette.
Think about a small pile of wrapped gifts, a festive throw blanket draped over a nearby chair, or a scented candle. These elements enhance the overall holiday atmosphere.
Keep the surrounding decor simple and uncluttered, allowing your beautifully decorated pencil tree to remain the star of the show.
Step 10: Step Back and Admire
Once all your decorations are in place, take a few steps back and view your tree from different angles in the room. This perspective allows you to spot any bare spots or areas that might need a small adjustment.
Tweak any ornaments or lights as needed. This final review ensures your pencil tree looks balanced, cohesive, and utterly charming from every vantage point.
Plug in the lights, dim the room, and enjoy the magical glow of your handiwork. You’ve created a beautiful, cozy focal point for the holidays.
Common Mistakes to Avoid
Overlooking the Fluffing Process
Many people rush through fluffing, thinking it’s a minor step. However, for a pencil tree, insufficient fluffing leaves it looking sparse and artificial.
Take your time to individually shape each branch. This simple effort dramatically improves the tree’s fullness and overall appearance, making it a lush backdrop for your ornaments.
Using Overly Large Ornaments
Pencil trees are designed for elegance and slenderness. Hanging large, heavy ornaments can overwhelm its delicate branches and make the tree look unbalanced.
Stick to small to medium-sized ornaments that complement its slim profile. This maintains the tree’s graceful silhouette and prevents branches from drooping.
Neglecting Layering of Lights and Ornaments
Simply hanging lights and ornaments on the outer tips makes a tree look flat. Failing to layer robs your tree of depth and visual interest.
Weave lights and place ornaments at varying depths within the branches. This technique creates a rich, full look that draws the eye in and adds dimension to your display.
Ignoring the Room’s Scale
Even with a pencil tree, it’s possible to misjudge the scale. Placing a tall, skinny tree in a cavernous room can make it feel lost, while a shorter one in a tall room might look disproportionate.
Choose a tree height that complements your ceiling height and the overall room dimensions. This ensures your tree feels integrated and impactful within its surroundings.
Troubleshooting
Tree Looks Too Sparse After Decorating
If your tree still appears sparse, it’s likely due to insufficient fluffing or a lack of filler decorations. Go back and spend more time fanning out each branch tip, ensuring maximum coverage.
Consider adding more small, inexpensive filler ornaments like solid colored balls or berry picks. Tuck them deep into the branches to create an illusion of fullness and depth.
Lights Aren’t Evenly Distributed
Uneven lighting can make parts of your tree look dull. This usually happens when lights are wrapped too quickly or only on the outermost branches.
Unplug the lights and re-wrap them, starting from the top and weaving them both deep into the tree and along the outer tips. Take small sections at a time and step back frequently to assess the distribution.
Ornaments Keep Falling Off
This is often a sign that ornaments are too heavy for the delicate branches of a pencil tree, or they aren’t properly secured. Check your ornament hooks.
Ensure hooks are fully closed around the branch, or use string/wire to tie heavier ornaments directly to a sturdier part of the branch. Prioritize lighter, shatterproof ornaments for a pencil tree.
Key Takeaways
- Fluffing is Fundamental: Dedicate time to shaping each branch for a fuller, more natural appearance.
- Layer with Purpose: Weave lights and place ornaments at varying depths for rich dimension.
- Scale Matters: Choose ornament sizes and a tree topper that complement your pencil tree’s slim profile.
- Consider Room Layout: Position your tree to enhance your space, not overcrowd it, creating a cozy focal point.
- Finish with Flair: A well-fitted tree skirt and thoughtful surrounding decor complete the look.
Frequently Asked Questions
What size pencil tree is best for a small apartment?
For a small apartment, a pencil tree between 6 to 7.5 feet tall often works wonderfully. This height makes an impact without taking up much floor space, drawing the eye upwards and enhancing the feeling of height in your room.
How many lights do I need for a pencil tree?
A good rule of thumb is about 100 lights per foot of tree height for a truly luminous look. So, a 7-foot pencil tree would benefit from 700 lights. For a simpler glow, 50 lights per foot (around 350 for a 7-foot tree) also works beautifully, especially with smaller LED bulbs.
Can I use heavy ornaments on a pencil tree?
It’s generally best to avoid heavy ornaments on a pencil tree. Their branches are often less robust than those of wider trees and can sag or break. Opt for lightweight, shatterproof ornaments to maintain the tree’s delicate structure and ensure stability.
What kind of tree skirt works best?
For a pencil tree, a smaller diameter tree skirt or a slim tree collar is ideal. You want something that covers the stand without extending too far beyond the tree’s base, maintaining its sleek silhouette. A simple, elegant fabric or a narrow woven collar complements its slim form.
Our Top Recommended Finds
- Warm White Micro LED String Lights: These tiny, bright lights add maximum sparkle without bulk, perfect for delicate pencil tree branches.
- Shatterproof Mini Ornament Set: A collection of small, lightweight, and durable ornaments ensures your tree stays balanced and safe, even in busy areas.
- Slim Woven Tree Collar: Provides a clean, modern base for your pencil tree, hiding the stand with a touch of rustic or contemporary charm.
Craft Your Winter Wonderland
Decorating your pencil Christmas tree is more than just hanging ornaments; it’s about crafting a cozy, inviting atmosphere that celebrates the season.
By following these steps, you’re not just decorating a tree; you’re infusing your home with warmth and personal style, creating a memorable holiday nook.
Don’t wait to bring that festive glow into your space. Gather your supplies and start creating your own beautiful winter wonderland today!