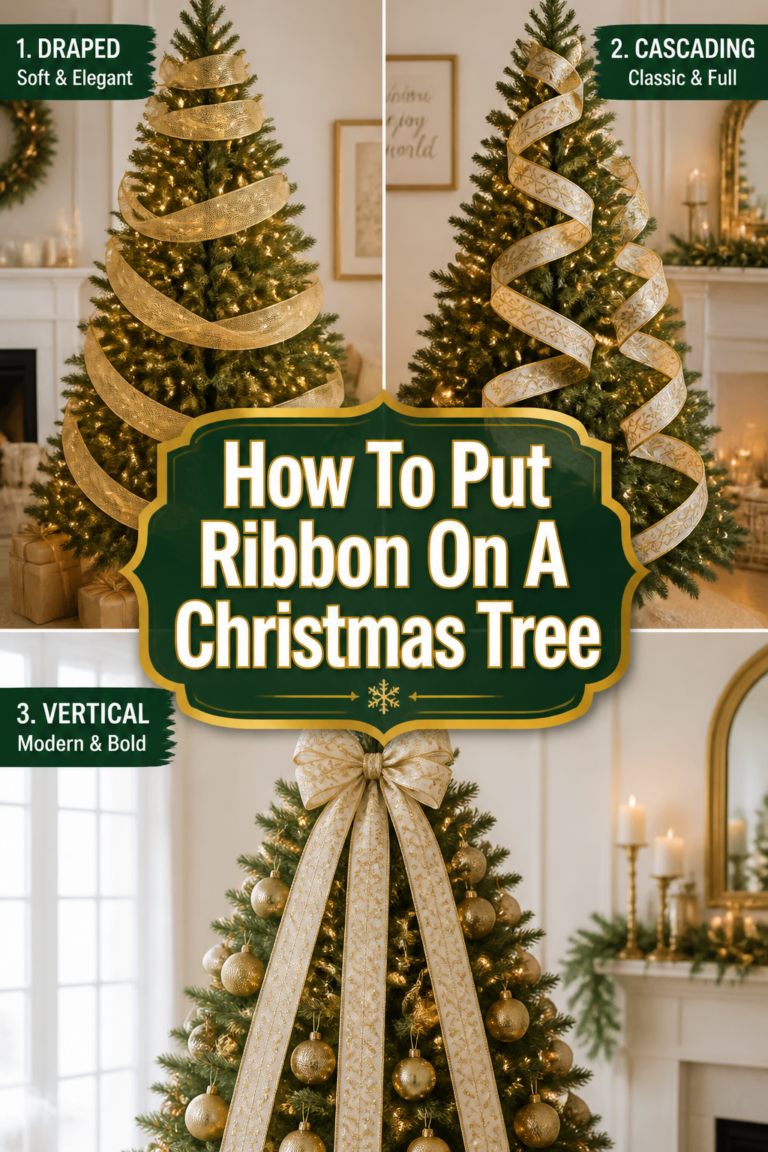
🎄 How To Decorate A Pencil Christmas Tree With Ribbon
A pencil tree is the perfect solution for small apartments or cozy corners that need a touch of holiday magic.
I remember the first time I tried to decorate one; I struggled to make it look full until I discovered the power of ribbon.
This guide comes from years of trial and error in my own home to help you get that designer look without the stress.

Quick Overview
Before you start, it helps to have a clear vision of your color palette and the overall mood you want to create.
- Time needed: 60-90 minutes
- Difficulty: Intermediate
- What you’ll need: Wired ribbon (various widths), floral wire or pipe cleaners, scissors, and a step stool.
Step 1: Fluff Your Tree Branches
Start by spending at least twenty minutes opening every single branch on your pencil tree.
Pencil trees are naturally thin, so you need to create as much surface area as possible to hold the ribbon.
Pull the back branches toward the center pole to hide the trunk and spread the front branches in a star pattern.
Pro Tip: Wear gardening gloves while fluffing to prevent the synthetic needles from scratching your hands and wrists.
Check for any large gaps by squinting your eyes; this helps you see the dark spots where more fluffing is required.
A well-fluffed tree provides the structural foundation that keeps your ribbon from slipping or looking limp.
Step 2: Choose Your Ribbon Palette
Select at least two different ribbons to create depth and visual interest on the narrow frame of a pencil tree.
I recommend a 4-inch wide ribbon for your primary “anchor” and a 1.5-inch ribbon for a delicate secondary layer.
Look for wired ribbon specifically, as it holds its shape and allows you to create beautiful, bouncy loops.
Consider a mix of textures, such as a heavy velvet paired with a shimmering sheer organza or a rustic burlap.
Coordinate your colors with your room’s existing decor to make the tree feel like a natural part of your home.
If your living room has navy accents, a champagne ribbon with navy trim can look incredibly sophisticated.
Step 3: Prepare Your Ribbon Strips
Cut your ribbon into manageable strips rather than trying to wrap the entire spool around the tree.
For a pencil tree, strips between 12 and 18 inches are much easier to control and weave into the tight branches.
Angling the ends of your ribbon with a “V” cut, also known as a dovetail, gives the tree a professional, finished look.
This method prevents the ribbon from looking like a continuous bandage and allows for more creative placement.
Group your cut strips by color and width so you can easily grab what you need as you work your way down.
Step 4: Create the Top Anchor
Begin at the top of the tree, just below the topper, to establish the flow of your ribbon waterfall.
Secure the end of your first ribbon strip to a branch near the center pole using a small piece of floral wire.
Let the ribbon spill outward, creating a soft “pouf” or loop before tucking the other end back into the tree.
Ensure the top loops are smaller than the ones you will create at the bottom to maintain the tree’s natural taper.
Pro Tip: If you are using a star or angel topper, tuck the ribbon directly under its base to hide any hardware.
Step 5: Master the Waterfall Technique
Work in a vertical fashion, moving from the top of the tree down toward the floor in slightly diagonal lines.
Tuck the ribbon into the tree every few inches, pinching it slightly to create a billowing effect.
Avoid pulling the ribbon tight; it should look like it is floating effortlessly on the tips of the branches.
Vary the depth of your tucks so that some loops sit deep inside the tree while others rest on the outer edges.
This technique adds the illusion of thickness to a pencil tree, making it look much more expensive than it is.
Step 6: Layer the Secondary Ribbon
Introduce your narrower ribbon once the primary “waterfall” is in place across the entire tree.
Criss-cross the thinner ribbon over the wider one, or place it in the gaps where the tree looks a bit thin.
Using a contrasting color, like a gold metallic ribbon over a forest green velvet, makes the tree glow from within.
Twist the thinner ribbon into “corkscrews” by wrapping it around your finger before placing it on the branch.
These small details draw the eye in and provide a sense of whimsy that standard ornaments can’t achieve.
Step 7: Secure with Branch Tips
Use the flexible tips of the tree branches themselves to hold the ribbon in place instead of using extra wire.
Simply wrap a small branch tip around the pinched part of your ribbon and give it a firm twist.
Hide the twist by fluffing the surrounding needles over the connection point.
This keeps the ribbon secure even if the tree is bumped by pets or children during the holiday season.
Check the stability of each loop by giving the tree a very gentle shake to see if anything slides out of place.
Step 8: Integrate Ornaments and Lighting
Place your largest ornaments inside the loops of the ribbon to create a sense of cohesion.
The ribbon acts as a frame for your favorite baubles, highlighting them and preventing them from getting lost.
Nestle some ornaments deep near the trunk to reflect the light and give the pencil tree more visual volume.
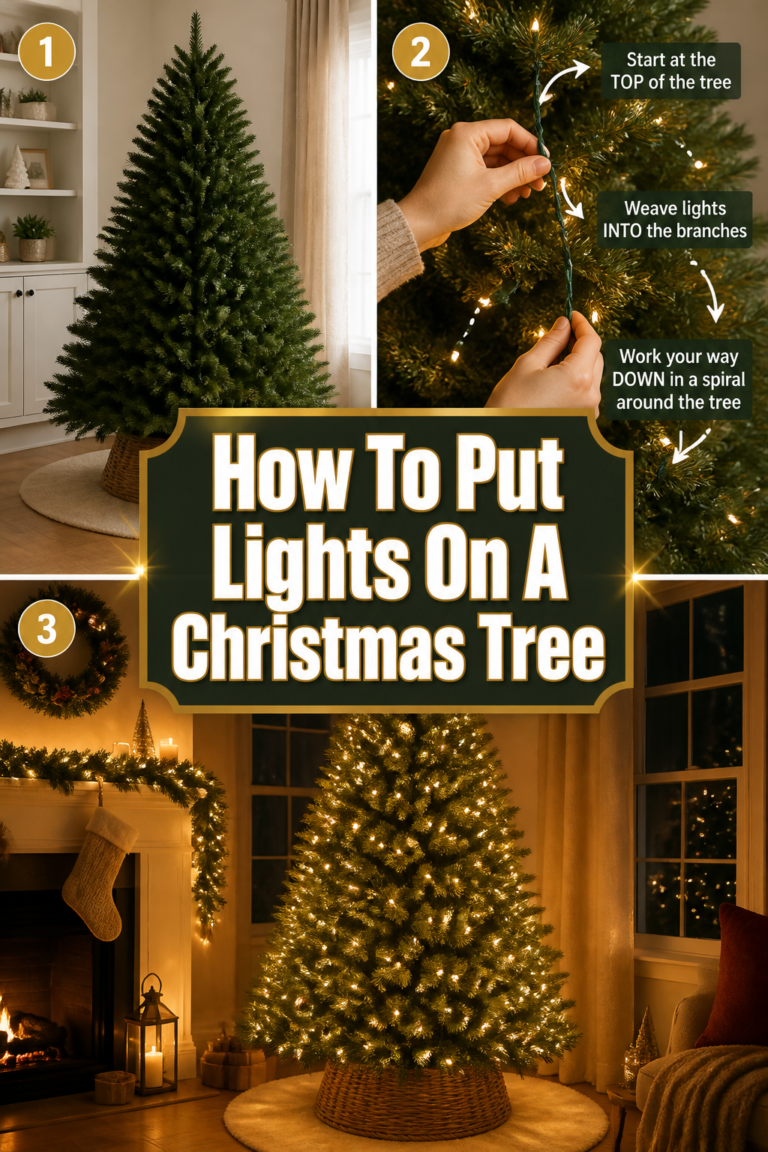
If your tree isn’t pre-lit, weave your lights in a pattern that follows the flow of your ribbon strips.
Step back frequently to ensure the ribbon isn’t obscuring too many of your special heirloom decorations.
Common Mistakes to Avoid
Using Non-Wired Ribbon
Non-wired ribbon is your biggest enemy when decorating a tree, especially a narrow one.
It tends to sag and flatten over time, losing the beautiful “pouf” shape you worked so hard to create.
Wired ribbon allows you to sculpt the fabric and ensures it stays exactly where you put it for the entire month.
The “Mummy” Wrap Effect
Many people make the mistake of wrapping the ribbon around the tree in a tight, circular spiral.
On a pencil tree, this actually emphasizes how thin the tree is and can make it look constricted.
Vertical or diagonal tucking is much better for adding the appearance of width and organic movement.
Ignoring the Back of the Tree
Even if your tree is tucked into a corner, you should still wrap the ribbon slightly around the sides.
If you only decorate the very front, the tree will look flat and two-dimensional from different angles in the room.
Bringing the ribbon around the “curve” of the pencil tree creates a sense of fullness and professional design.
Troubleshooting
The Ribbon Keeps Sliding Down
If your ribbon won’t stay put, the branches might be too smooth or the ribbon might be too heavy.
Use green pipe cleaners to create a more permanent anchor between the ribbon and the center pole of the tree.
You can also try “scuffing” the wire inside the ribbon slightly to give it more grip against the synthetic needles.
The Tree Looks Cluttered Instead of Elegant
This usually happens when there are too many competing patterns or the ribbon strips are too long.
Try removing a few sections and shortening the loops to show more of the green branches.
Sometimes less is more; focus on three or four main vertical “runs” of ribbon rather than covering every inch.
Visible Gaps Between Ribbon Loops
If you see large holes where the tree pole is visible, your loops might be too far apart.
Bridge these gaps by adding “filler” items like sprigs of holly, pinecones, or oversized berries.
You can also create a “bow” out of the same ribbon and pin it directly over the gap to hide the trunk.
Key Takeaways
- Always use wired ribbon to maintain the shape and structure of your loops.
- Cut ribbon into 12-18 inch strips for easier handling on narrow pencil trees.
- Work vertically or diagonally to create a “waterfall” effect that adds width.
- Secure the ribbon by twisting the tree’s own branch tips around the fabric.
- Layer two different widths of ribbon to create professional-looking depth.
- Dovetail the ends of your ribbon for a polished and high-end finish.
Frequently Asked Questions
How much ribbon do I need for a 7-foot pencil tree?
Generally, you should plan for about 20 to 30 yards of ribbon for a standard 7-foot pencil tree.
This allows for plenty of deep tucks and large loops, which are essential for making the tree look full.
If you plan on making a large topper out of the same ribbon, buy an extra 10-yard spool just to be safe.
Should I put the ribbon on before or after the ornaments?
You should almost always put the ribbon on after the lights but before the ornaments.
The ribbon acts as a structural element that helps you decide where the larger ornaments should live.
It is much easier to tuck an ornament into a ribbon loop than it is to weave ribbon around hanging glass balls.
Can I use mesh ribbon on a pencil tree?
Mesh ribbon works well for adding massive amounts of volume very quickly, but it can be scratchy.
It is best used as a base layer to fill in the interior of the tree before adding your “pretty” fabric ribbons on top.
Be careful with mesh on pencil trees, as its bulk can sometimes overwhelm the slim silhouette if not used sparingly.
How do I store the ribbon for next year?
The best way to store wired ribbon is to gently unroll it and wrap it back onto the original cardboard spool.
Avoid folding it, as this can create permanent creases in the wire that are difficult to iron out later.
Store the spools in a plastic bin to protect the fabric from dust, moisture, and fading over the off-season.
Our Top Recommended Finds
- 4-Inch Velvet Wired Ribbon: This provides a heavy, luxurious look that fills gaps perfectly on thin trees.
- 22-Gauge Green Floral Wire: Essential for securing ribbon to the trunk without being visible to guests.
- Professional Fabric Shears: A sharp pair of scissors ensures your dovetail cuts are clean and don’t fray over time.
Transform Your Space With Style
Now that your pencil tree is dressed in beautiful ribbon, take a moment to look at the room as a whole.
Consider placing a few matching ribbon bows on your mantel or around a staircase banister to tie the look together.
You might also want to explore different lighting temperatures, such as warm white versus cool white, to see how they change the color of your ribbon.
The best part about decorating with ribbon is that it is completely reversible and easy to change every year.
Grab your favorite spool today and start experimenting with different loops and tucks to find your unique holiday style.