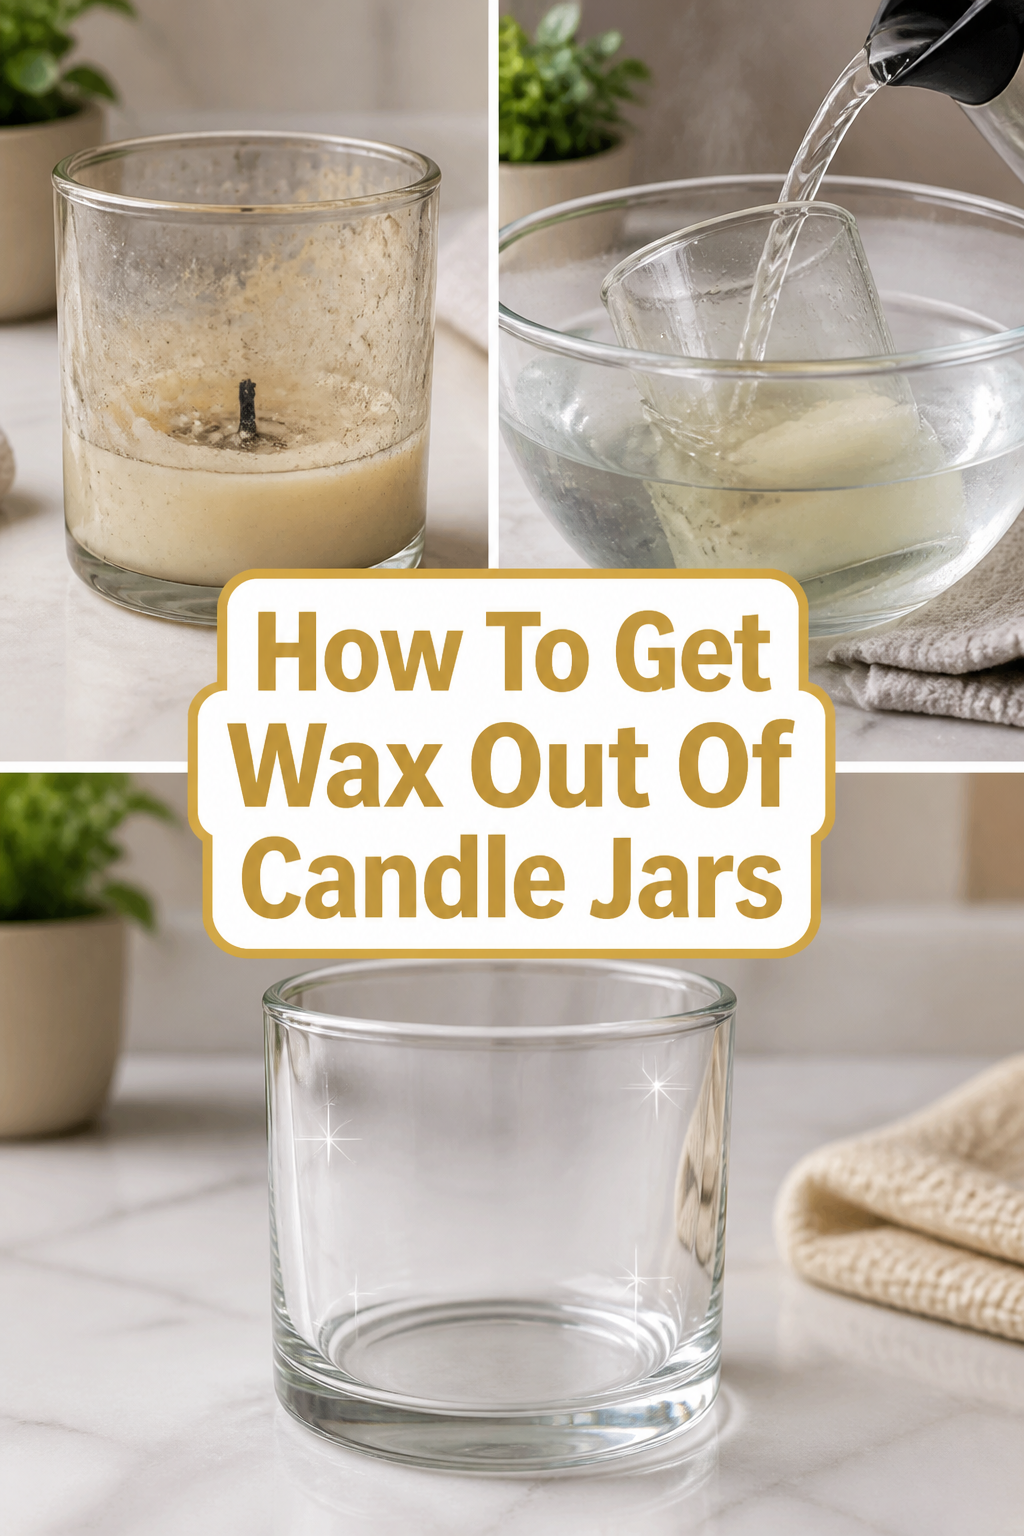
🕯️ How To Get Wax Out Of Candle Jars
There’s a special joy in finishing a beautiful candle, watching the last flicker fade.
But then you’re left with that little bit of wax at the bottom, and a gorgeous jar just waiting for a second life.
I’ve repurposed countless jars over the years, transforming them into charming decor, and I’m excited to share my favorite, fuss-free methods with you.

Quick Overview
This guide will help you safely and effectively remove stubborn wax from your candle jars, preparing them for their next chapter as beautiful, functional pieces in your home.
Imagine them holding fresh flowers, organizing your vanity, or becoming part of a cozy tablescape.
- Time needed: 30-60 minutes (active time, plus chilling)
- Difficulty: Beginner
- What you’ll need: Freezer, large pot or heat-safe bowl, spoon, butter knife, paper towels, dish soap, sponge, rubbing alcohol (optional)
Step-by-Step Instructions
Step 1: Gather Your Tools and Set the Scene
Before you begin, create a tidy workspace. Lay down an old towel or newspaper to protect your surfaces from any stray wax or water.
Having everything within reach makes the process smooth and enjoyable, turning a chore into a mindful craft session.
Step 2: Assess Your Jar and Remaining Wax
Take a moment to look at your candle jar. How much wax is left? Is the wick clip still firmly attached?
Understanding the situation helps you choose the most efficient removal method and ensures you don’t miss any pesky remnants.
Step 3: Embrace the Freeze (Method 1: The Easiest Way)
This is often the simplest and cleanest method for most jars. Place your candle jar directly into the freezer.
Allow it to chill for at least a few hours, or even overnight. The cold will cause the wax to shrink and harden, making it brittle.
Pro Tip: For jars with a significant amount of wax, freezing for longer can make a huge difference. Patience here truly pays off.
Step 4: Gently Pry Out the Frozen Wax
Once thoroughly chilled, remove the jar from the freezer. Turn it upside down and give it a gentle tap on a protected surface.
Often, the frozen wax puck will pop right out, sometimes with the wick clip still attached.
If it doesn’t release immediately, carefully insert a butter knife or the handle of a spoon between the wax and the glass edge. Gently twist and pry.
Step 5: Warm Up with a Water Bath (Method 2: For Stubborn Bits or Primary Removal)
If freezing didn’t quite do the trick, or for smaller amounts of wax, a warm water bath is excellent. Fill a large pot or heat-safe bowl with hot, but not boiling, water.
Place your candle jar into the hot water, ensuring the water level is below the rim of the jar so no water gets inside.
Let it sit for 10-15 minutes. The gentle warmth will soften the wax, making it easy to remove.
Pro Tip: This method is particularly effective for jars with adhesive labels you also want to remove. The heat often loosens the glue.
Step 6: Scoop Out the Softened Wax
Carefully remove the jar from the hot water, using oven mitts or a towel if it’s warm. Pour out the softened wax into a trash can.
Never pour melted wax down your drain, as it can solidify and clog pipes.
Use a spoon or a paper towel to scrape out any remaining softened wax and the wick clip. The wick clip should now be easy to pop off.
Step 7: Tackle Any Residue with a Gentle Cleanse
After removing the bulk of the wax, you might find a thin, waxy film or some adhesive residue from the wick clip.
For wax film, a quick wipe with a paper towel and a little dish soap and warm water usually does the trick. For stubborn adhesive, a dab of rubbing alcohol or even cooking oil on a paper towel works wonders.
Step 8: Final Polish and Aesthetic Prep
Wash the jar thoroughly with warm, soapy water and a sponge. Pay attention to the rim and base, ensuring every trace of wax and scent is gone.
Rinse it well and dry it with a clean cloth, allowing it to air dry completely for a streak-free shine.
Now, your beautiful, clean jar is ready for its next life. Imagine it holding delicate wildflowers on your bedside table, organizing cotton pads in your bathroom, or housing your favorite pens on a tidy desk. Each repurposed jar adds a touch of thoughtful design to your home.
Common Mistakes to Avoid
Pouring Hot Wax Down the Drain
It’s tempting to simply pour out any melted wax, but this is a serious plumbing hazard. Wax solidifies as it cools, leading to costly clogs in your pipes.
Always scrape or pour melted wax into a trash can or onto a disposable paper towel before discarding, keeping your plumbing clear and happy.
Using Boiling Water Directly in the Jar
While a hot water bath is safe, pouring boiling water directly into a cold or room-temperature glass jar can cause thermal shock. This can lead to the glass cracking or shattering, creating a dangerous situation.
Always use hot, but not boiling, water and allow the jar to warm up gradually, or use the freezer method for a safer approach.
Scraping Too Aggressively
When removing wax, especially the last stubborn bits, it’s easy to get carried away with a metal utensil. Overly aggressive scraping can scratch the inside of your beautiful jar.
Use a gentle hand, and opt for a plastic scraper, a wooden stick, or even the handle of a spoon before resorting to anything sharper. Patience and a little warmth are often more effective than brute force.
Forgetting the Wick Clip
The small metal disc that holds the wick in place is often overlooked until the last minute. This little metal piece can be sharp and difficult to remove if not addressed properly.
Ensure you pry out the wick clip after the wax is mostly gone, using a butter knife or small pliers. It’s a small detail that makes a big difference in a truly clean jar.
Troubleshooting
Wax Won’t Budge After Freezing
Sometimes, despite a good chill, the wax stubbornly clings to the glass. This can happen with certain wax types or very deep jars.
If the wax isn’t popping out easily, try freezing the jar for an extended period, perhaps overnight. If it’s still stuck, switch to the hot water bath method to gently soften the wax for removal.
Sticky Residue Remains on the Glass
Even after the wax is gone, a thin, greasy film or adhesive from the wick clip can persist. This residue can feel unpleasant and detract from the jar’s clean aesthetic.
For waxy film, a good scrub with warm, soapy water and a sponge often works. For tougher adhesive, a cotton ball soaked in rubbing alcohol, nail polish remover, or even a small amount of cooking oil can help dissolve the stickiness. Always wash thoroughly afterward.
Lingering Scent in the Jar
Some highly fragranced candles can leave a subtle scent behind, even after cleaning. This can be an issue if you plan to use the jar for food storage or for a different scented item.
Try filling the jar with a mixture of white vinegar and water and letting it sit overnight. Alternatively, place a few coffee grounds or crumpled newspaper inside for a day or two to absorb any remaining odors. A good airing out in the sunshine can also work wonders.
Key Takeaways
- Always prioritize safety by avoiding boiling water directly in glass jars and never pouring wax down drains.
- The freezing method is often the quickest and cleanest way to remove large wax pieces.
- A warm water bath effectively softens remaining wax and can help loosen stubborn labels.
- Gentle scraping and appropriate cleaning agents will ensure your jars remain scratch-free and sparkling.
- Repurposing candle jars is a wonderful way to add sustainable, personalized touches to your home decor.
- Clean jars are versatile vessels, ready to enhance any cozy corner or organized space.
Frequently Asked Questions
Can I use a microwave to melt the wax?
Using a microwave to melt wax directly in a candle jar is not recommended and can be dangerous. The metal wick clip can spark, potentially causing a fire or damaging your microwave. Stick to the freezer or hot water bath methods for safety.
What if my jar has a wooden wick? Do the methods change?
The methods for removing wax remain the same regardless of whether your candle had a cotton or wooden wick. Both the freezing and hot water bath techniques will effectively loosen the wax and the wick clip from the bottom of the jar.
How do I get rid of the strong scent that lingers in the jar?
Lingering scents can be tough, but not impossible. After cleaning, try filling the jar with white vinegar and letting it sit for several hours or overnight. Alternatively, place a crumpled piece of newspaper or a few spoonfuls of baking soda inside and let it sit for a day or two to absorb the odor. A good wash and air dry in sunlight can also help tremendously.
Are all candle jars safe to reuse?
Most glass candle jars are perfectly safe for reuse once cleaned. Always inspect the jar for any cracks, chips, or damage before repurposing. Jars made of heat-safe glass are generally very durable, making them ideal for holding anything from snacks to succulents.
Our Top Recommended Finds
- Silicone Spatula Set: Perfect for gently scraping out wax without scratching the glass, these are soft and flexible.
- Microfiber Cleaning Cloths: Ideal for a streak-free shine on your newly cleaned jars, leaving them sparkling and ready for display.
- Decorative Labels & Tags: For those who love to organize, these add a beautiful, personalized touch to your repurposed jars, especially for kitchen or craft storage.
Your Home’s Next Chapter: Embracing Mindful Design
Imagine your now-pristine candle jars gracing your bookshelves, holding your favorite teas, or nurturing small plants on a sunny windowsill.
Each cleaned jar represents a small act of sustainability, a touch of mindful design, and a personal statement in your cozy home.
Don’t let those beautiful vessels gather dust. Take the first step today and transform them into functional art, breathing new life into your living spaces.