🖼️ How To Hang 3 Pictures On Wall
Remember that empty wall you’ve been staring at for weeks?
It’s time to transform it into a cozy, personal gallery that truly reflects your style.
I’ve helped countless friends and clients create stunning visual narratives in their homes, and now I’m sharing my foolproof method with you.
Quick Overview
You’re about to turn a blank space into a captivating focal point, adding warmth and personality to your room.
This guide will walk you through creating a balanced and beautiful arrangement with confidence and ease.
- Time needed: 1-2 hours
- Difficulty: Beginner
- What you’ll need: Your three pictures, tape measure, pencil, painter’s tape, hammer, picture hanging hardware (nails/screws/hooks), level, and a cleaning cloth.
Step-by-Step Instructions
Step 1: Gather Your Inspiration and Art
Before any measuring begins, consider the mood you want to create.
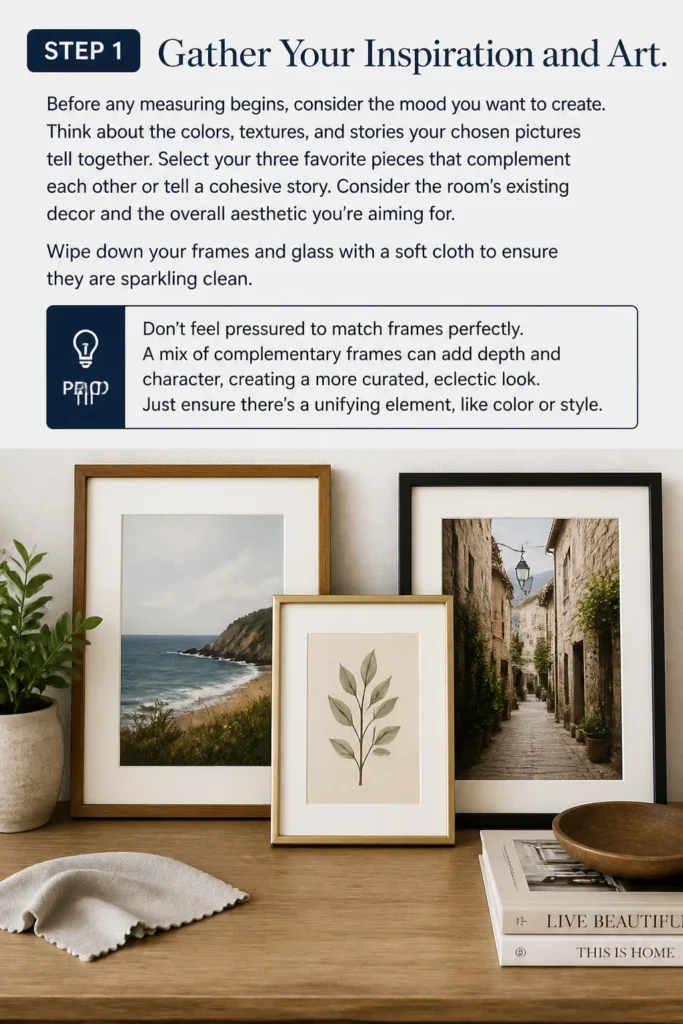
Think about the colors, textures, and stories your chosen pictures tell together.
- Select your three favorite pieces that complement each other or tell a cohesive story.
- Consider the room’s existing decor and the overall aesthetic you’re aiming for.
- Wipe down your frames and glass with a soft cloth to ensure they are sparkling clean.
Pro Tip: Don’t feel pressured to match frames perfectly. A mix of complementary frames can add depth and character, creating a more curated, eclectic look. Just ensure there’s a unifying element, like color or style.
Step 2: Plan Your Layout on the Floor
This crucial step helps visualize your arrangement without putting a single hole in your wall.
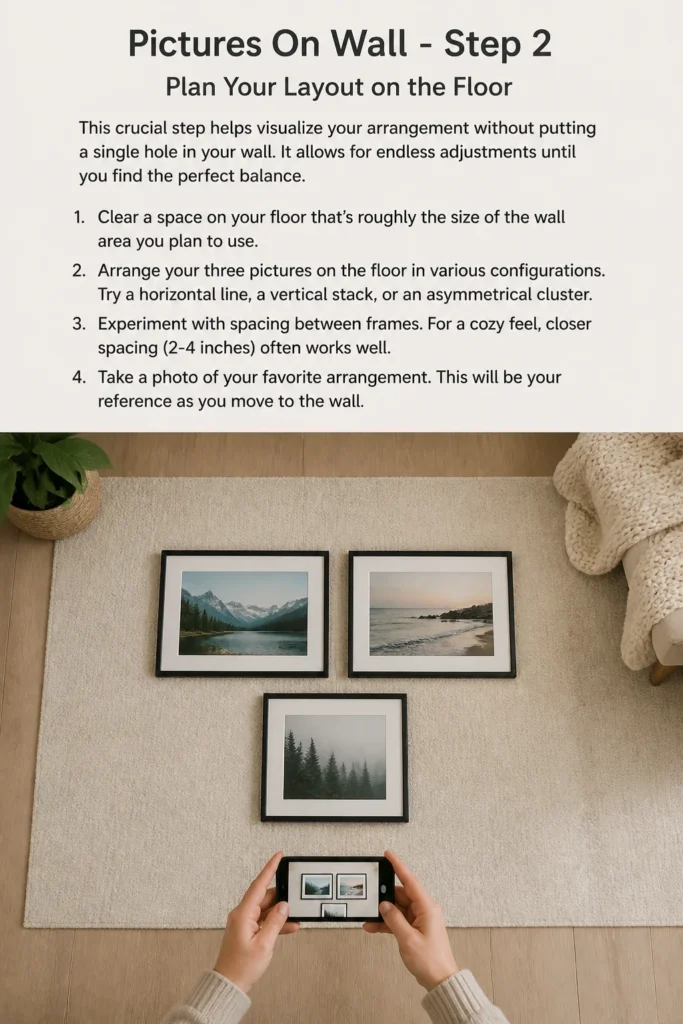
It allows for endless adjustments until you find the perfect balance.
- Clear a space on your floor that’s roughly the size of the wall area you plan to use.
- Arrange your three pictures on the floor in various configurations. Try a horizontal line, a vertical stack, or an asymmetrical cluster.
- Experiment with spacing between frames. For a cozy feel, closer spacing (2-4 inches) often works well.
- Take a photo of your favorite arrangement. This will be your reference as you move to the wall.
Step 3: Measure and Mark Hanger Placement on Your Art
Accuracy here prevents crooked pictures and extra holes later.
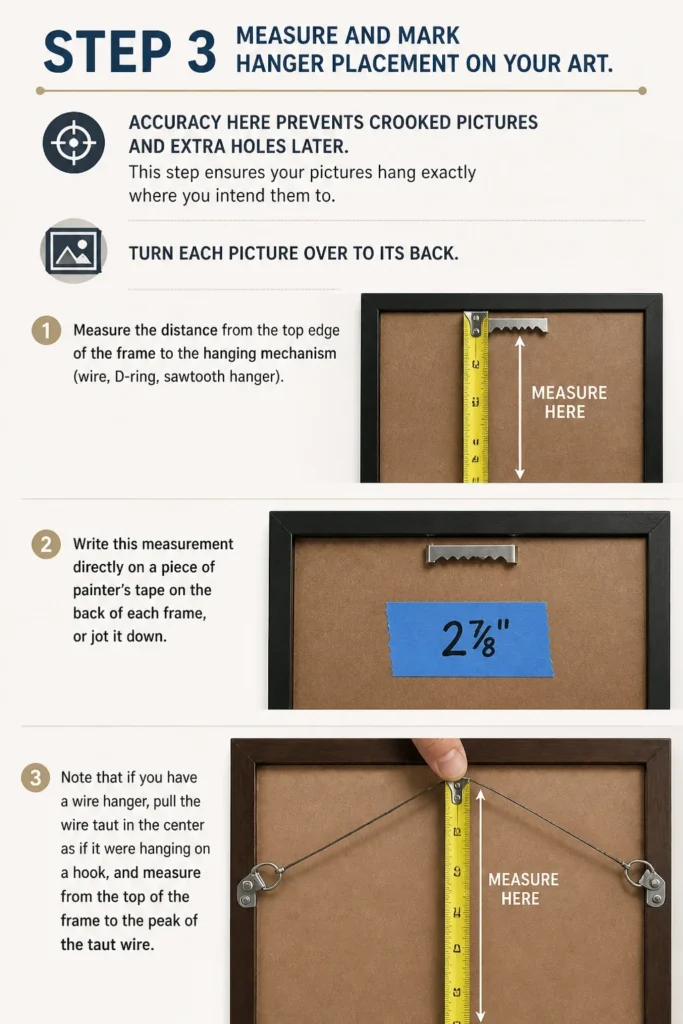
This step ensures your pictures hang exactly where you intend them to.
- Turn each picture over to its back.
- Measure the distance from the top edge of the frame to the hanging mechanism (wire, D-ring, sawtooth hanger).
- Write this measurement directly on a piece of painter’s tape on the back of each frame, or jot it down.
- Note that if you have a wire hanger, pull the wire taut in the center as if it were hanging on a hook, and measure from the top of the frame to the peak of the taut wire.
Step 4: Transfer Your Layout to the Wall Using Painter’s Tape
Painter’s tape is your best friend for a stress-free wall layout.
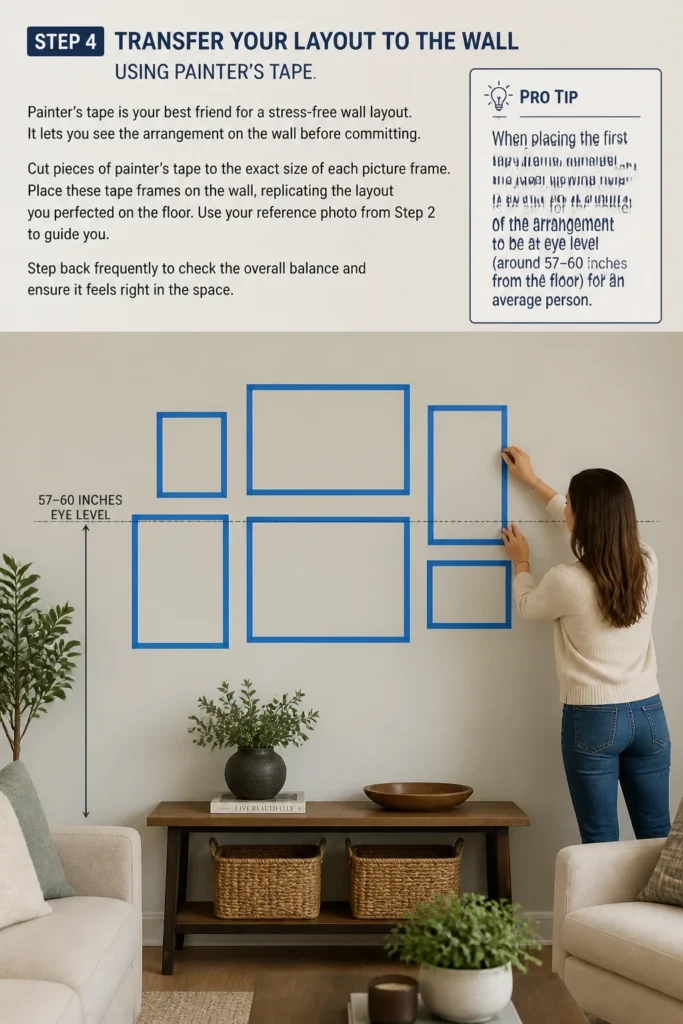
It lets you see the arrangement on the wall before committing.
- Cut pieces of painter’s tape to the exact size of each picture frame.
- Place these tape “frames” on the wall, replicating the layout you perfected on the floor.
- Use your reference photo from Step 2 to guide you.
- Step back frequently to check the overall balance and ensure it feels right in the space.
Pro Tip: When placing the first tape “frame,” consider the ideal viewing height. A good rule of thumb is to aim for the center of the arrangement to be at eye level (around 57-60 inches from the floor) for an average person. This creates a comfortable viewing experience.
Step 5: Mark and Install Your Hardware
Now it’s time to make those precise marks and secure your hangers.
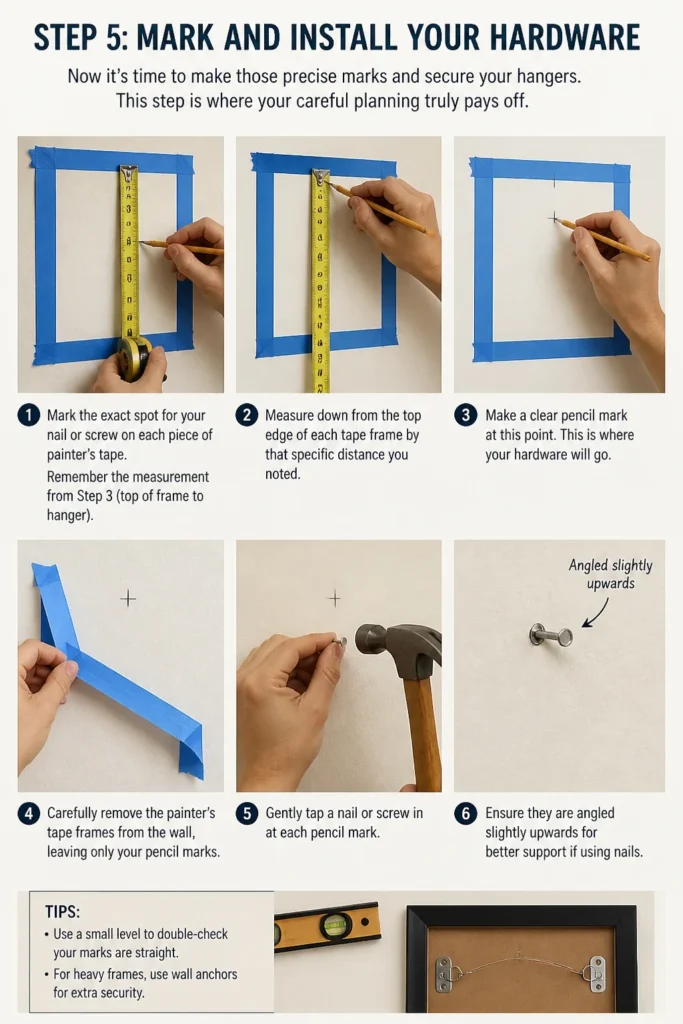
This step is where your careful planning truly pays off.
- Mark the exact spot for your nail or screw on each piece of painter’s tape. Remember the measurement from Step 3 (top of frame to hanger).
- Measure down from the top edge of each tape “frame” by that specific distance you noted.
- Make a clear pencil mark at this point. This is where your hardware will go.
- Carefully remove the painter’s tape frames from the wall, leaving only your pencil marks.
- Gently tap a nail or screw in at each pencil mark. Ensure they are angled slightly upwards for better support if using nails.
Step 6: Hang Your Pictures
The moment of truth! This is where your wall begins its transformation.
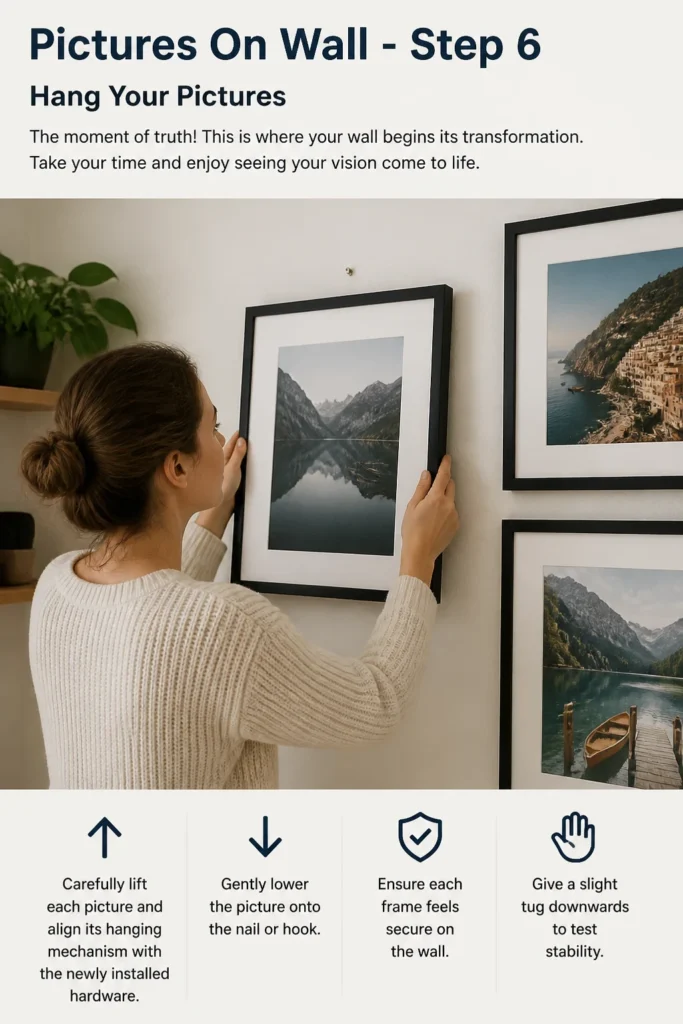
Take your time and enjoy seeing your vision come to life.
- Carefully lift each picture and align its hanging mechanism with the newly installed hardware.
- Gently lower the picture onto the nail or hook.
- Ensure each frame feels secure on the wall.
- Give a slight tug downwards to test stability.
Step 7: Level and Adjust
Even with careful measurements, a slight adjustment can make all the difference.
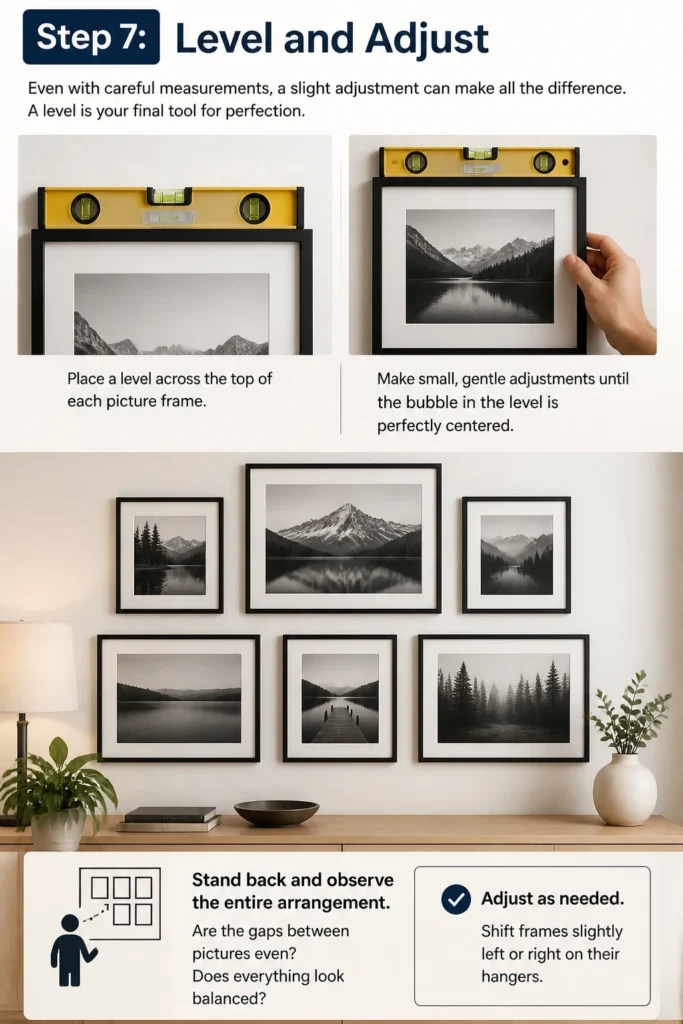
A level is your final tool for perfection.
- Place a level across the top of each picture frame.
- Make small, gentle adjustments until the bubble in the level is perfectly centered.
- Stand back and observe the entire arrangement. Are the gaps between pictures even? Does everything look balanced?
- Adjust as needed, shifting frames slightly left or right on their hangers.
Step 8: Step Back and Admire Your Work
Your beautiful, personalized gallery wall is complete!
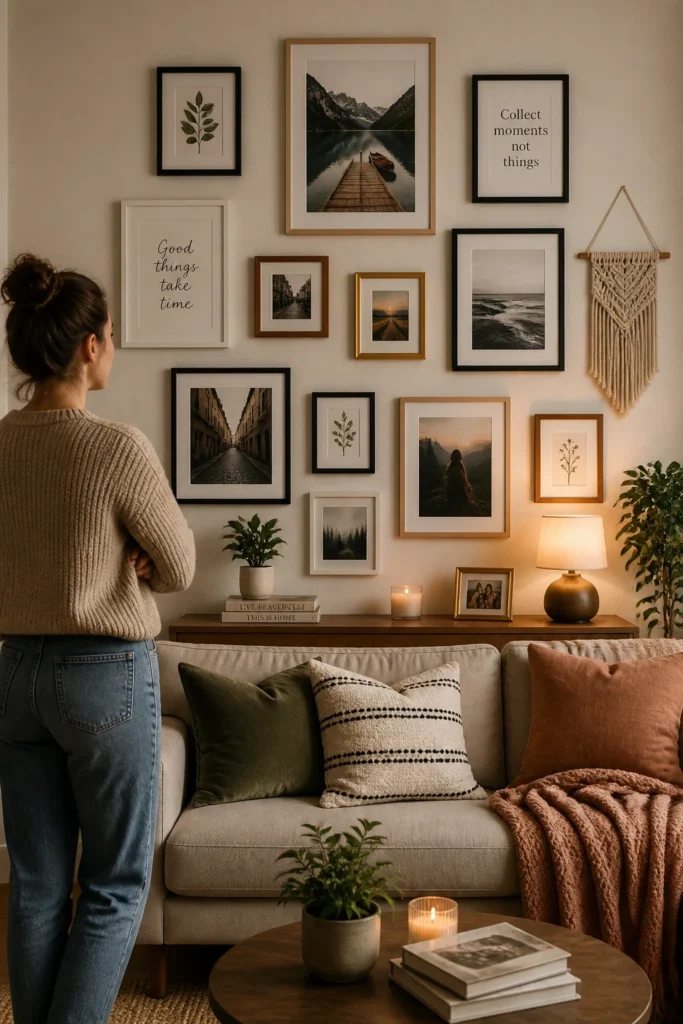
Take a moment to appreciate the cozy atmosphere you’ve created.
- Enjoy the new focal point in your room.
- Celebrate your accomplishment in adding a touch of personal style.
- Consider what other decorative elements might enhance the space around your new display, like a small plant or a cozy throw.
Common Mistakes to Avoid
Eyeballing It
Trying to guess measurements or spacing often leads to frustration and extra holes.
It’s tempting to skip the measuring, but precision ensures a polished, professional look.
Always use a tape measure and pencil to mark carefully, even if it feels like an extra step.
Ignoring Room Scale
Hanging pictures that are too small for a large wall or too large for a cramped space can throw off the entire room’s balance.
Consider the size of your wall and surrounding furniture.
Your three pictures should feel proportionate to their environment, neither overwhelmed nor overwhelming.
Using the Wrong Hardware
Using tiny nails for heavy frames or flimsy hooks for valuable art is a recipe for disaster.
Always match your hanging hardware to the weight of your pictures.
Picture hanging kits often come with various options, or you can purchase specific hardware for heavier items.
Rushing the Layout
Skipping the floor layout step means you’re guessing on the wall, which can lead to multiple attempts and unnecessary damage.
The floor planning allows you to visualize and refine your arrangement without commitment.
Invest time in this initial step; it saves time and headaches later.
Troubleshooting
Pictures Aren’t Level
It’s common for pictures to shift slightly after hanging, or for walls to be subtly uneven.
Don’t fret if your frames aren’t perfectly straight right away.
Use a small level to check each picture individually, then gently adjust by nudging the frame on its hanger until it’s perfectly straight.
Too Many Holes in the Wall
Sometimes, despite best efforts, you might make a small error in marking.
A few extra holes are easily fixable and shouldn’t deter you.
Use a small amount of spackle or wall filler, apply it with a putty knife, let it dry, and then lightly sand before touching up with paint.
Pictures Look “Off” After Hanging
You’ve hung them, but something just doesn’t feel right about the overall arrangement.
This often happens when you view the arrangement up close during installation.
Step far back from the wall, even out of the room, and then re-enter to get a fresh perspective. Sometimes a slight shift in one frame’s position or spacing is all that’s needed to restore balance.
Key Takeaways
- Plan on the Floor First: Always arrange your pictures on the floor to visualize and perfect your layout before touching the wall.
- Measure Everything: Accurate measurements from frame top to hanger and then to the wall are crucial for a precise display.
- Use Painter’s Tape: This invaluable tool allows you to “preview” your arrangement on the wall without making holes.
- Eye Level is Key: Aim for the center of your arrangement to be around 57-60 inches from the floor for comfortable viewing.
- Don’t Rush the Leveling: Take your time to ensure each picture is perfectly straight and balanced within the grouping.
- Embrace Your Style: Let your personality shine through your chosen art and arrangement; there are no strict rules for personal aesthetics.
Frequently Asked Questions
How high should I hang pictures?
A general guideline is to hang the center of your picture or picture grouping at eye level, which is typically 57-60 inches from the floor.
However, if hanging above furniture, ensure there’s enough space between the bottom of the frame and the top of the furniture (usually 6-12 inches) so it doesn’t look crammed.
What if my walls are plaster?
Hanging pictures on plaster walls requires a bit more care than drywall.
Instead of hammering nails directly, it’s often better to drill a small pilot hole first, then use a plastic anchor and screw for better grip and to prevent cracking the plaster.
Special plaster picture hooks are also available that have multiple small pins.
Can I mix different frame styles?
Absolutely! Mixing frame styles can add a wonderful, curated feel to your space, making it feel less like a showroom and more like a cherished home.
To keep the look cohesive, try to have a unifying element, such as all frames being a similar color (e.g., all black, all wood tones) or sharing a similar finish (e.g., all metallic, all matte).
What’s the best way to clean picture frames?
For most frames, a soft, dry microfiber cloth is sufficient to remove dust and smudges.
For glass, use a glass cleaner sprayed onto the cloth (not directly onto the frame) to avoid liquid seeping into the frame’s edges.
For ornate or delicate frames, a soft brush or a can of compressed air can help dislodge dust from intricate details.
Our Top Recommended Finds
- Laser Level: Projects a straight line onto your wall, making it incredibly easy to align multiple frames perfectly.
- Picture Hanging Kit: These kits often include a variety of nails, hooks, wire, and sometimes even a small level, offering a convenient all-in-one solution.
- Painter’s Tape: Essential for mapping out your layout on the wall without damaging paint, allowing for easy adjustments.
Your Walls, Your Story: Embrace the Transformation
You’ve just transformed a blank canvas into a reflection of your personality and style.
Hanging pictures might seem daunting at first, but with a little planning and these practical steps, it becomes an enjoyable part of making your house truly feel like home.
Don’t stop here! Consider how you can expand this newfound skill to other walls or even create a larger gallery wall.
Go ahead, take that first step today and let your walls tell your beautiful story.